

Shipping Labels
02/13/2025

How to Set Up Label Printing?
In order to start shipping orders, it is recommended that sellers set up the default actions for creating and printing labels, as well as configure the document format options.
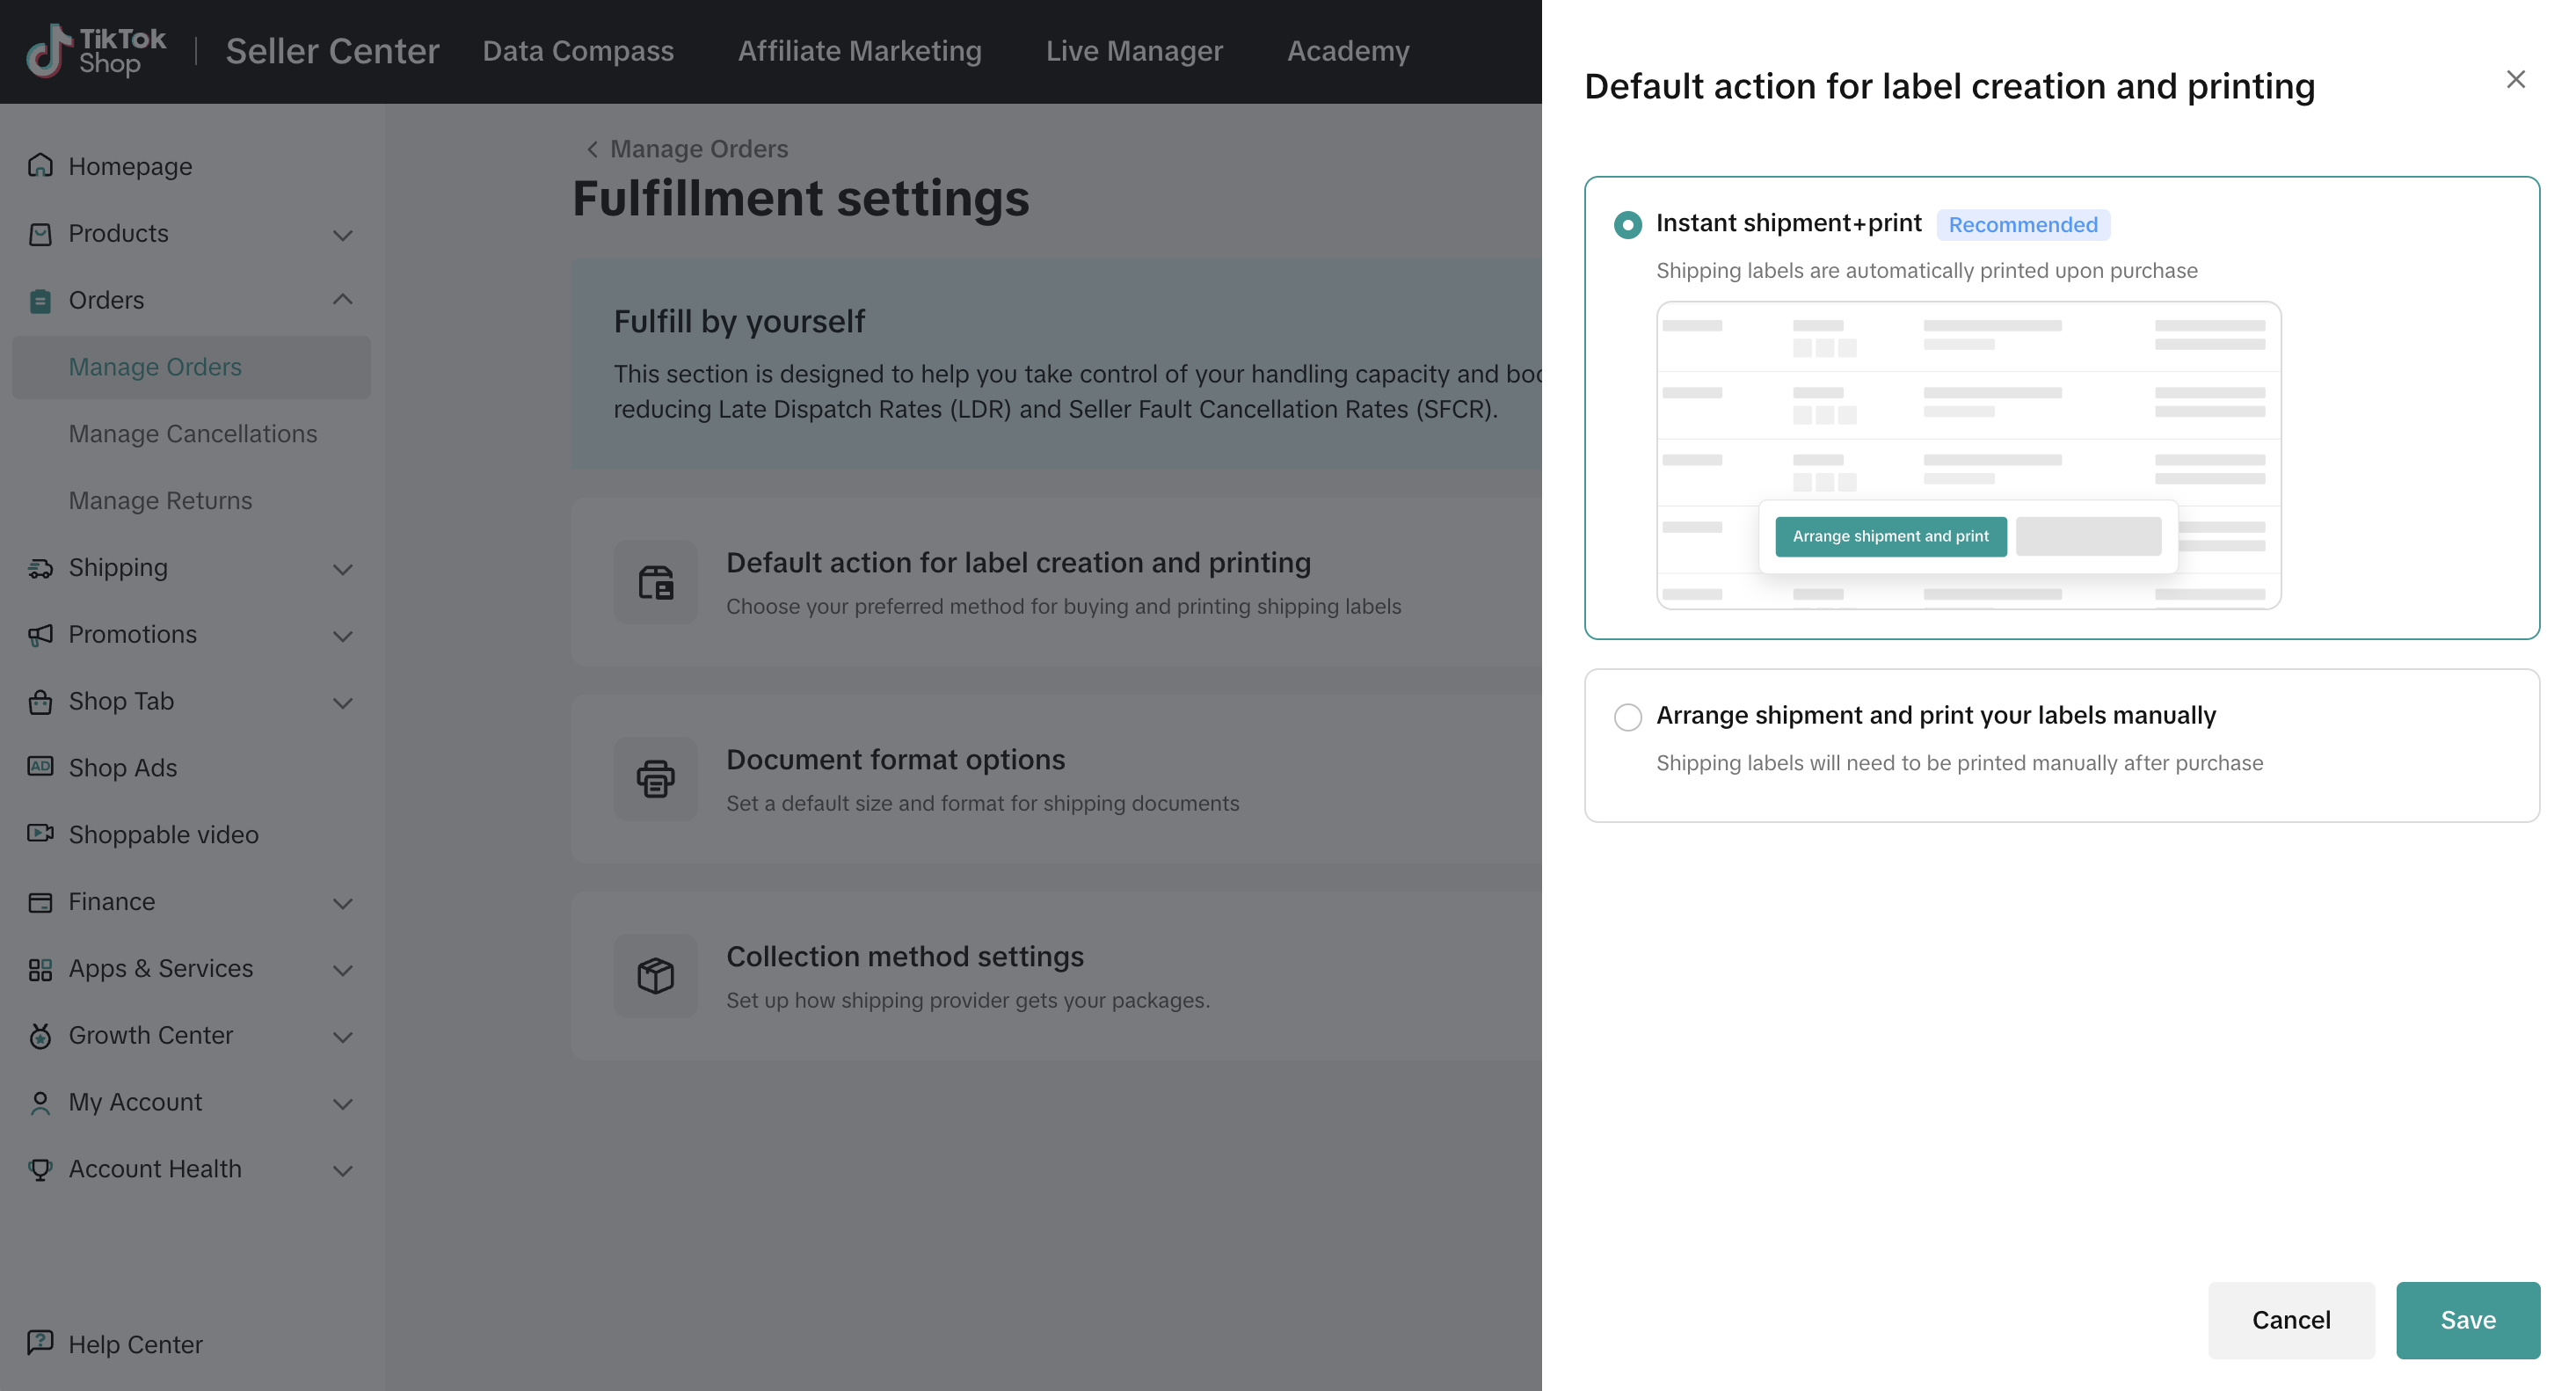
- Go to 'Default action for label creation and printing' to configure your preferred option when arranging shipments
- Instant Shipment + Print: Automatically prints documents when a shipment is arranged
- Arrange shipment and print your labels manually: Allows manual printing of documents after arranging shipment.
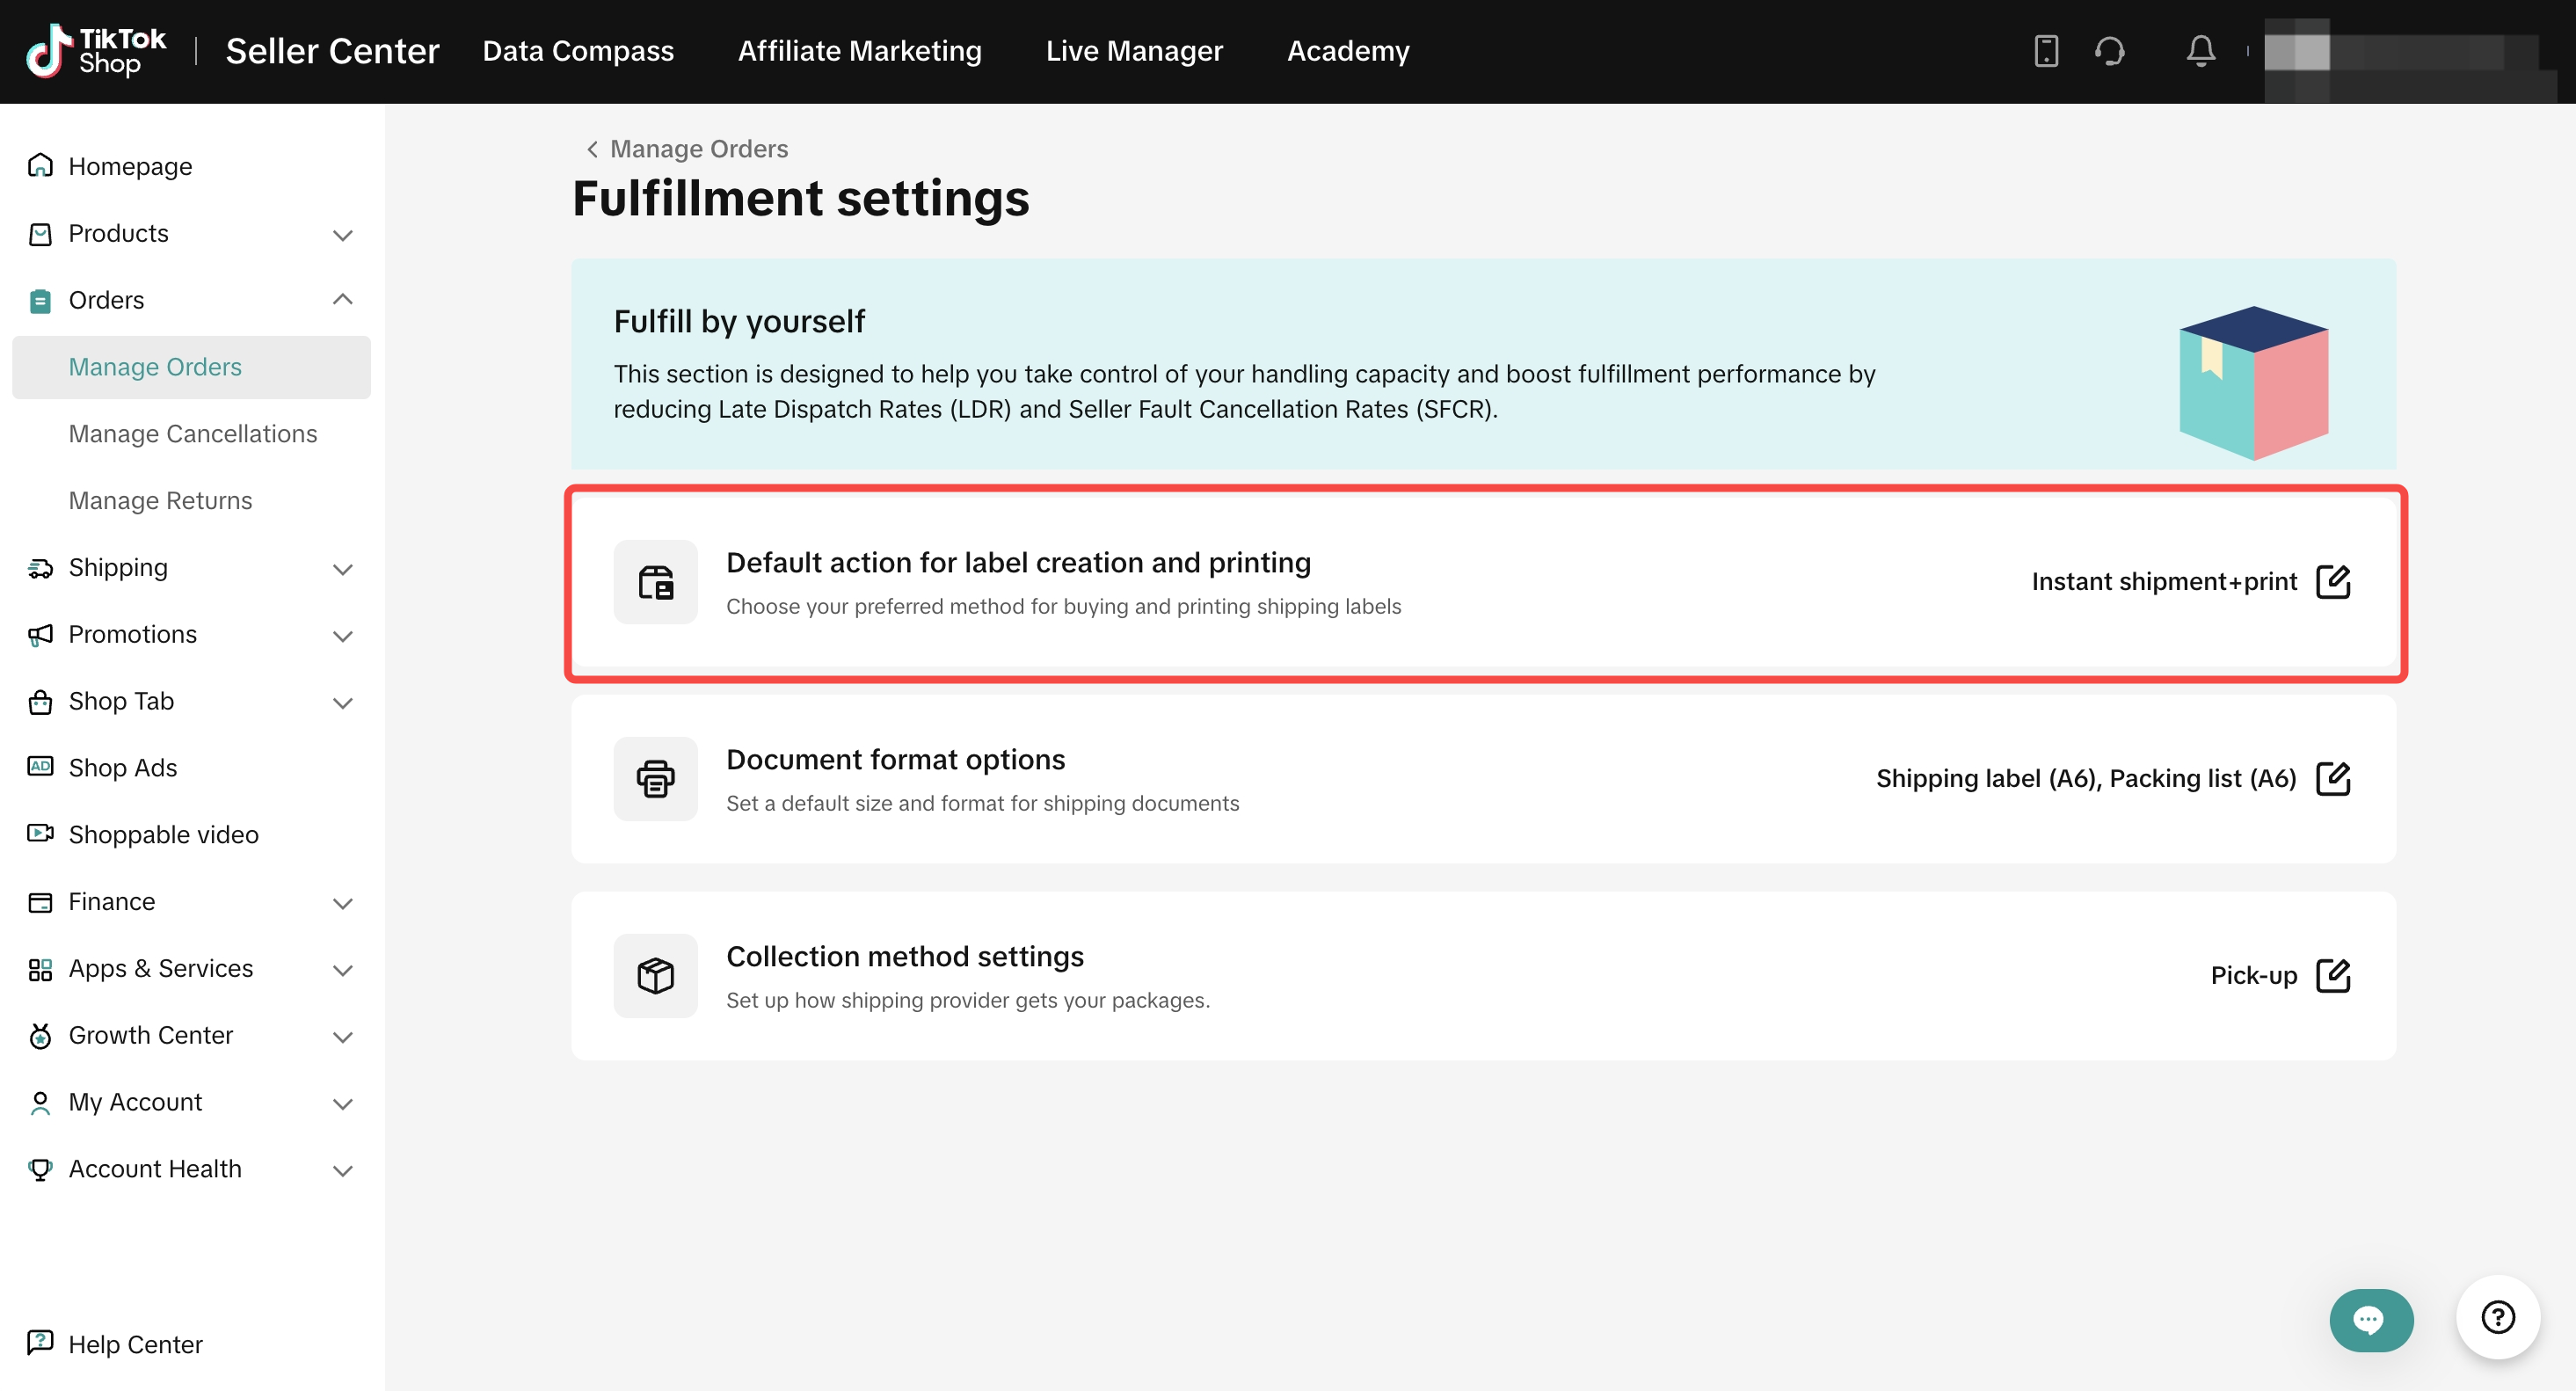
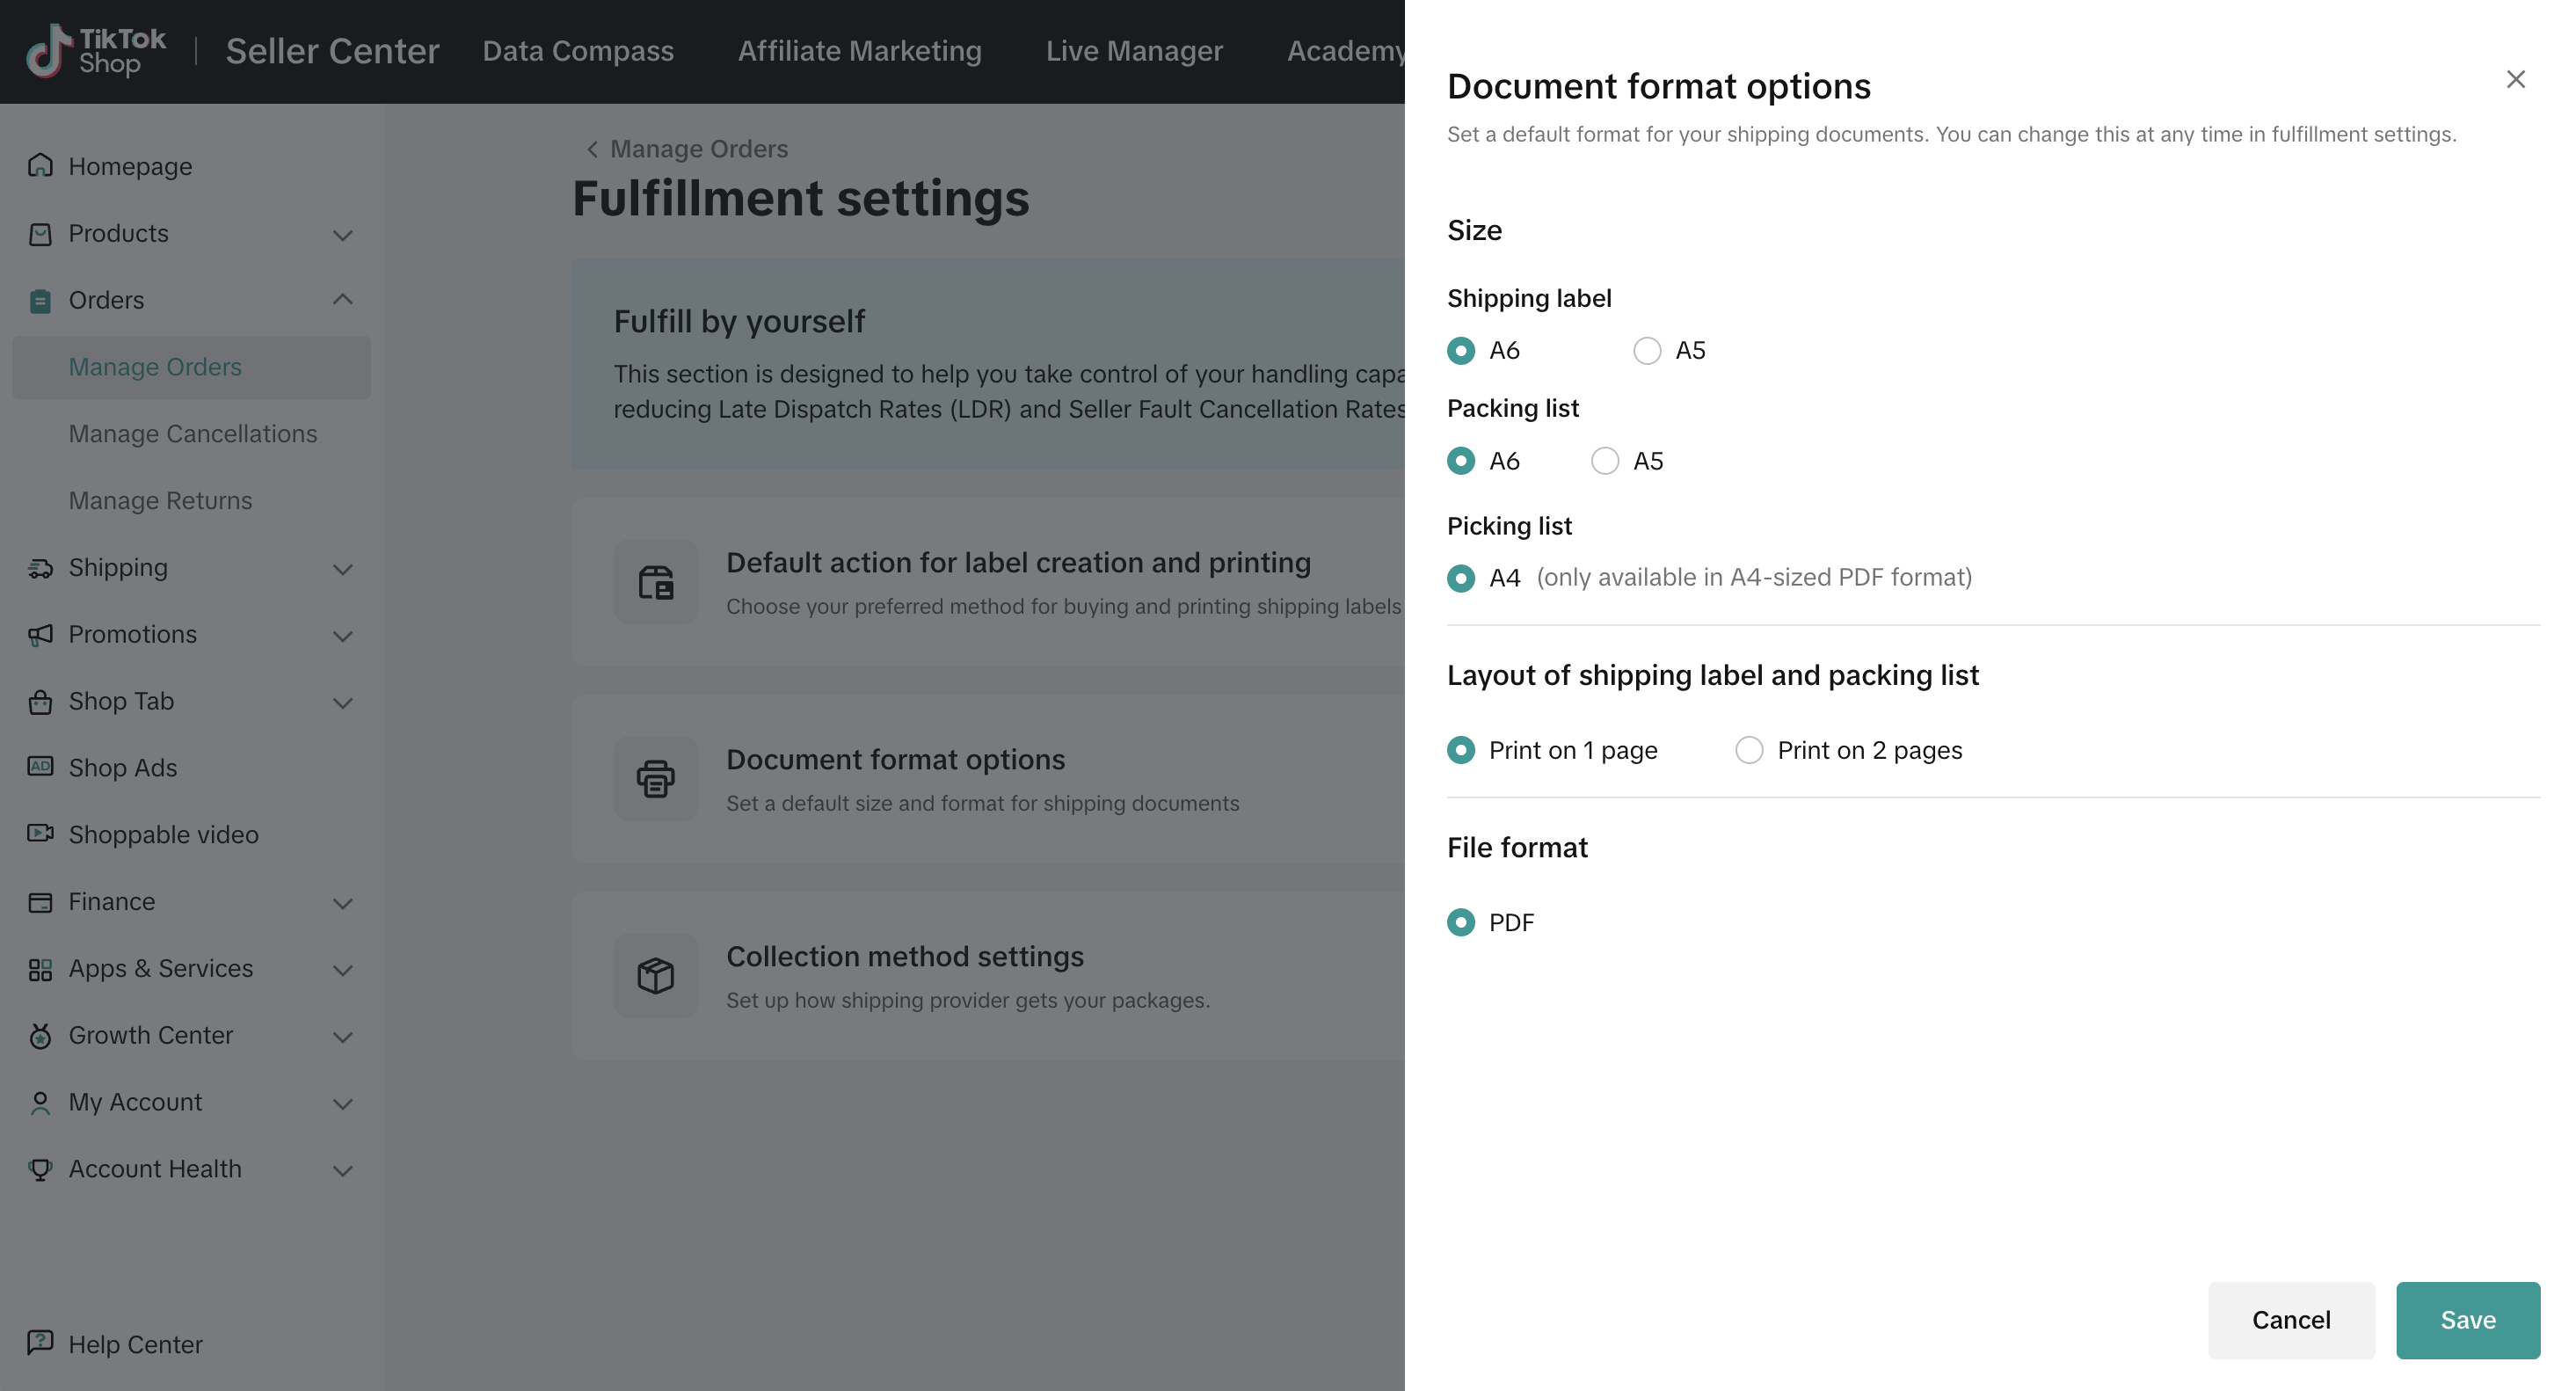
- Go to 'Document format options' to configure your document format for shipping labels, packing list, and picking List


How to Print Shipping Labels?
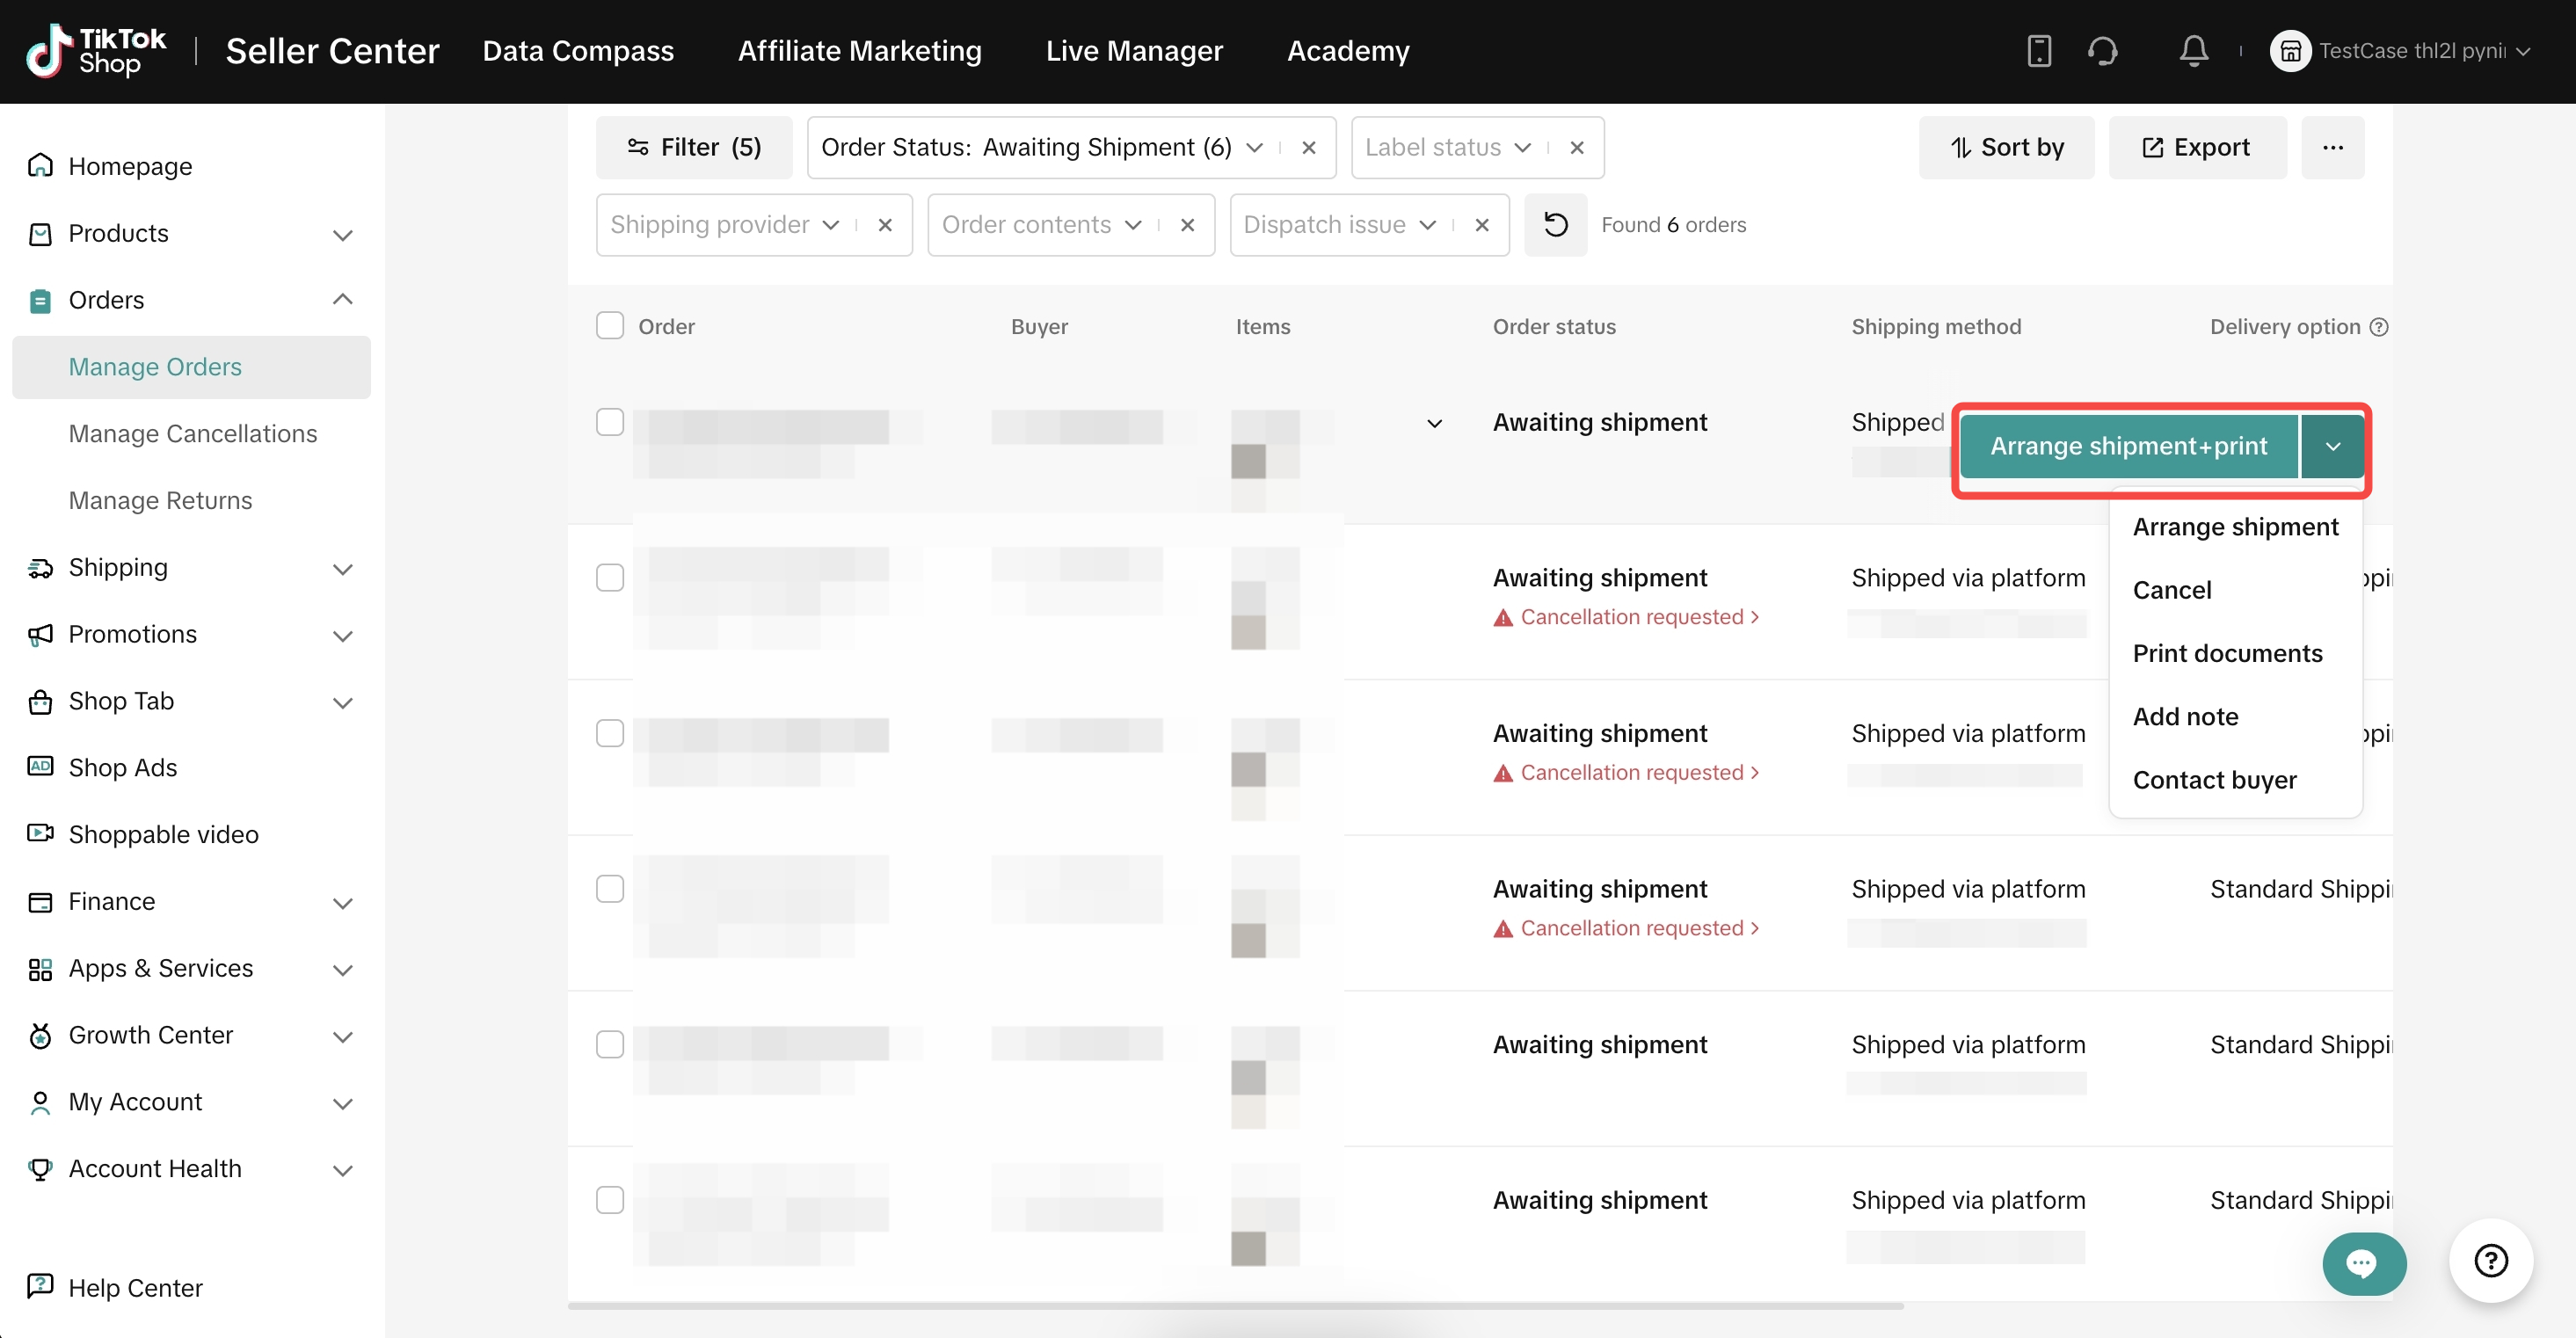
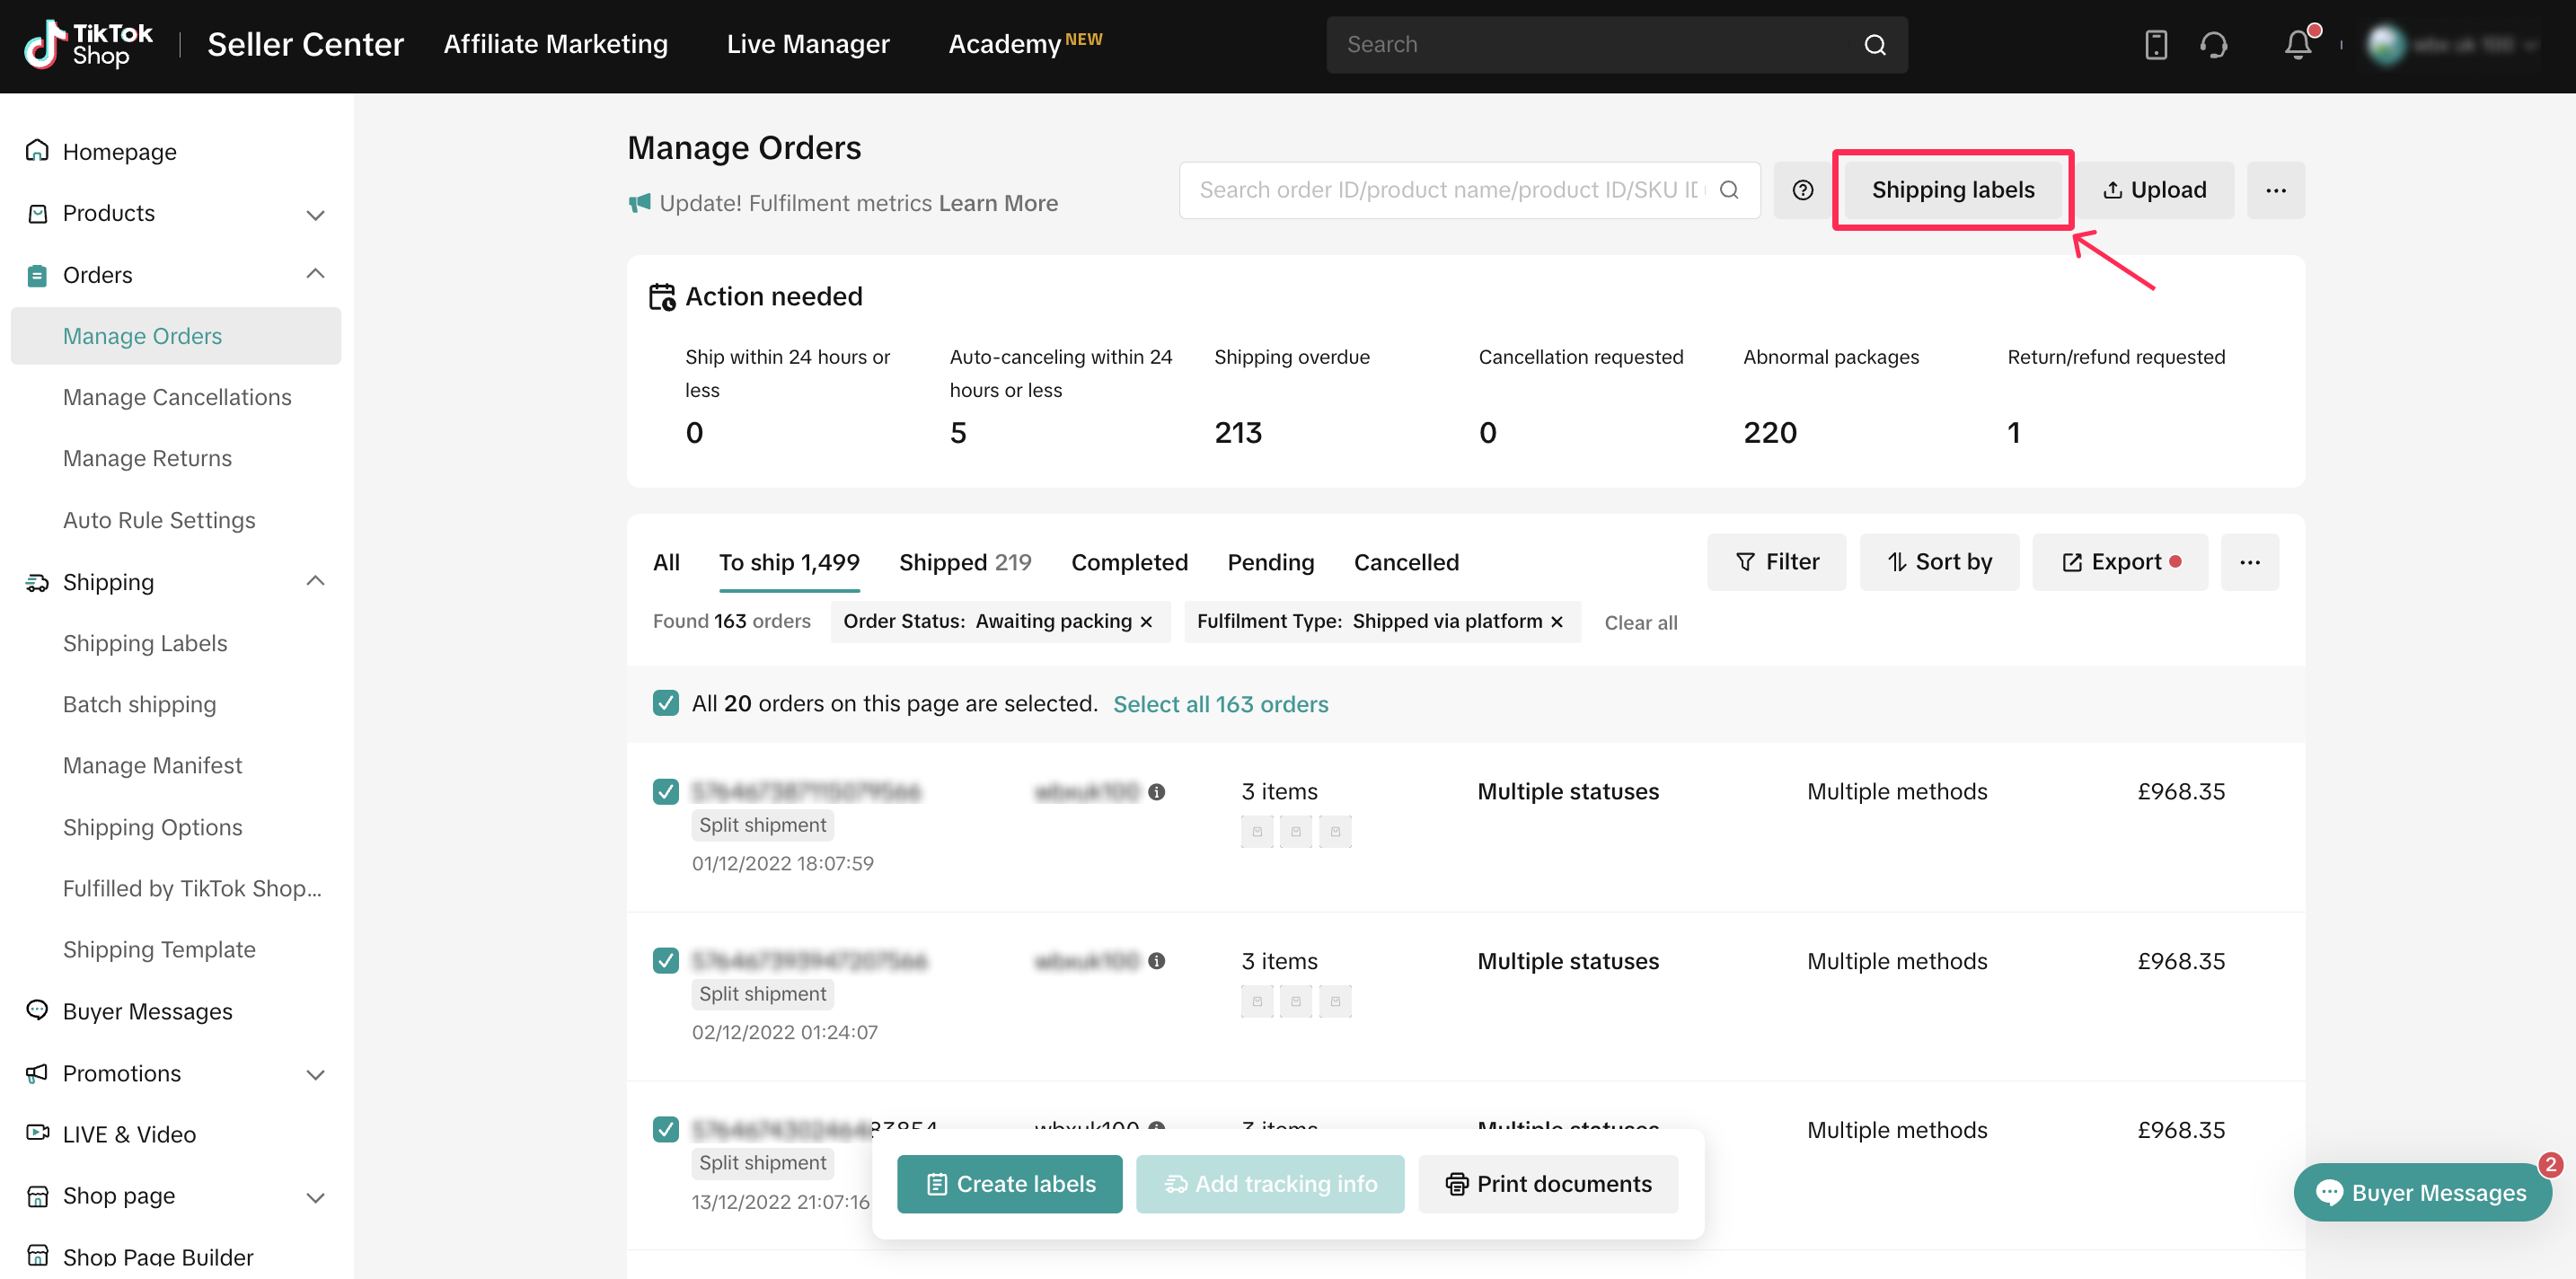
Once the label printing setup is completed, follow these steps for label and document printing:- Go to the Manage Orders page and select the orders you wish to print labels for. You can select multiple orders for batch printing or choose individual orders for printing. The default action will be displayed based on the setup of 'Default Actions for Label Creation and Printing'.

 💡Seller Tip:
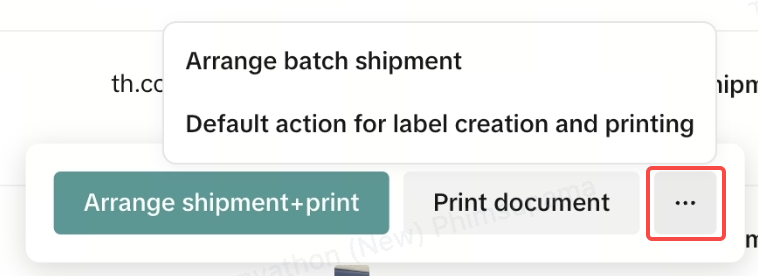
 - If you would like to change the action, click on the ... and select the desired action, or navigate to the 'Default Actions for Label Creation and Printing' page to update the setup.
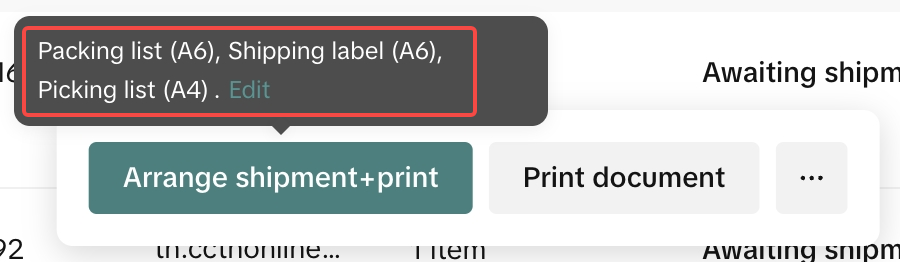
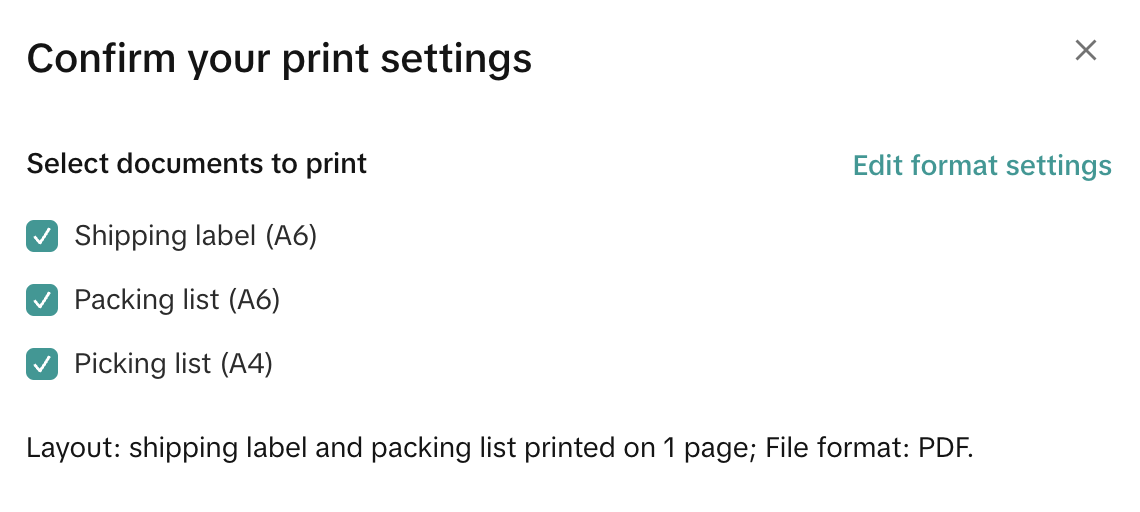
- The printing documents can be set up by placing your cursor over the 'Arrange Shipment' button and then selecting Edit to choose and select document to print.
- The system will automatically generate shipping labels and all related documents. In case of any errors, the system will provide you with a comprehensive overview of the printing results. Take a moment to check for any issues and follow the brief instructions for your next steps.

- If you wish to print another batch of shipping labels, navigate to the Manage Orders page, and repeat all the steps mentioned above once again.

Troubleshooting Shipping Label Issues
While creating and printing shipping labels, you may encounter common issues. Don't worry; we have a guide to assist you in troubleshooting these concerns.My Shipping Label is Rejected
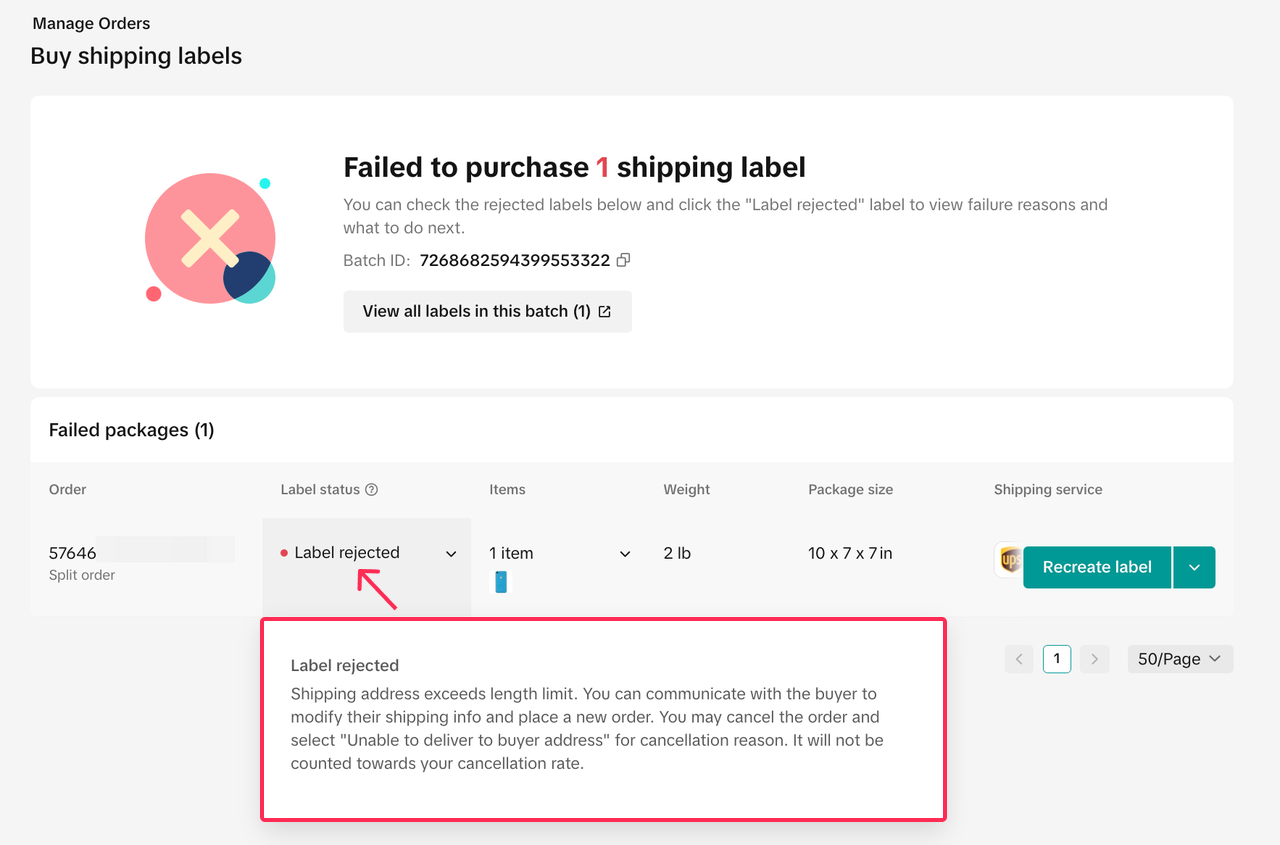
When generating shipping labels, TikTok Shop must verify shipping information with shipping providers. If we receive an error code from them, the shipping labels may be rejected.Here's what you need to do:
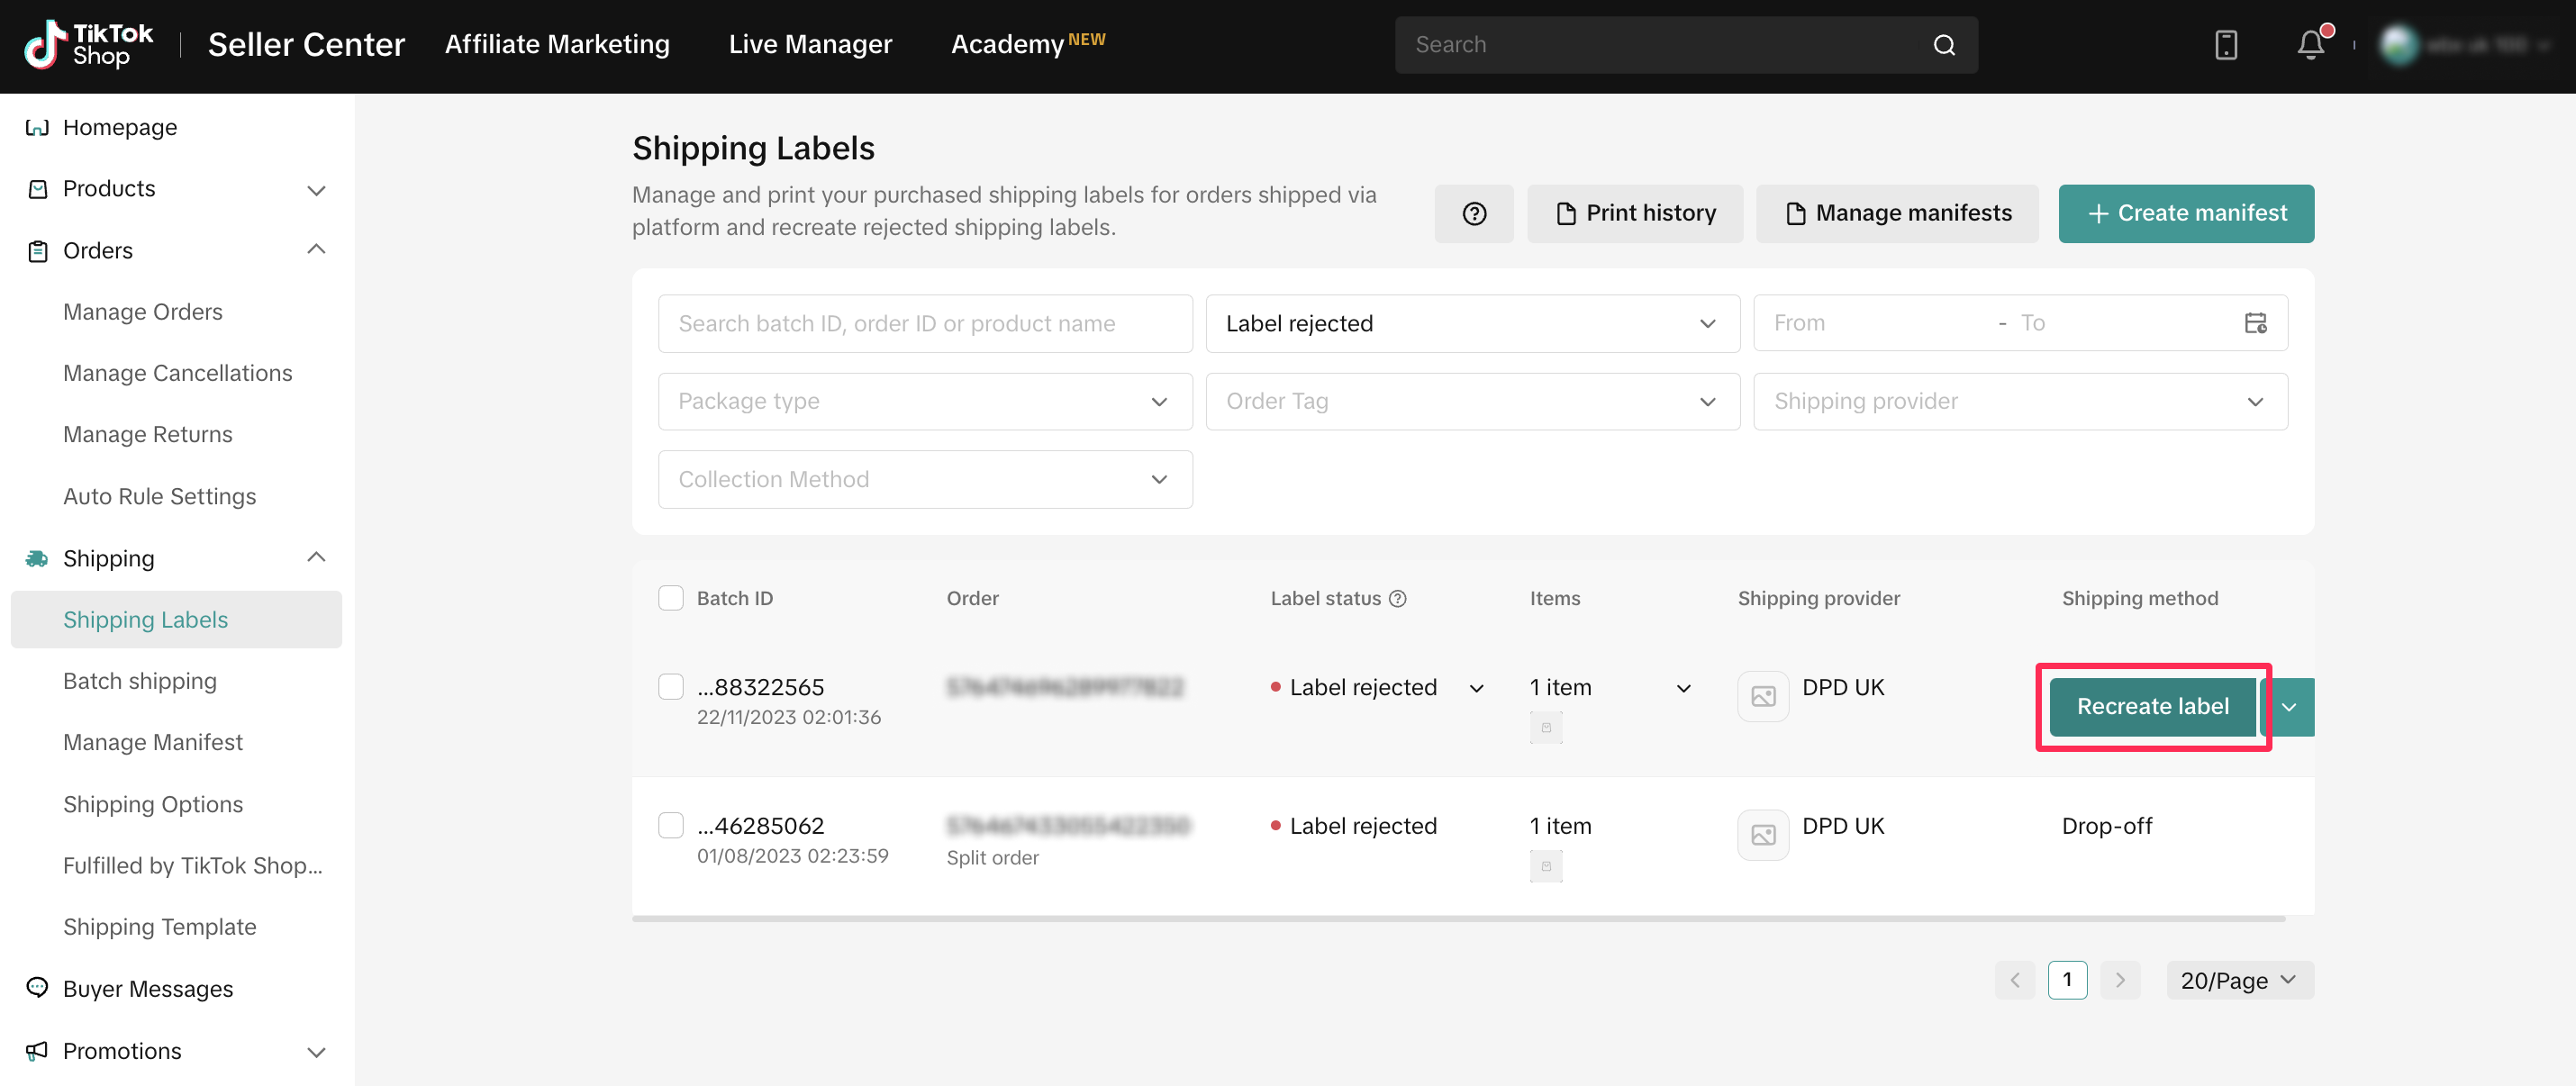
- Check the reason for the rejected label by hovering over the 'Label Rejected' status. The platform will provide reasons for the error and suggest the next steps to resolve the issue.
- An issue with the buyer's address
- An oversized product
- An order failure with the shipping provider
- Once the error has been resolved, you can click 'Recreate Label' to obtain the shipping label again. Alternatively, navigate to Manage Orders > Shipping Labels page, locate the specific shipping labels you want to recreate, and click 'Recreate Label.'
Printing Failure
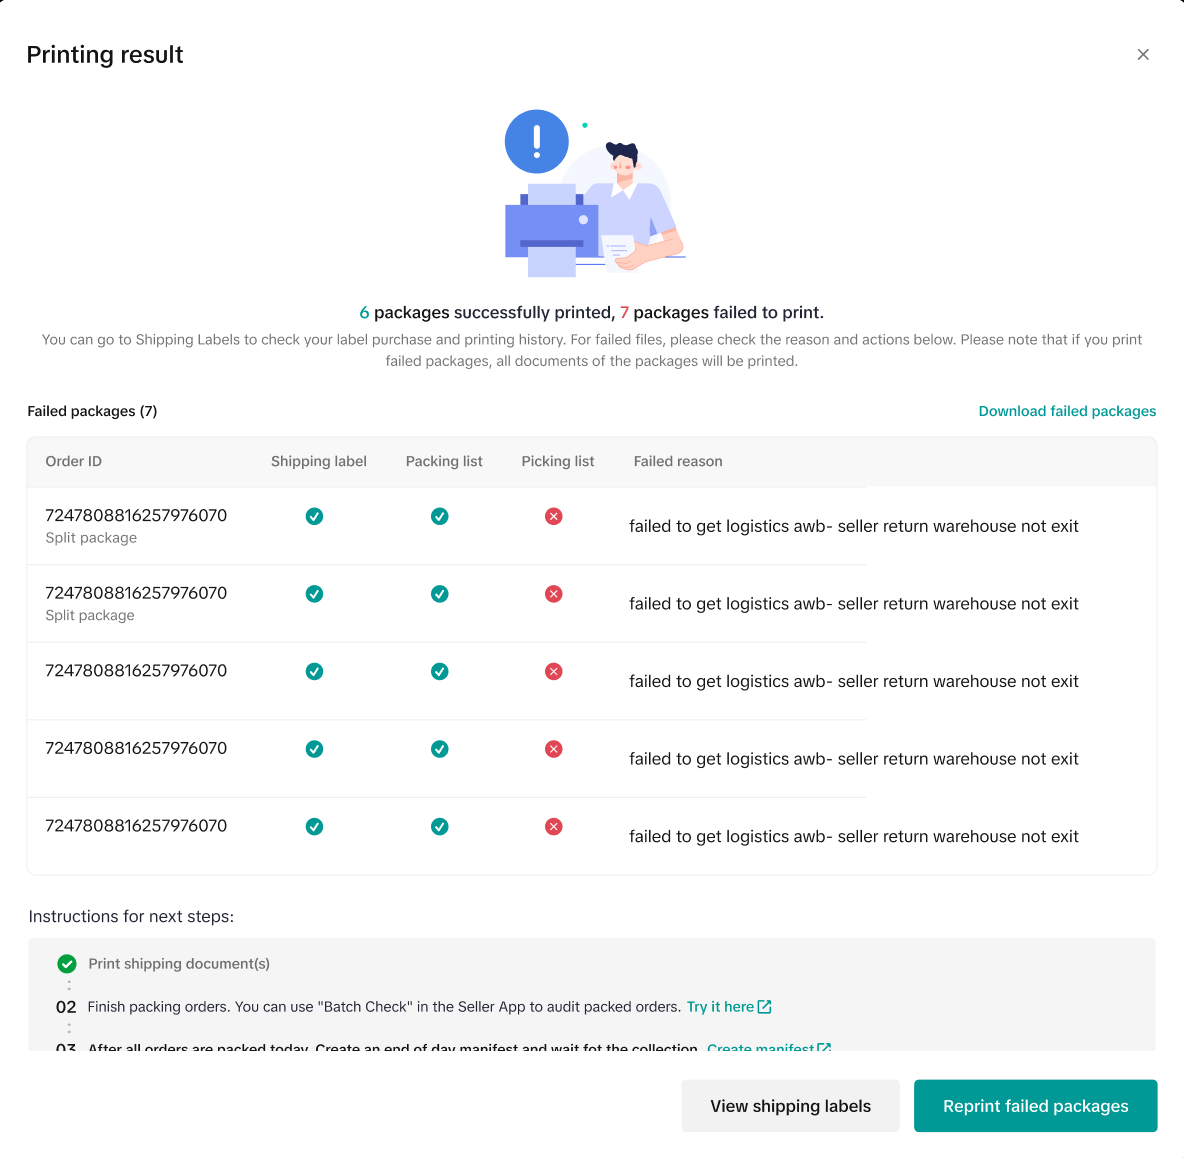
If your attempt to print a shipping label and packing list encounters an issue, any failures will be showcased in the Printing Result. The display will include order IDs and the reasons for the printing failure.You can retry printing by clicking 'Reprint Failed Packages' or you may choose to 'View Shipping Labels' for more detailed information.

Recreating or Reprinting Shipping Labels
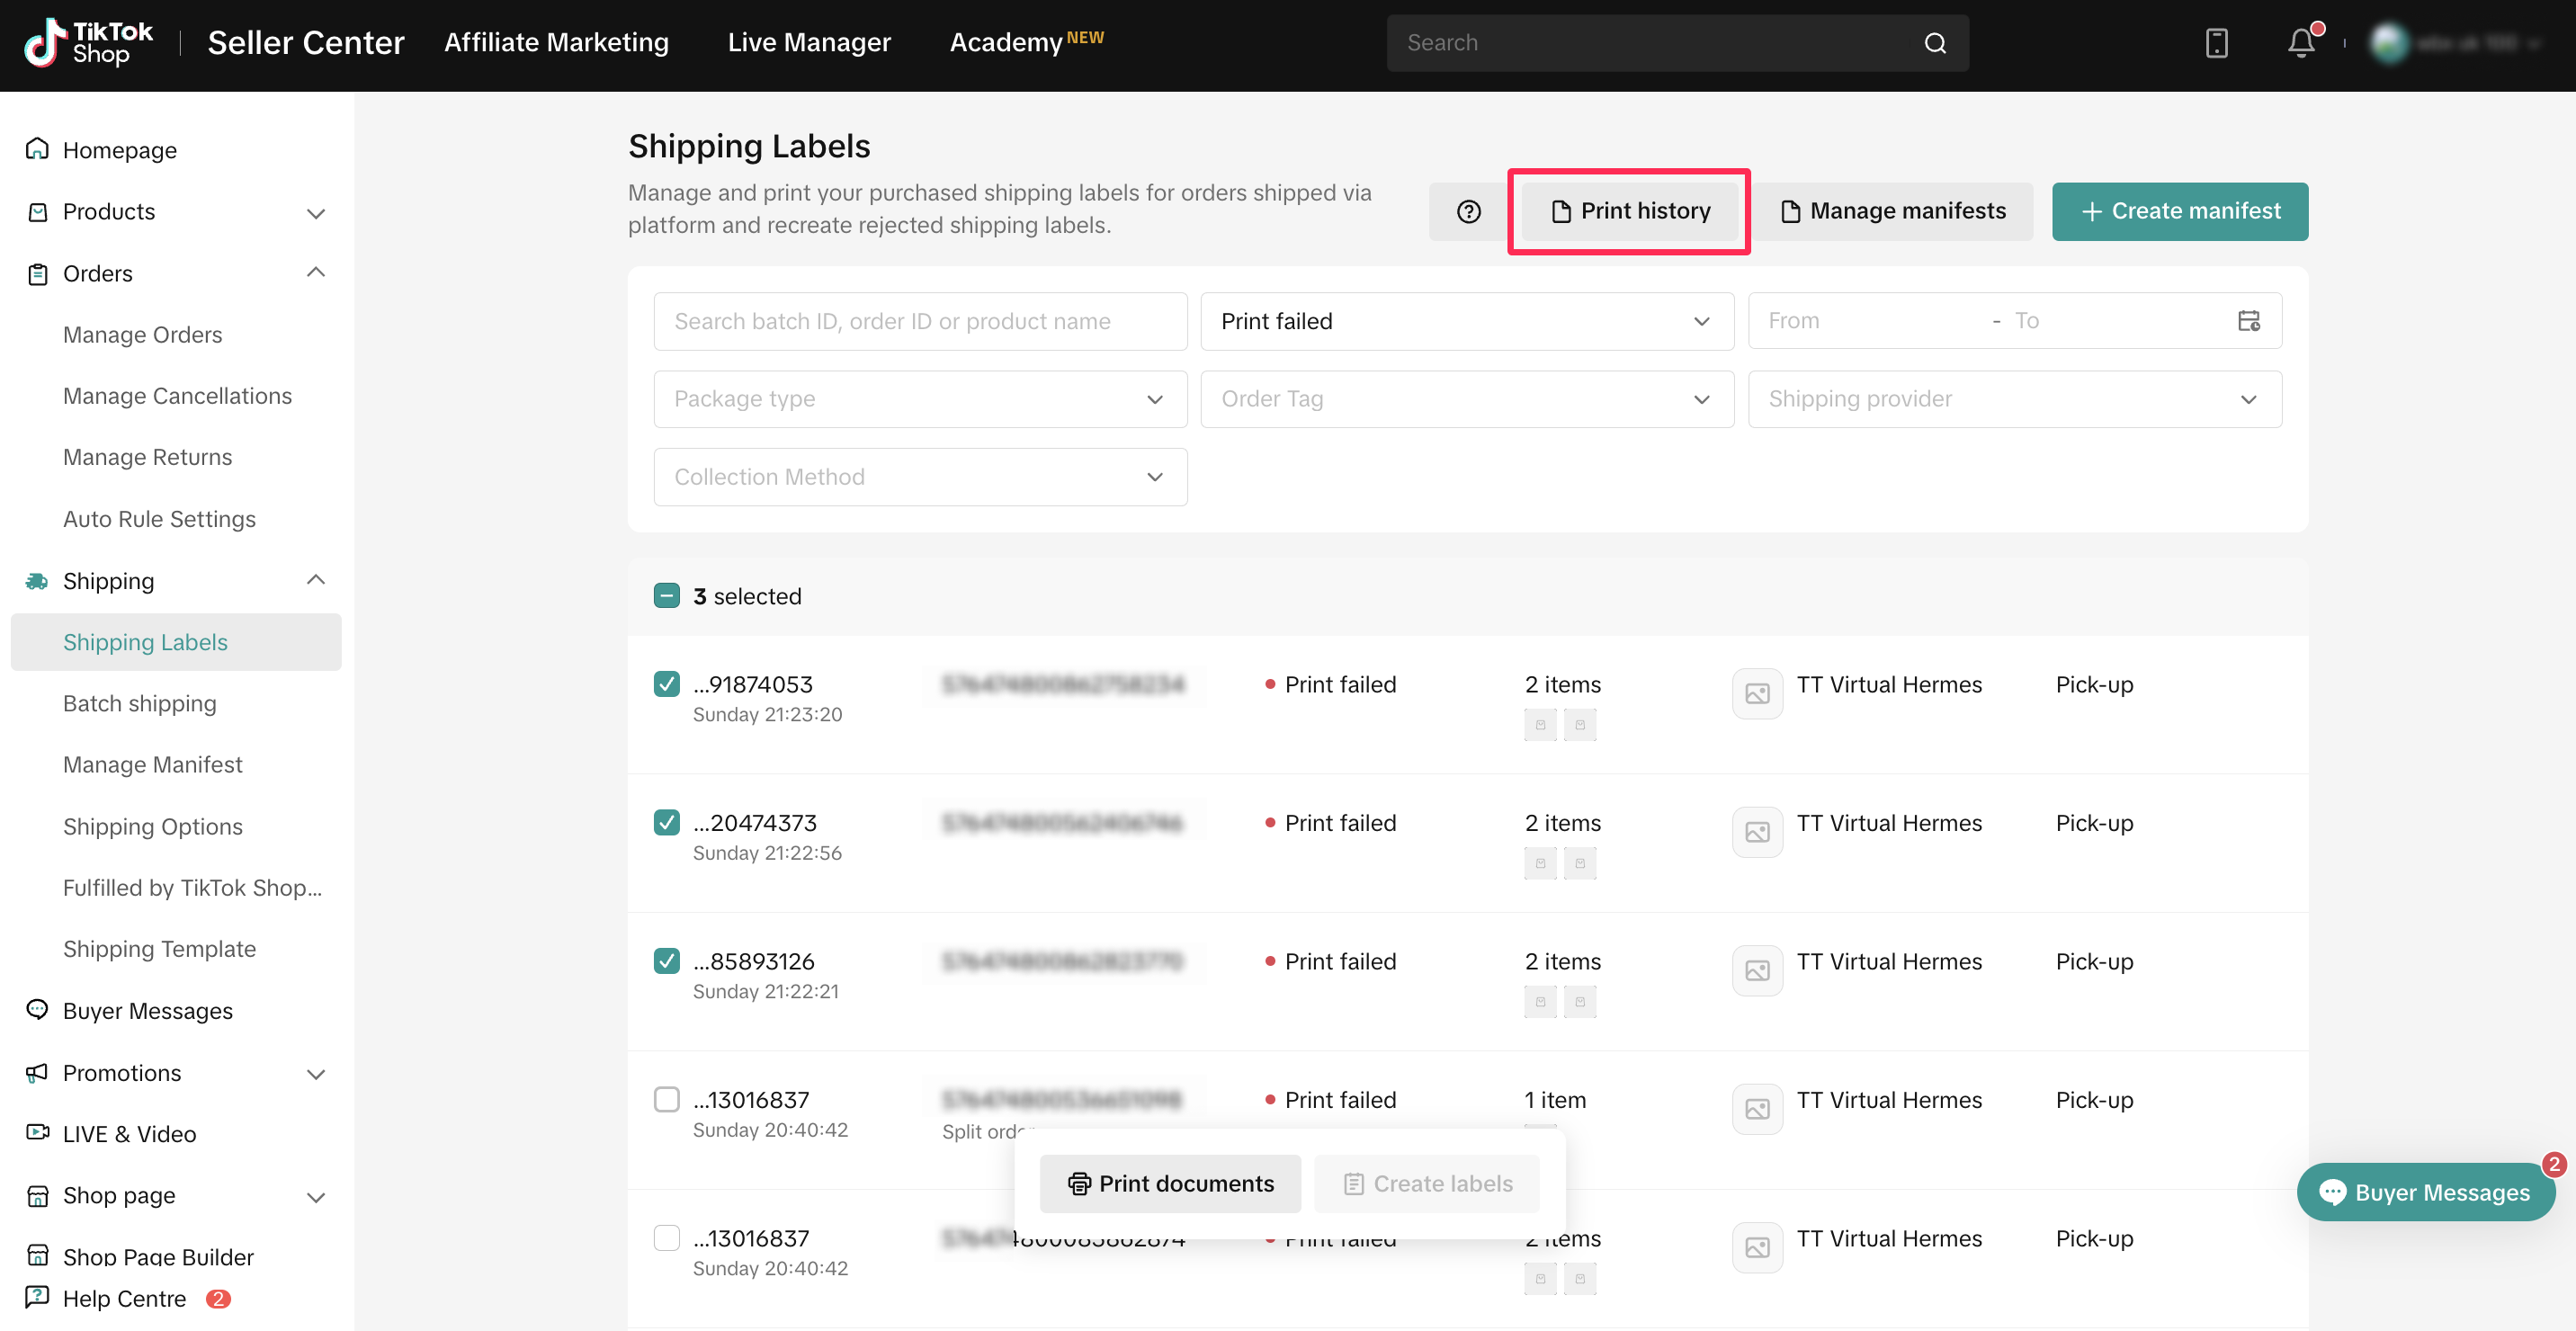
Once you have successfully addressed any issues with your failed labels and are prepared to recreate or reprint them, follow these steps on the new Shipping Labels page.- Access the Shipping Labels page by navigating to Manage Orders > Shipping Labels. Here, you will find a comprehensive list of all the shipping labels you have generated.
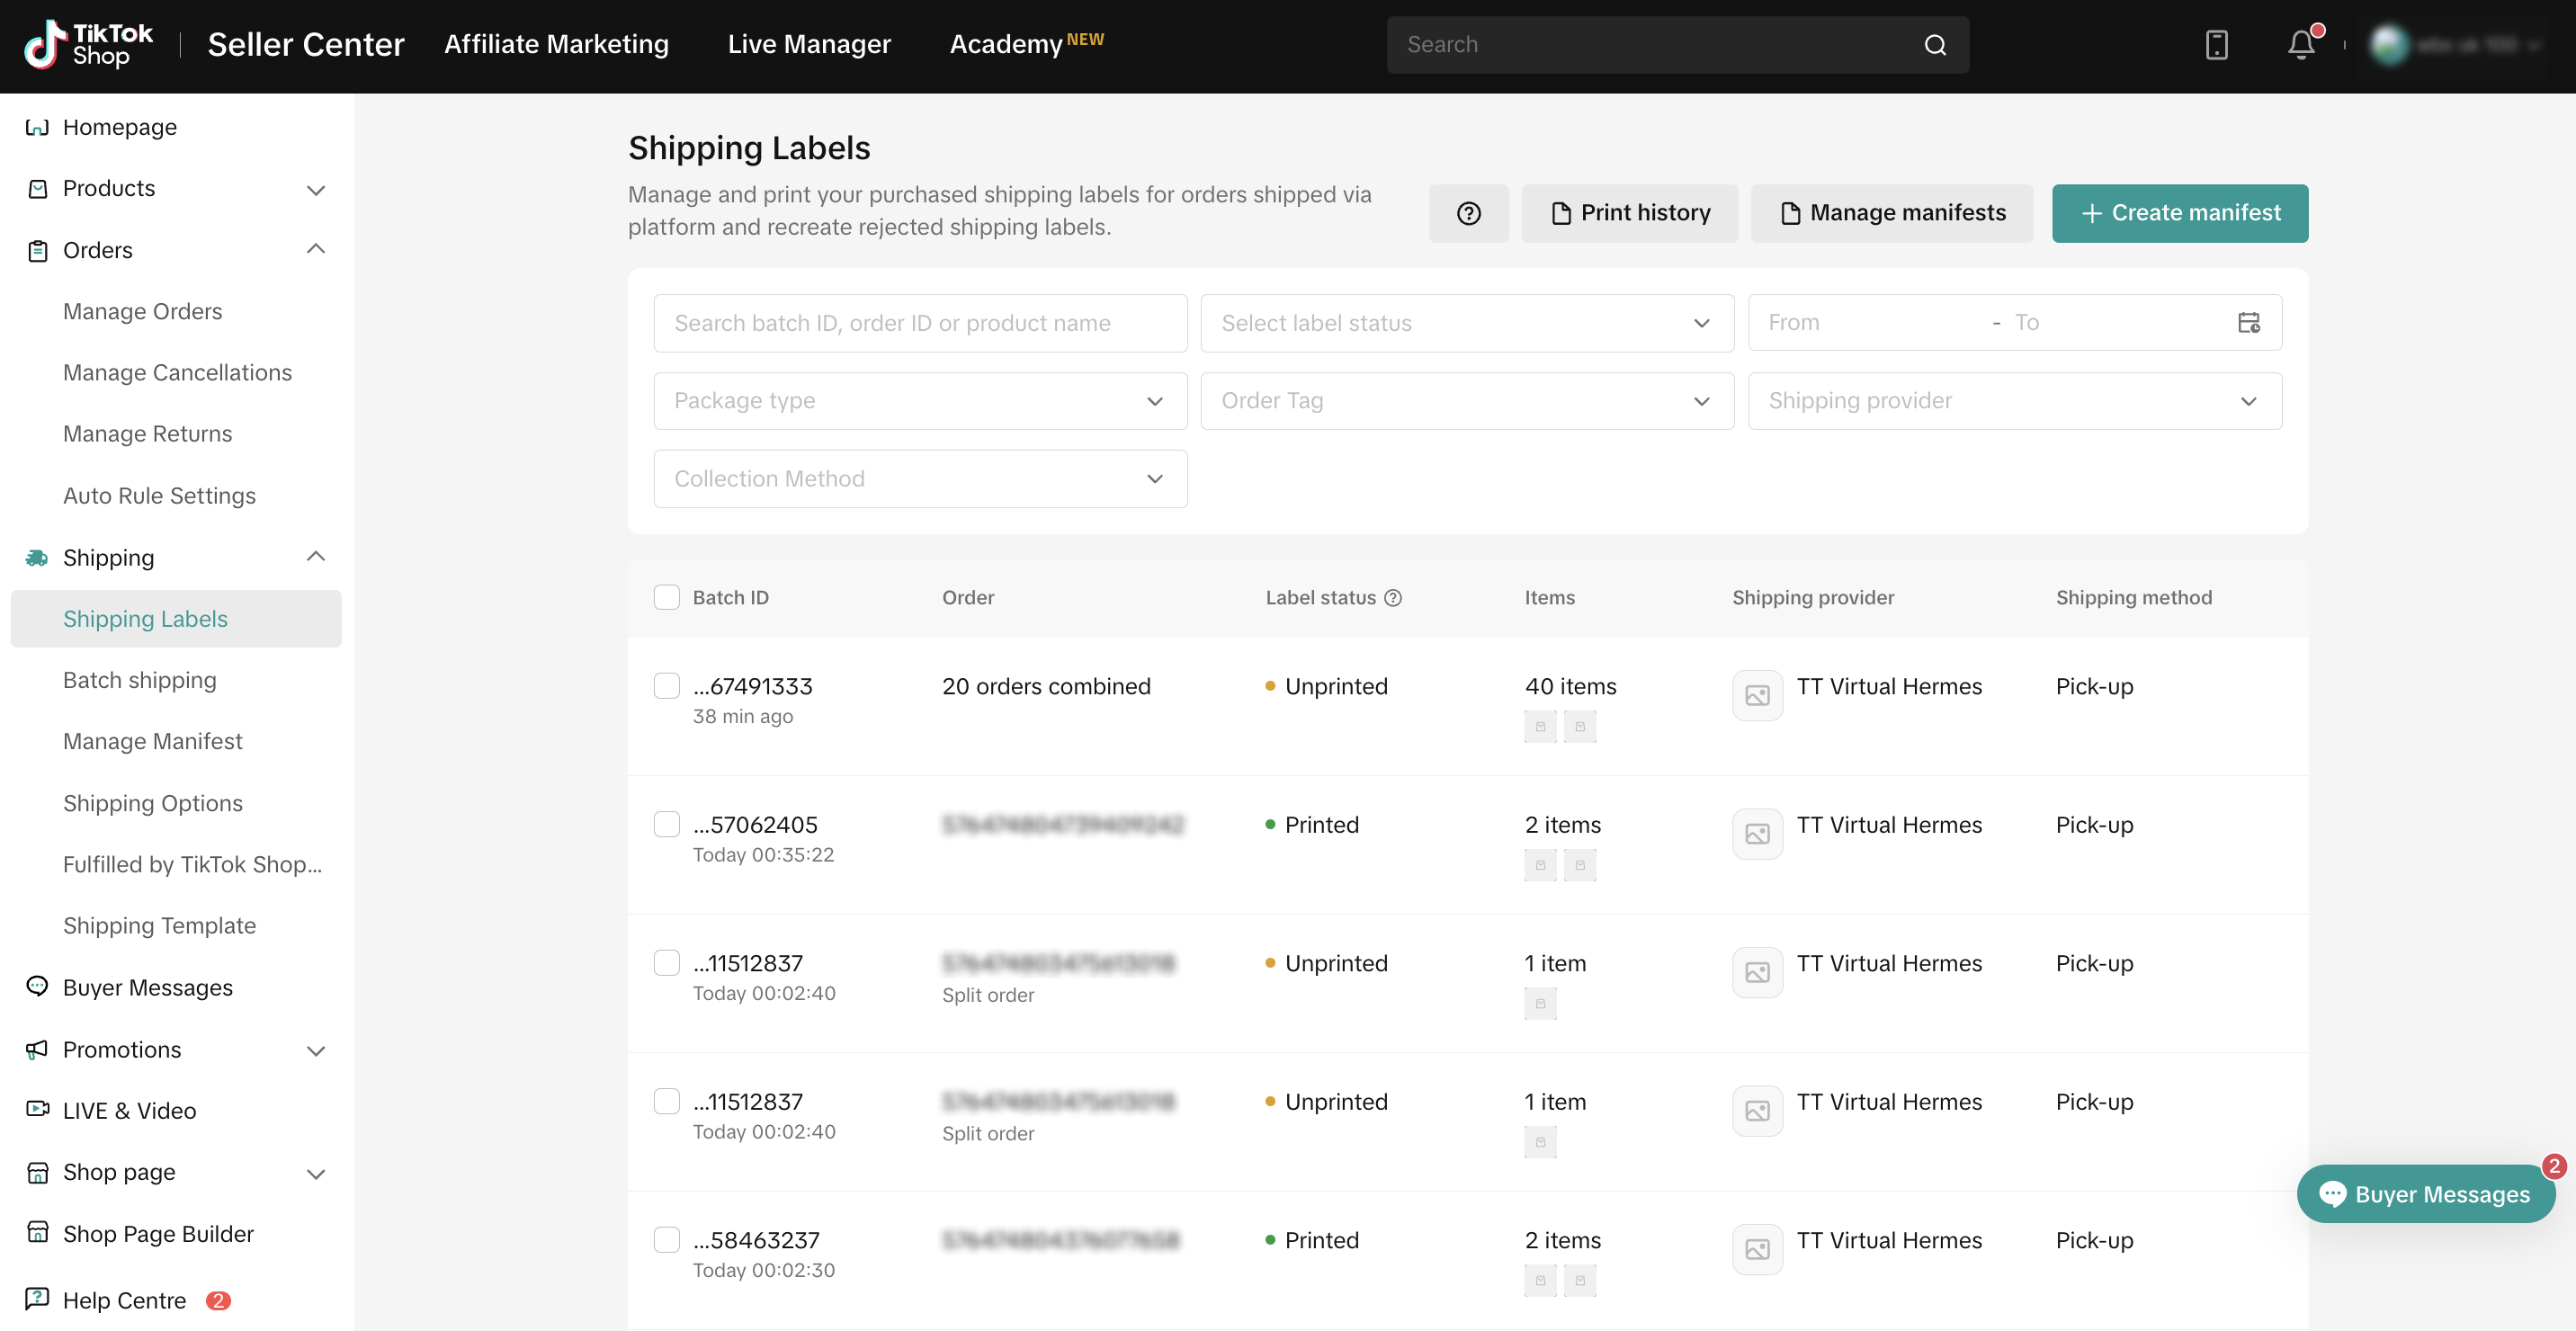
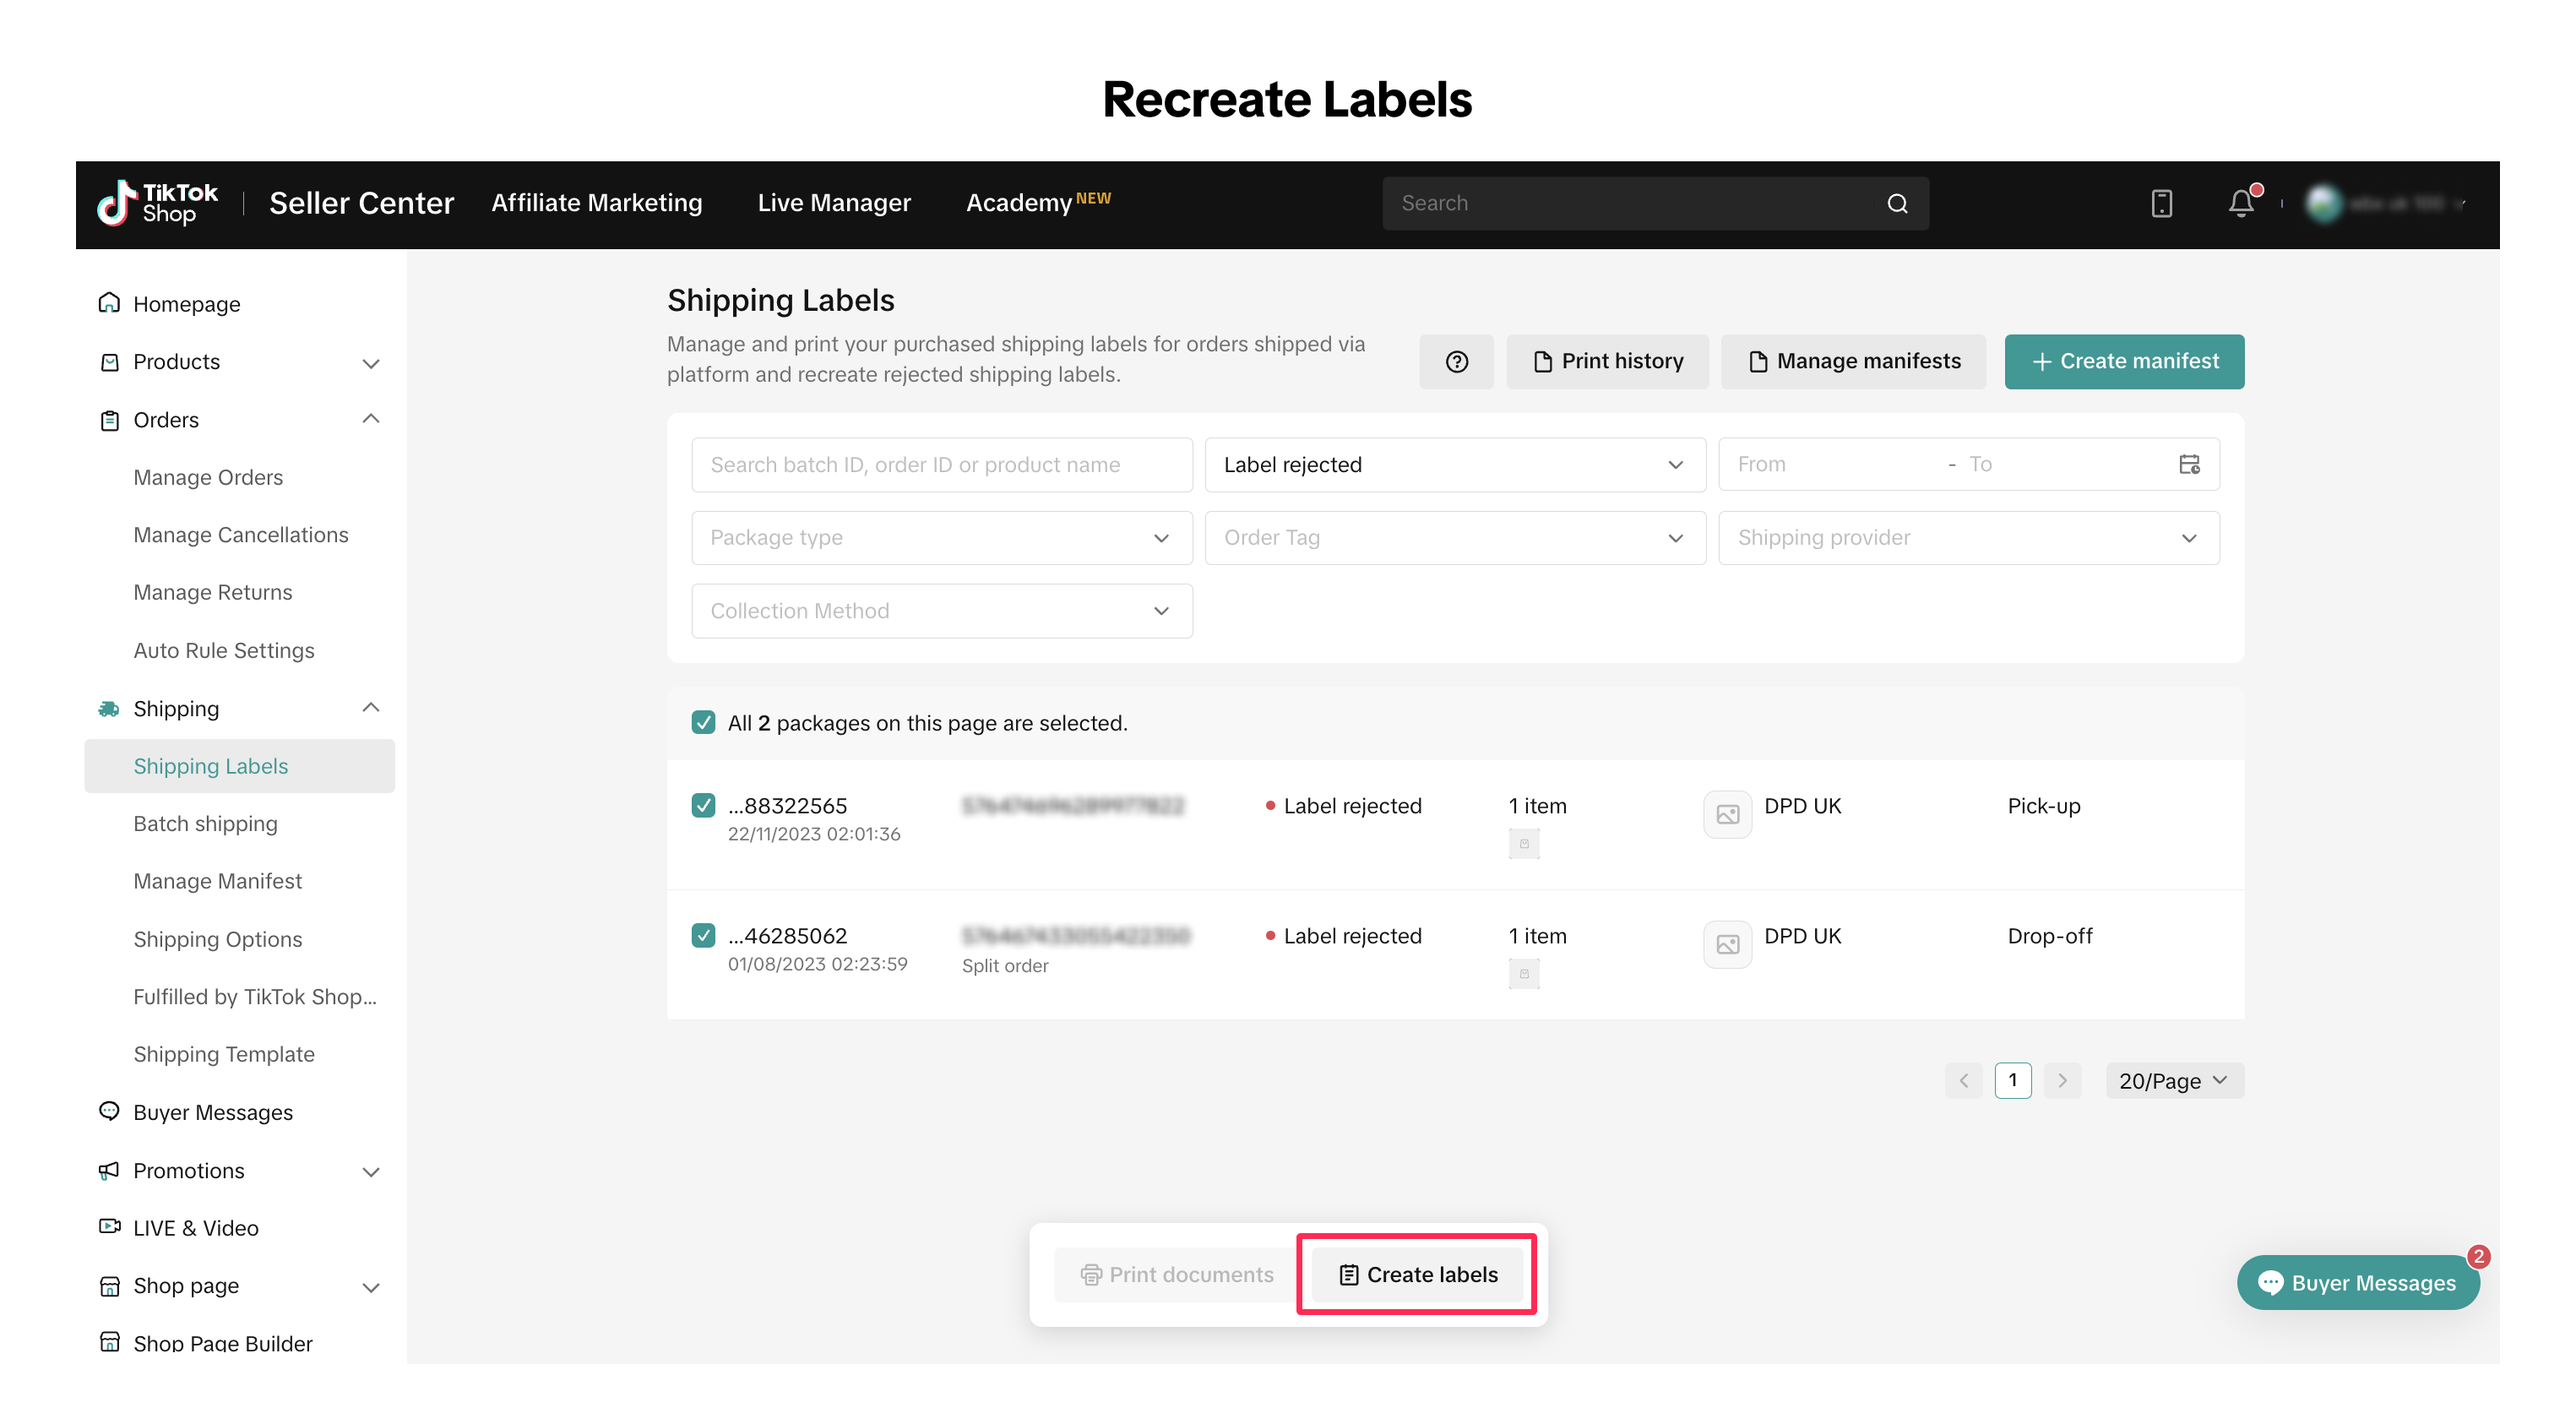
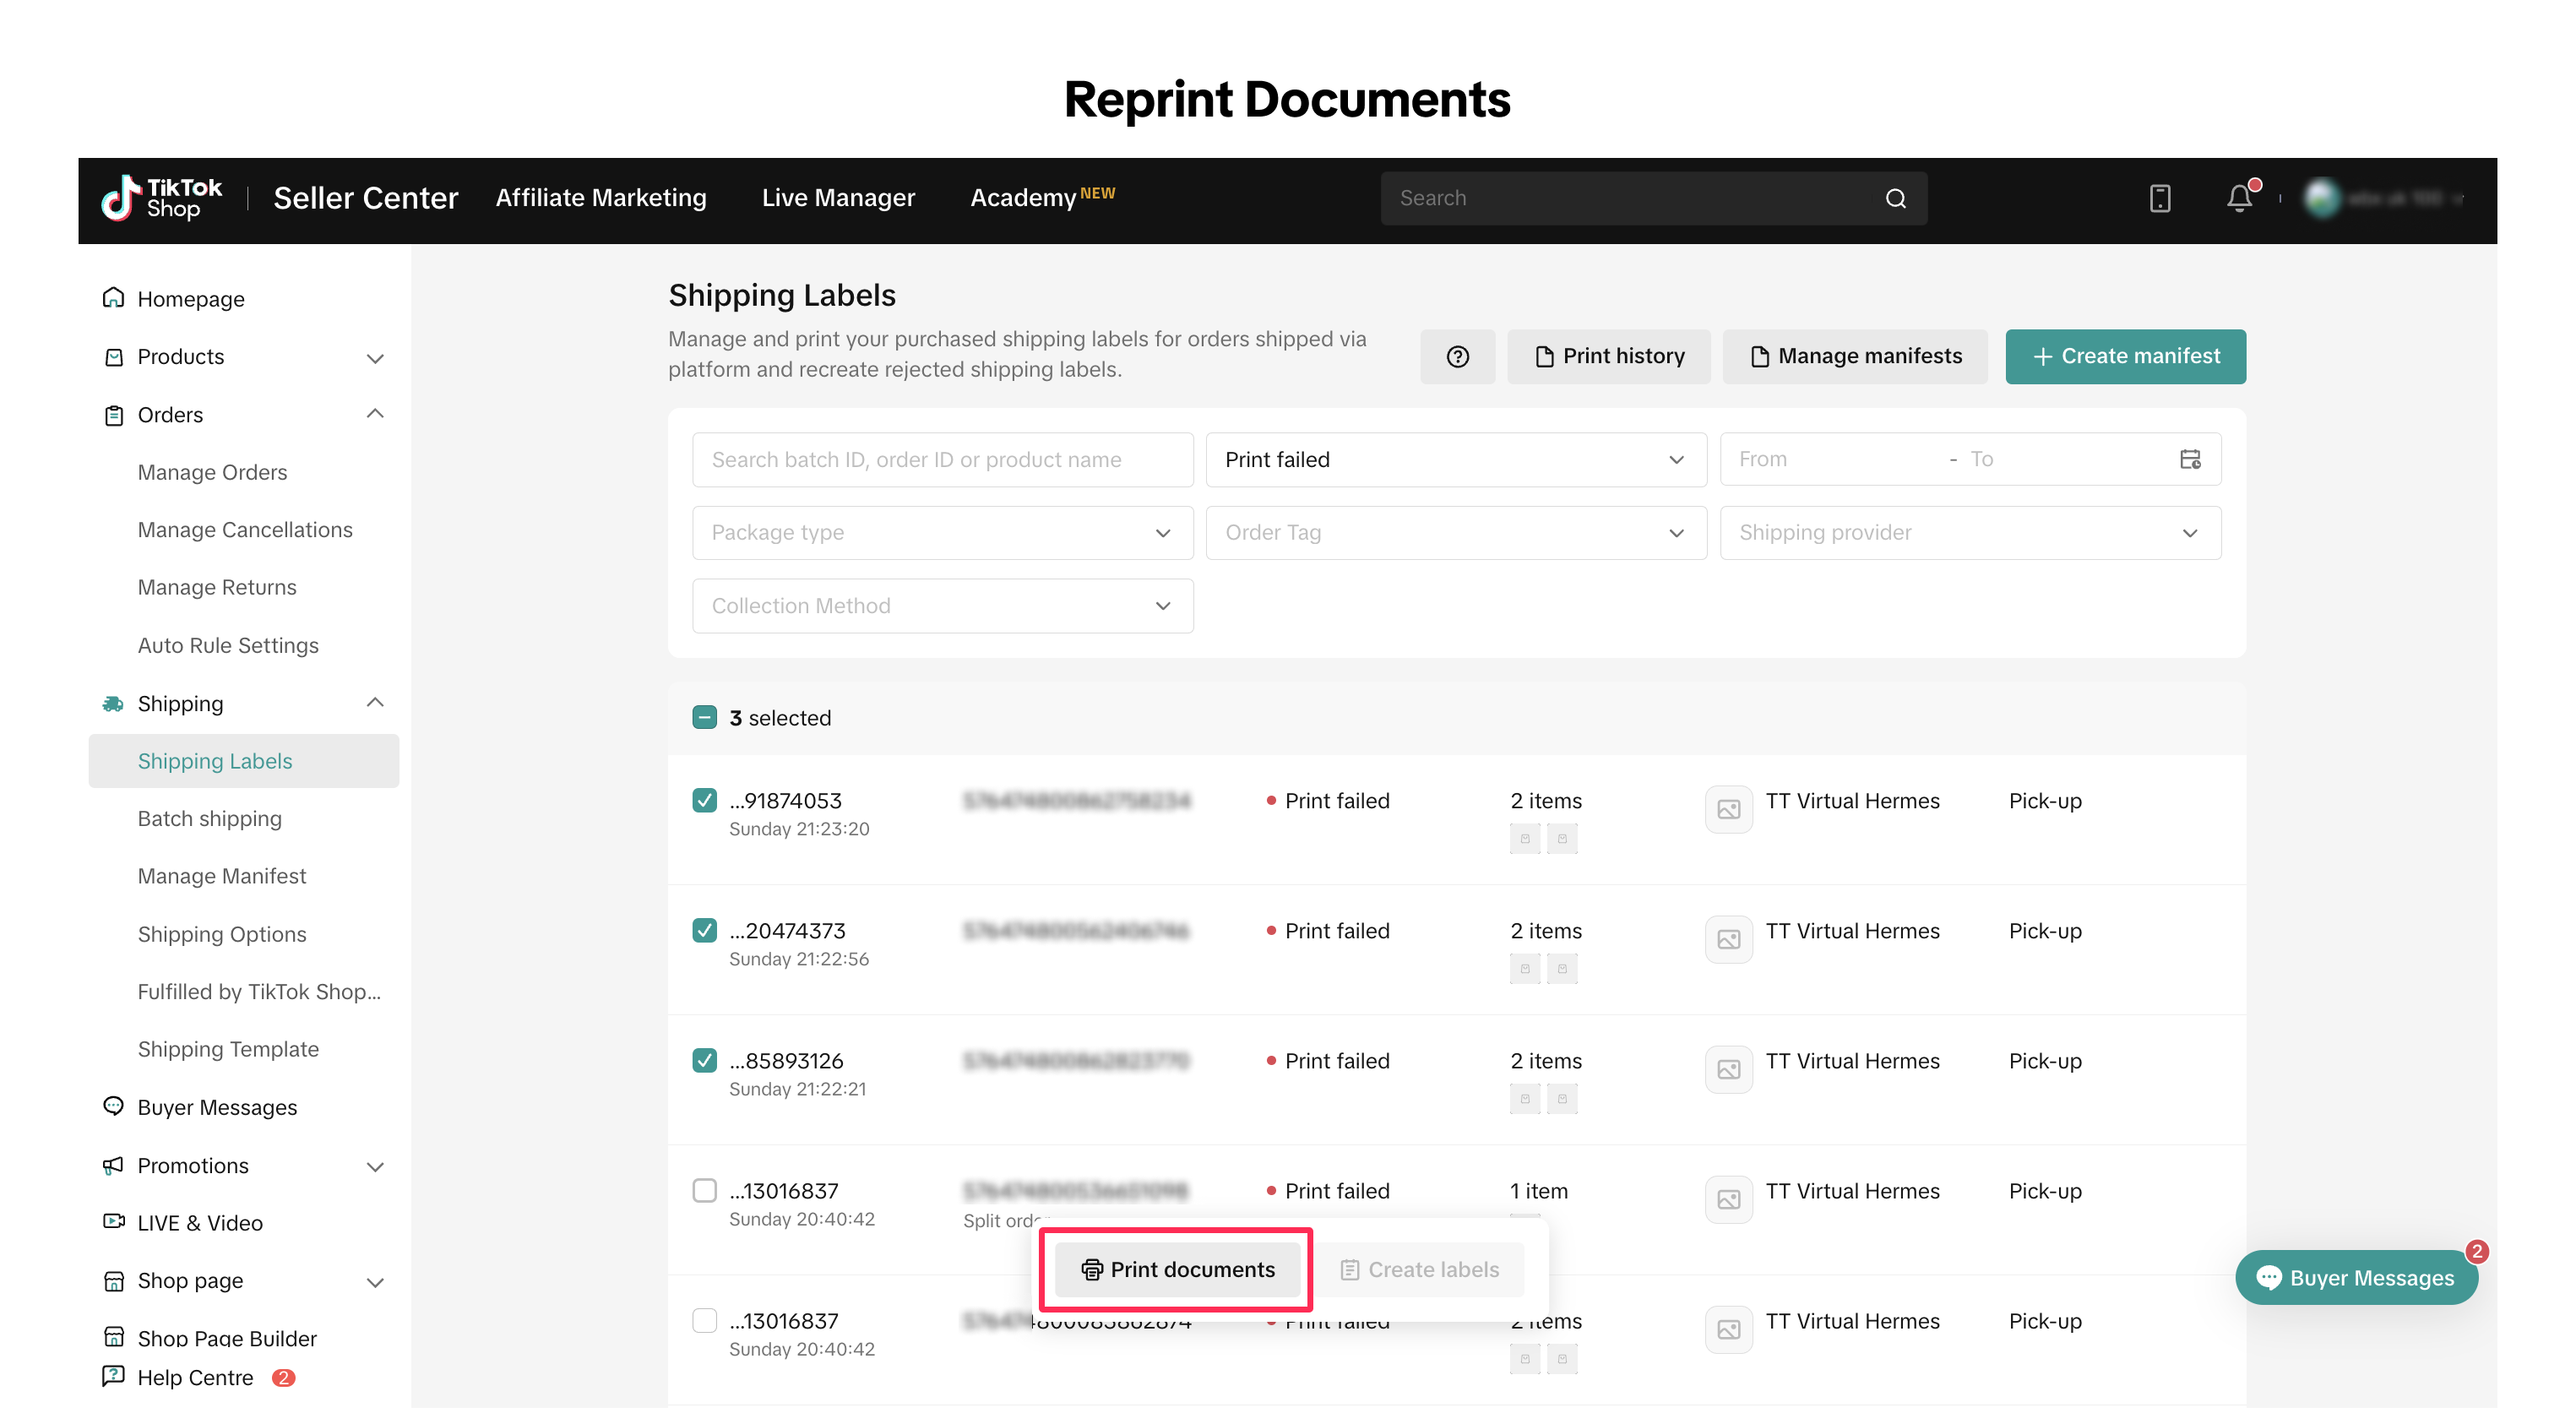
- Locate the specific orders for which you want to recreate or reprint shipping labels by filtering the orders based on the label status.
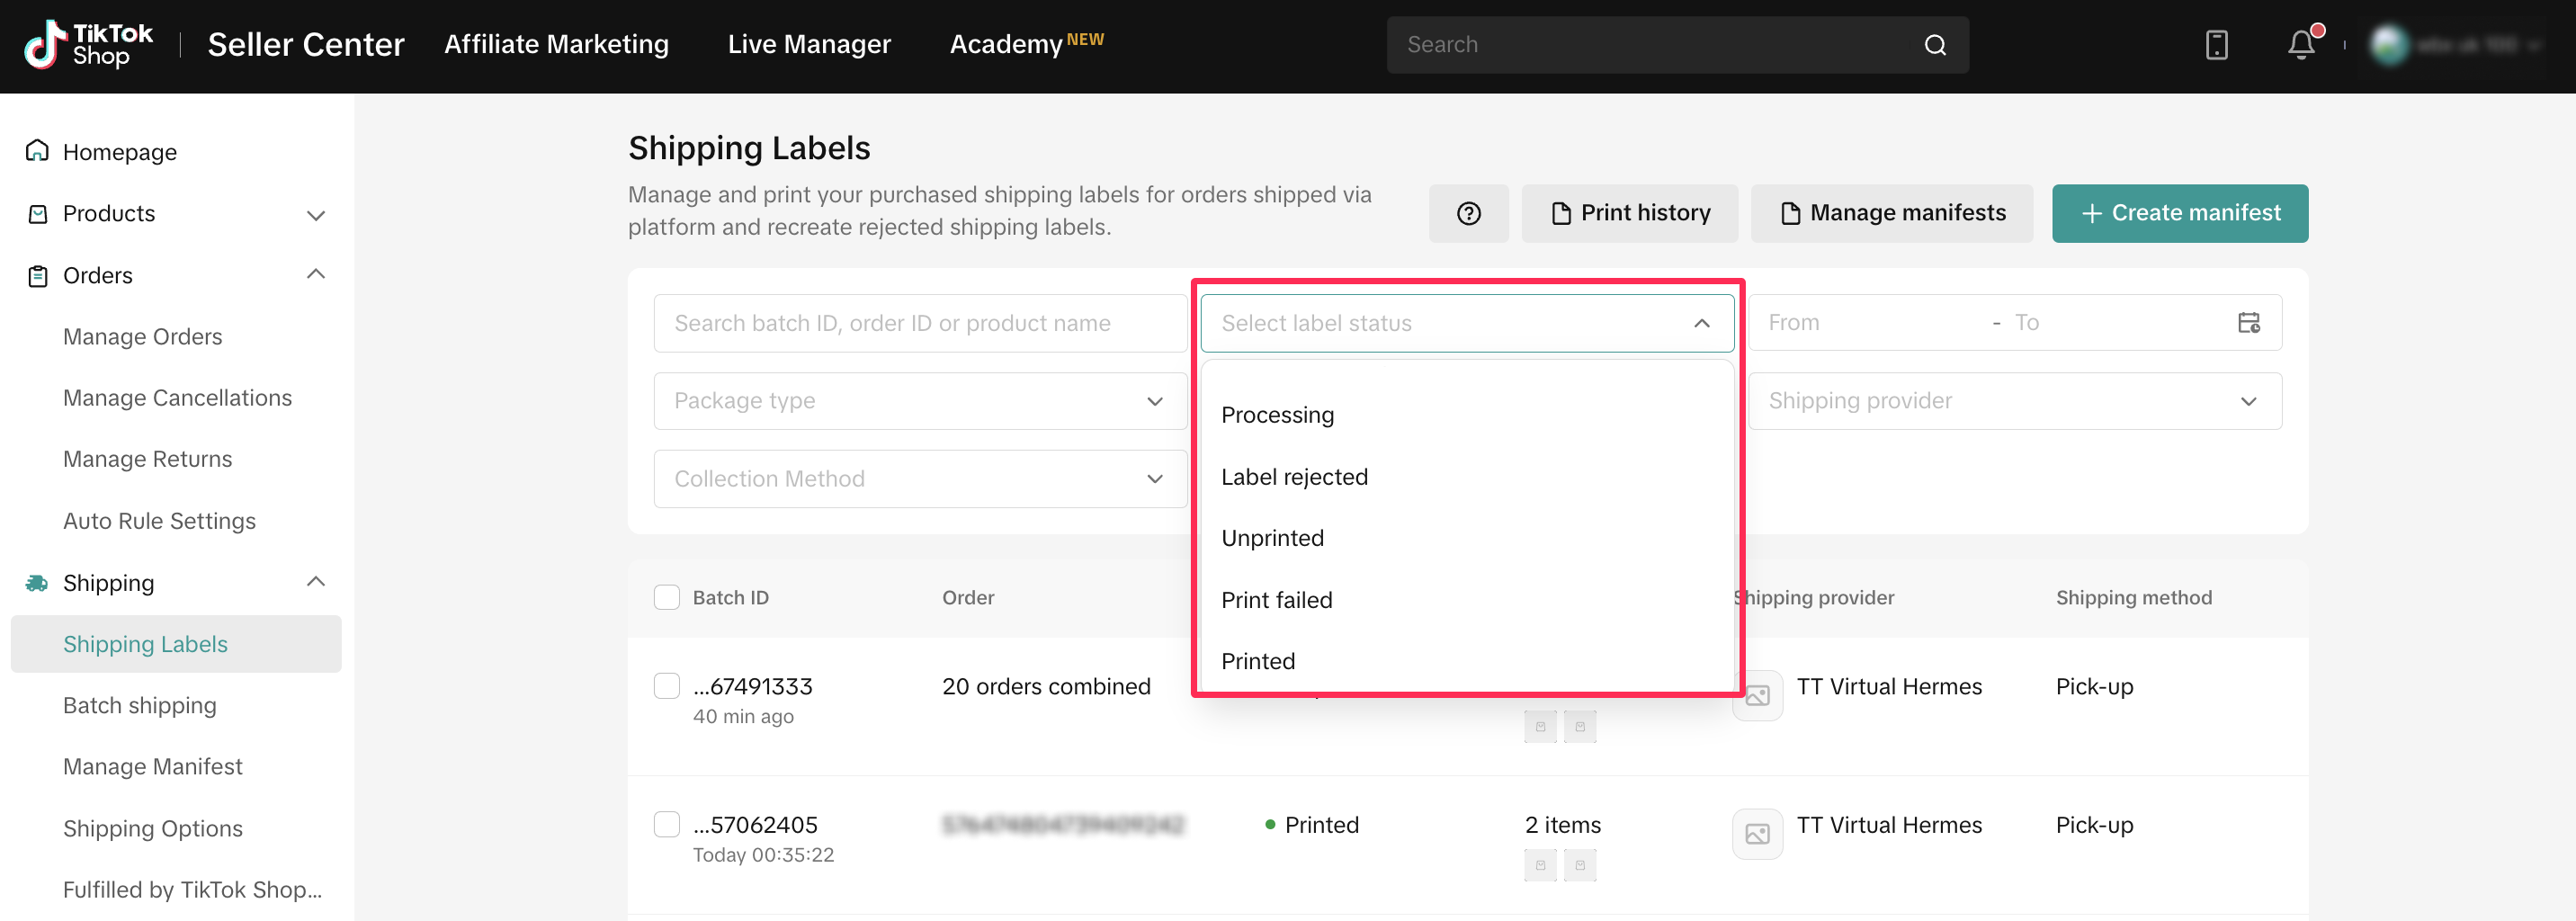
- After filtering your orders, select the individual orders or use multi-select, then click 'Create Labels' or 'Print Documents,' depending on the action you wish to take.

Viewing Printing History
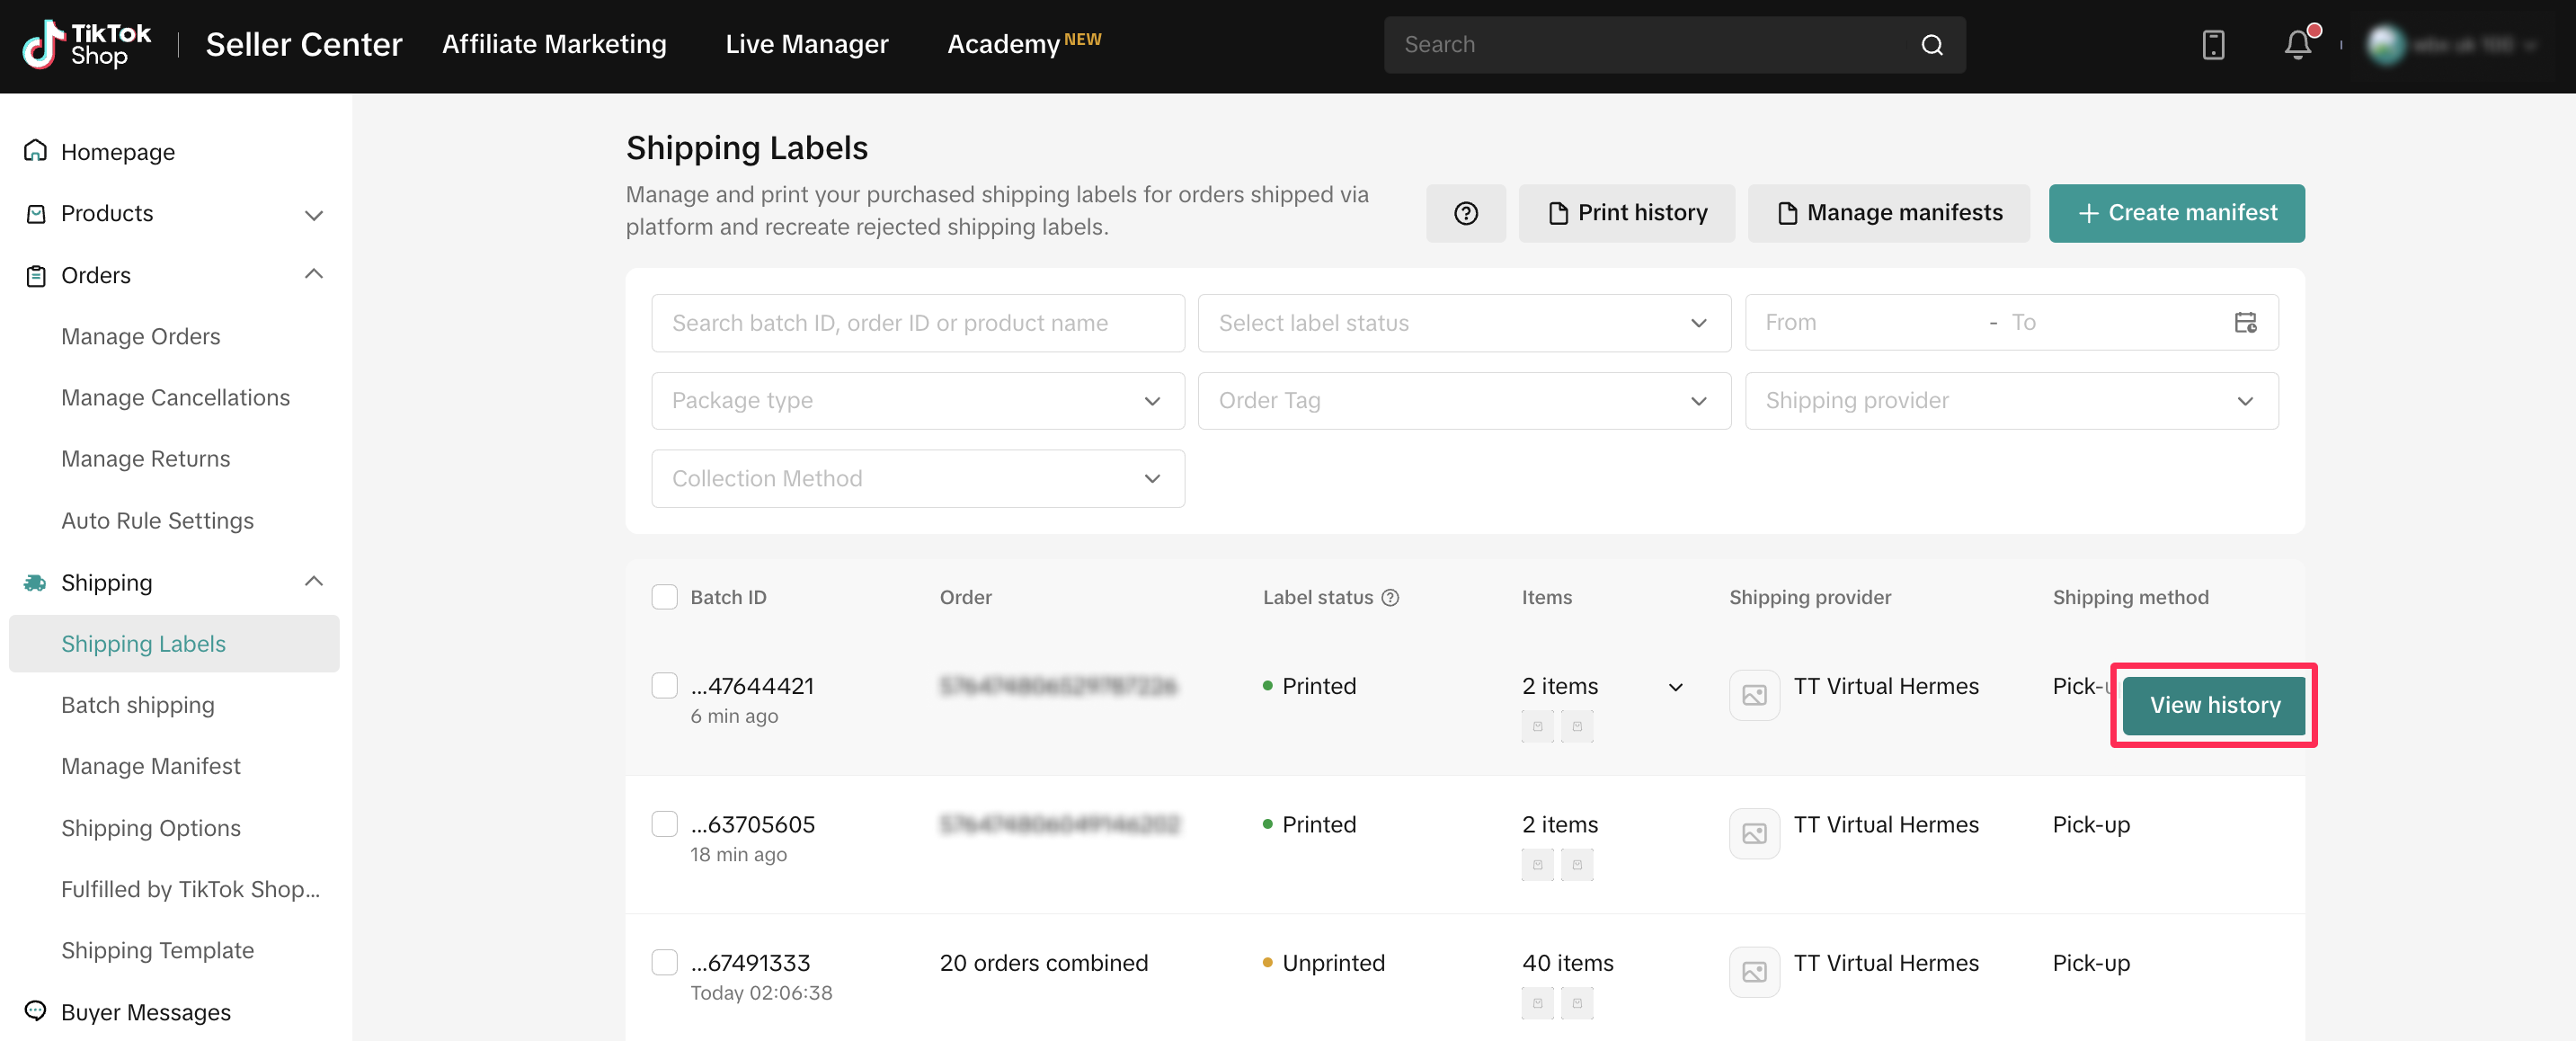
You can effortlessly review detailed package information, monitor the status of your labels for each order, and view your printing history on the Shipping Labels page. Simply follow these steps:- Navigate to Manage Orders > Shipping Labels page and click on 'View History' for the order you wish to explore the shipping label history, from label creation to label printing.
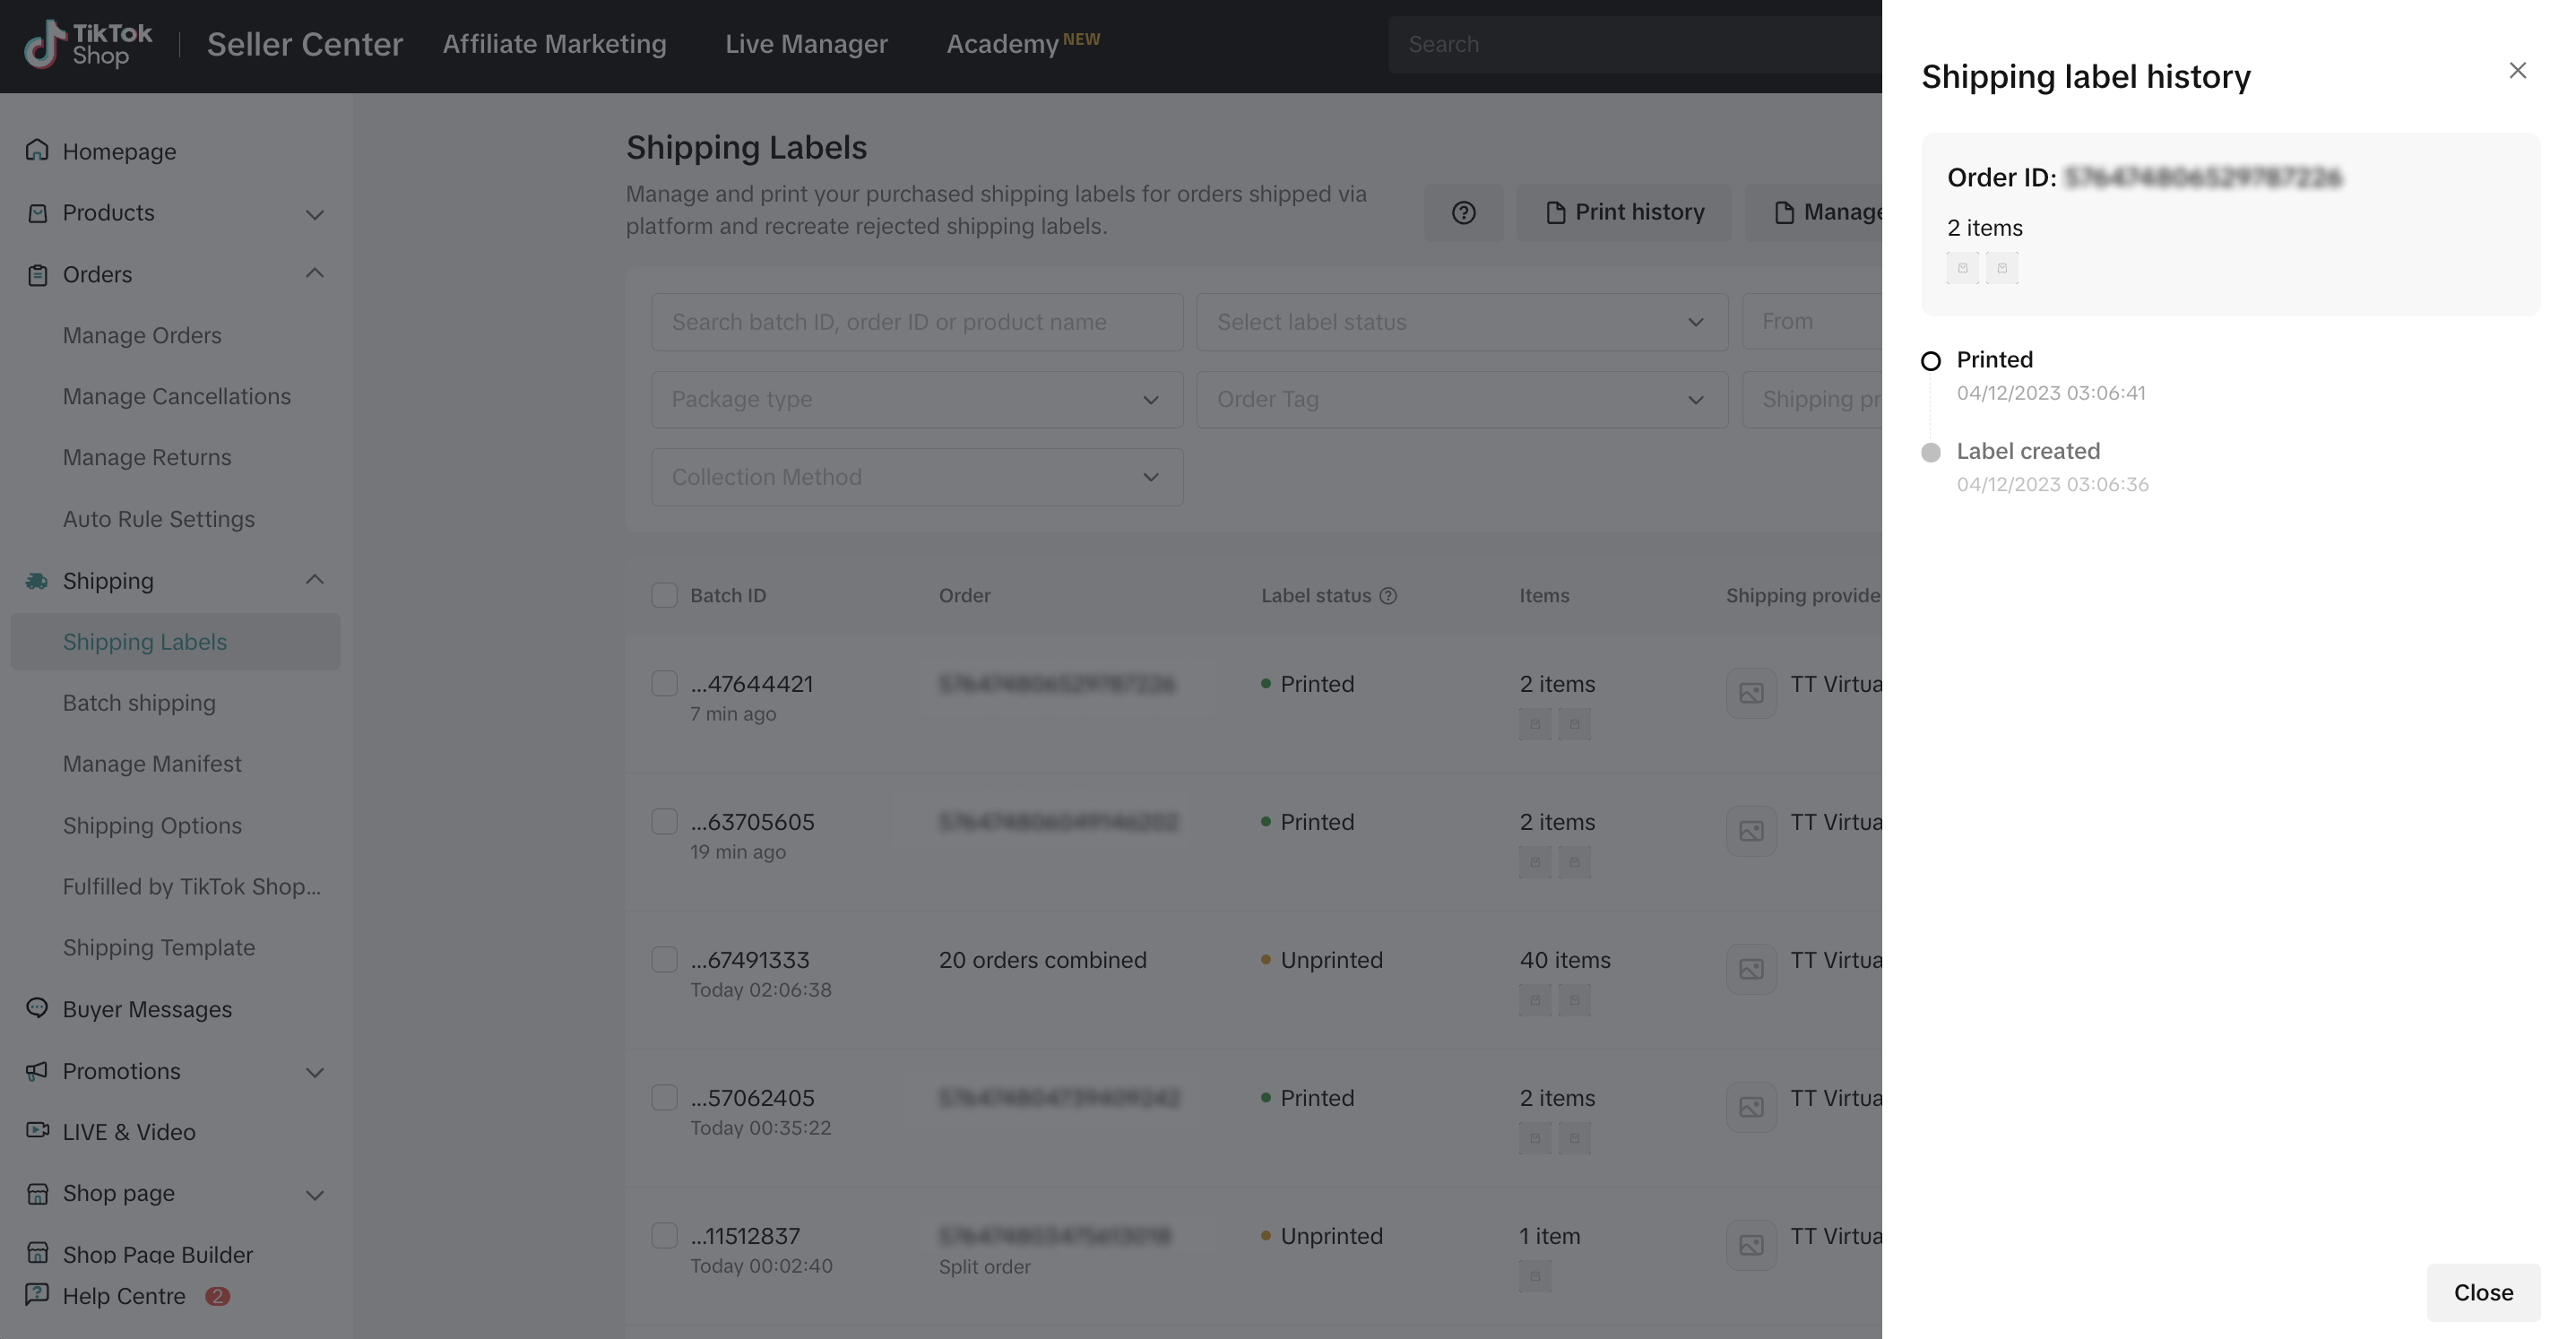
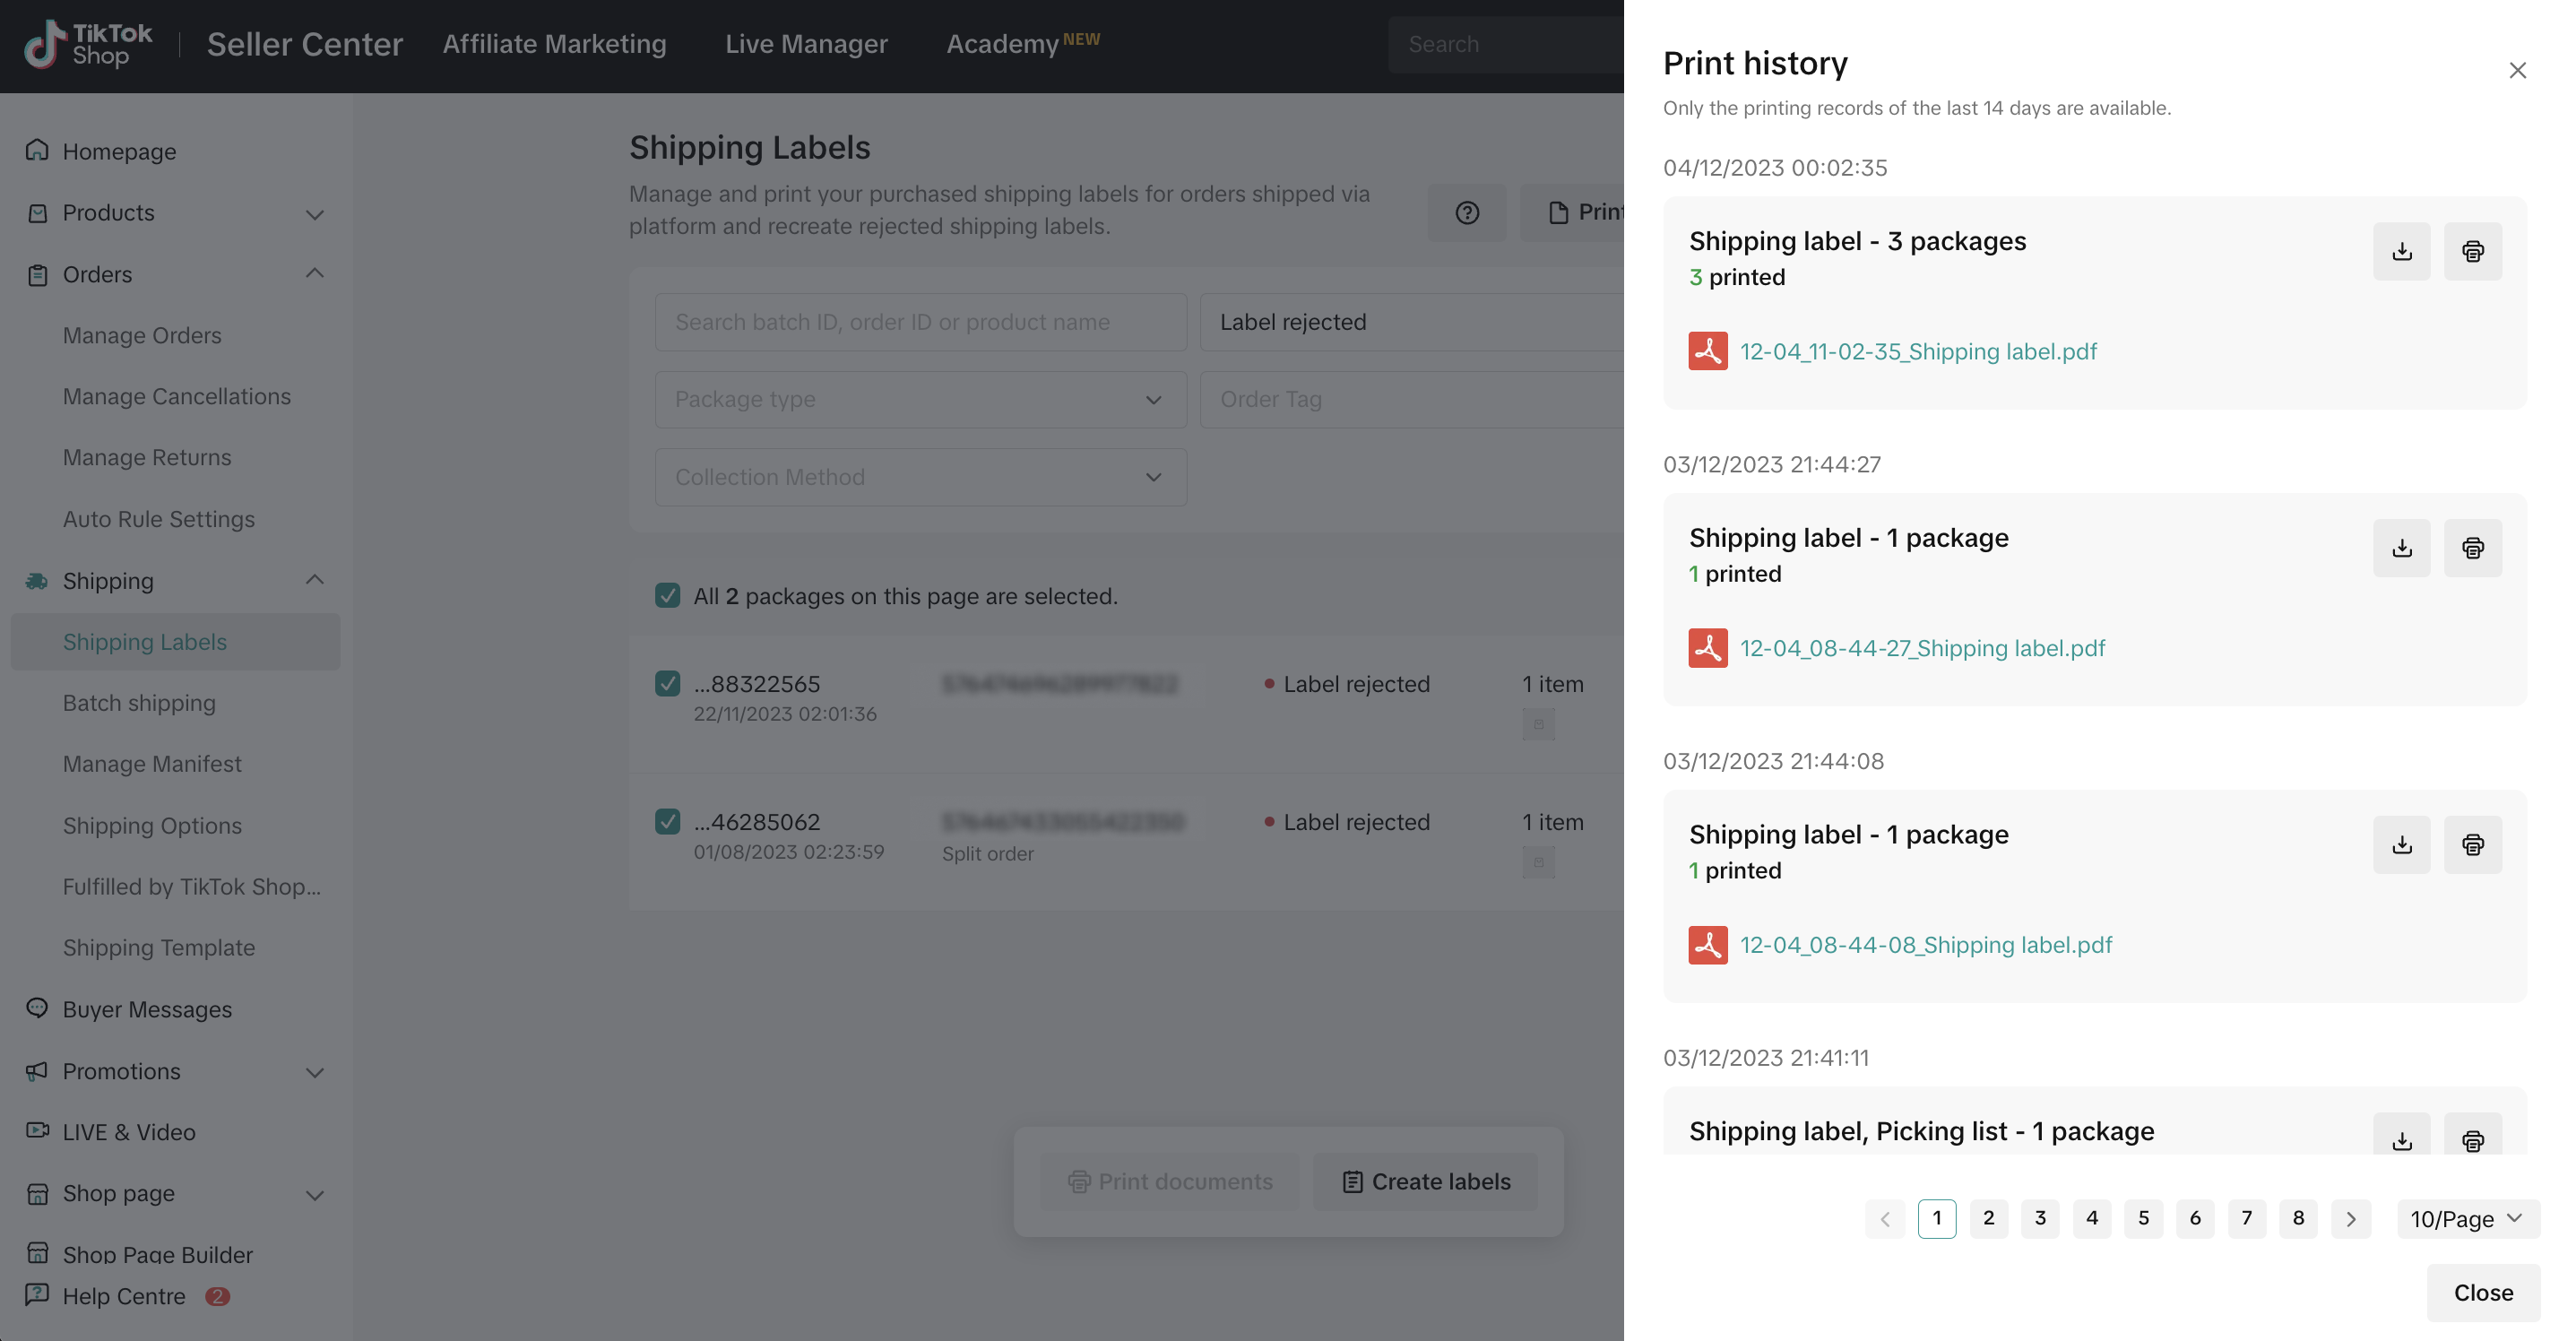
- Alternatively, click 'Print History' at the upper right corner of the Shipping Labels page to review the past printing records.
- Within this section, you can see the printing records from the last 14 days, where you have the option to download the PDF file of shipping labels or print them again.
Có thể bạn cũng quan tâm về
- 1 lesson
Setting Shipping Channel
Learn more about How to Setting Shipping Channel
- 1 lesson
Shipping & Order Management
The sellers will learn about the overall management of orders on TikTok Shop, starting from order ve…

Thailand Platform Shipping Fee Instruction
Thailand Platform Shipping Fee Instruction From 1 April 2025, the shipping fee will also be charged…

Order Fulfilment Timelines
Order Fulfilment Timelines (Effective 1 October 2025) Note: New fulfillment timelines have been appl…

How to Set Delivery Option for Fruits: Fresh Delivery
Only sellers identified as eligible by the platform will see Fresh Delivery available on Seller Cent…

A Complete Guide to 'Shipped via Platform'
In this article, we will guide you through the updated 'Shipped via Platform' shipping process, enab…

Manage shipping options for your shop
Available shipping service and providers In this section, we’ll explain the logistics services avail…

TikTok Shop Thailand Same Day Delivery Rate Card
TikTok Shop is launching a Same Day delivery service for selected cities. To support this service, a…

Ship By TikTok: Same Day Delivery
What is Same Day Delivery Same Day Delivery is a shipping service provided by TikTok Shop in partner…

A Complete Guide to 'Shipped by Seller (SOF)'
In this guide, we will walk you through the enhanced 'Shipped by Seller' shipping process. We've imp…