

Auto Rule Settings for Returnless Refunds
06/17/2025

Creating New Rules
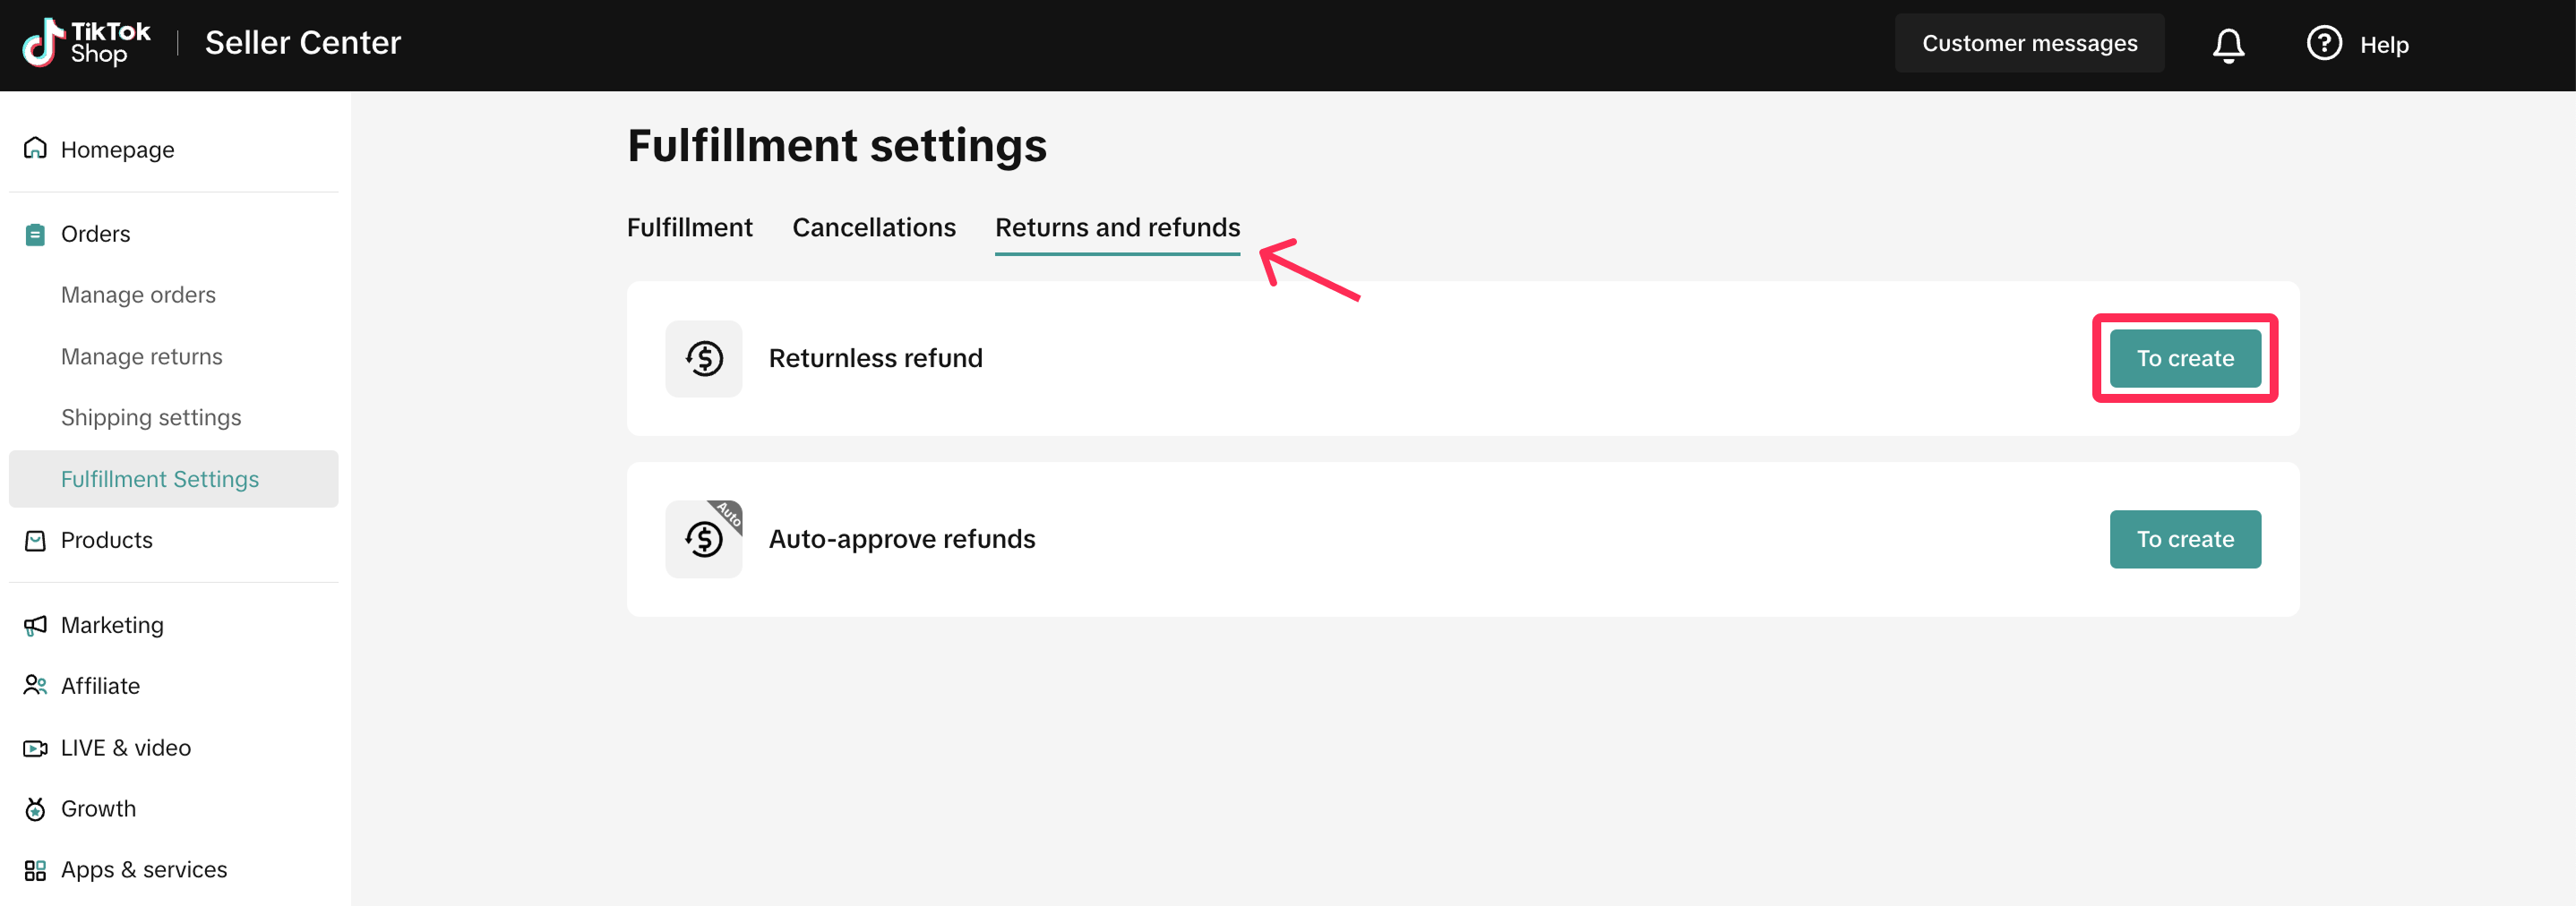
- Go to Orders > Fulfiment Settings. Navigate to the Returns and Refunds tab and click 'To Create' under Returnless Refund or Auto-Approve Refunds.
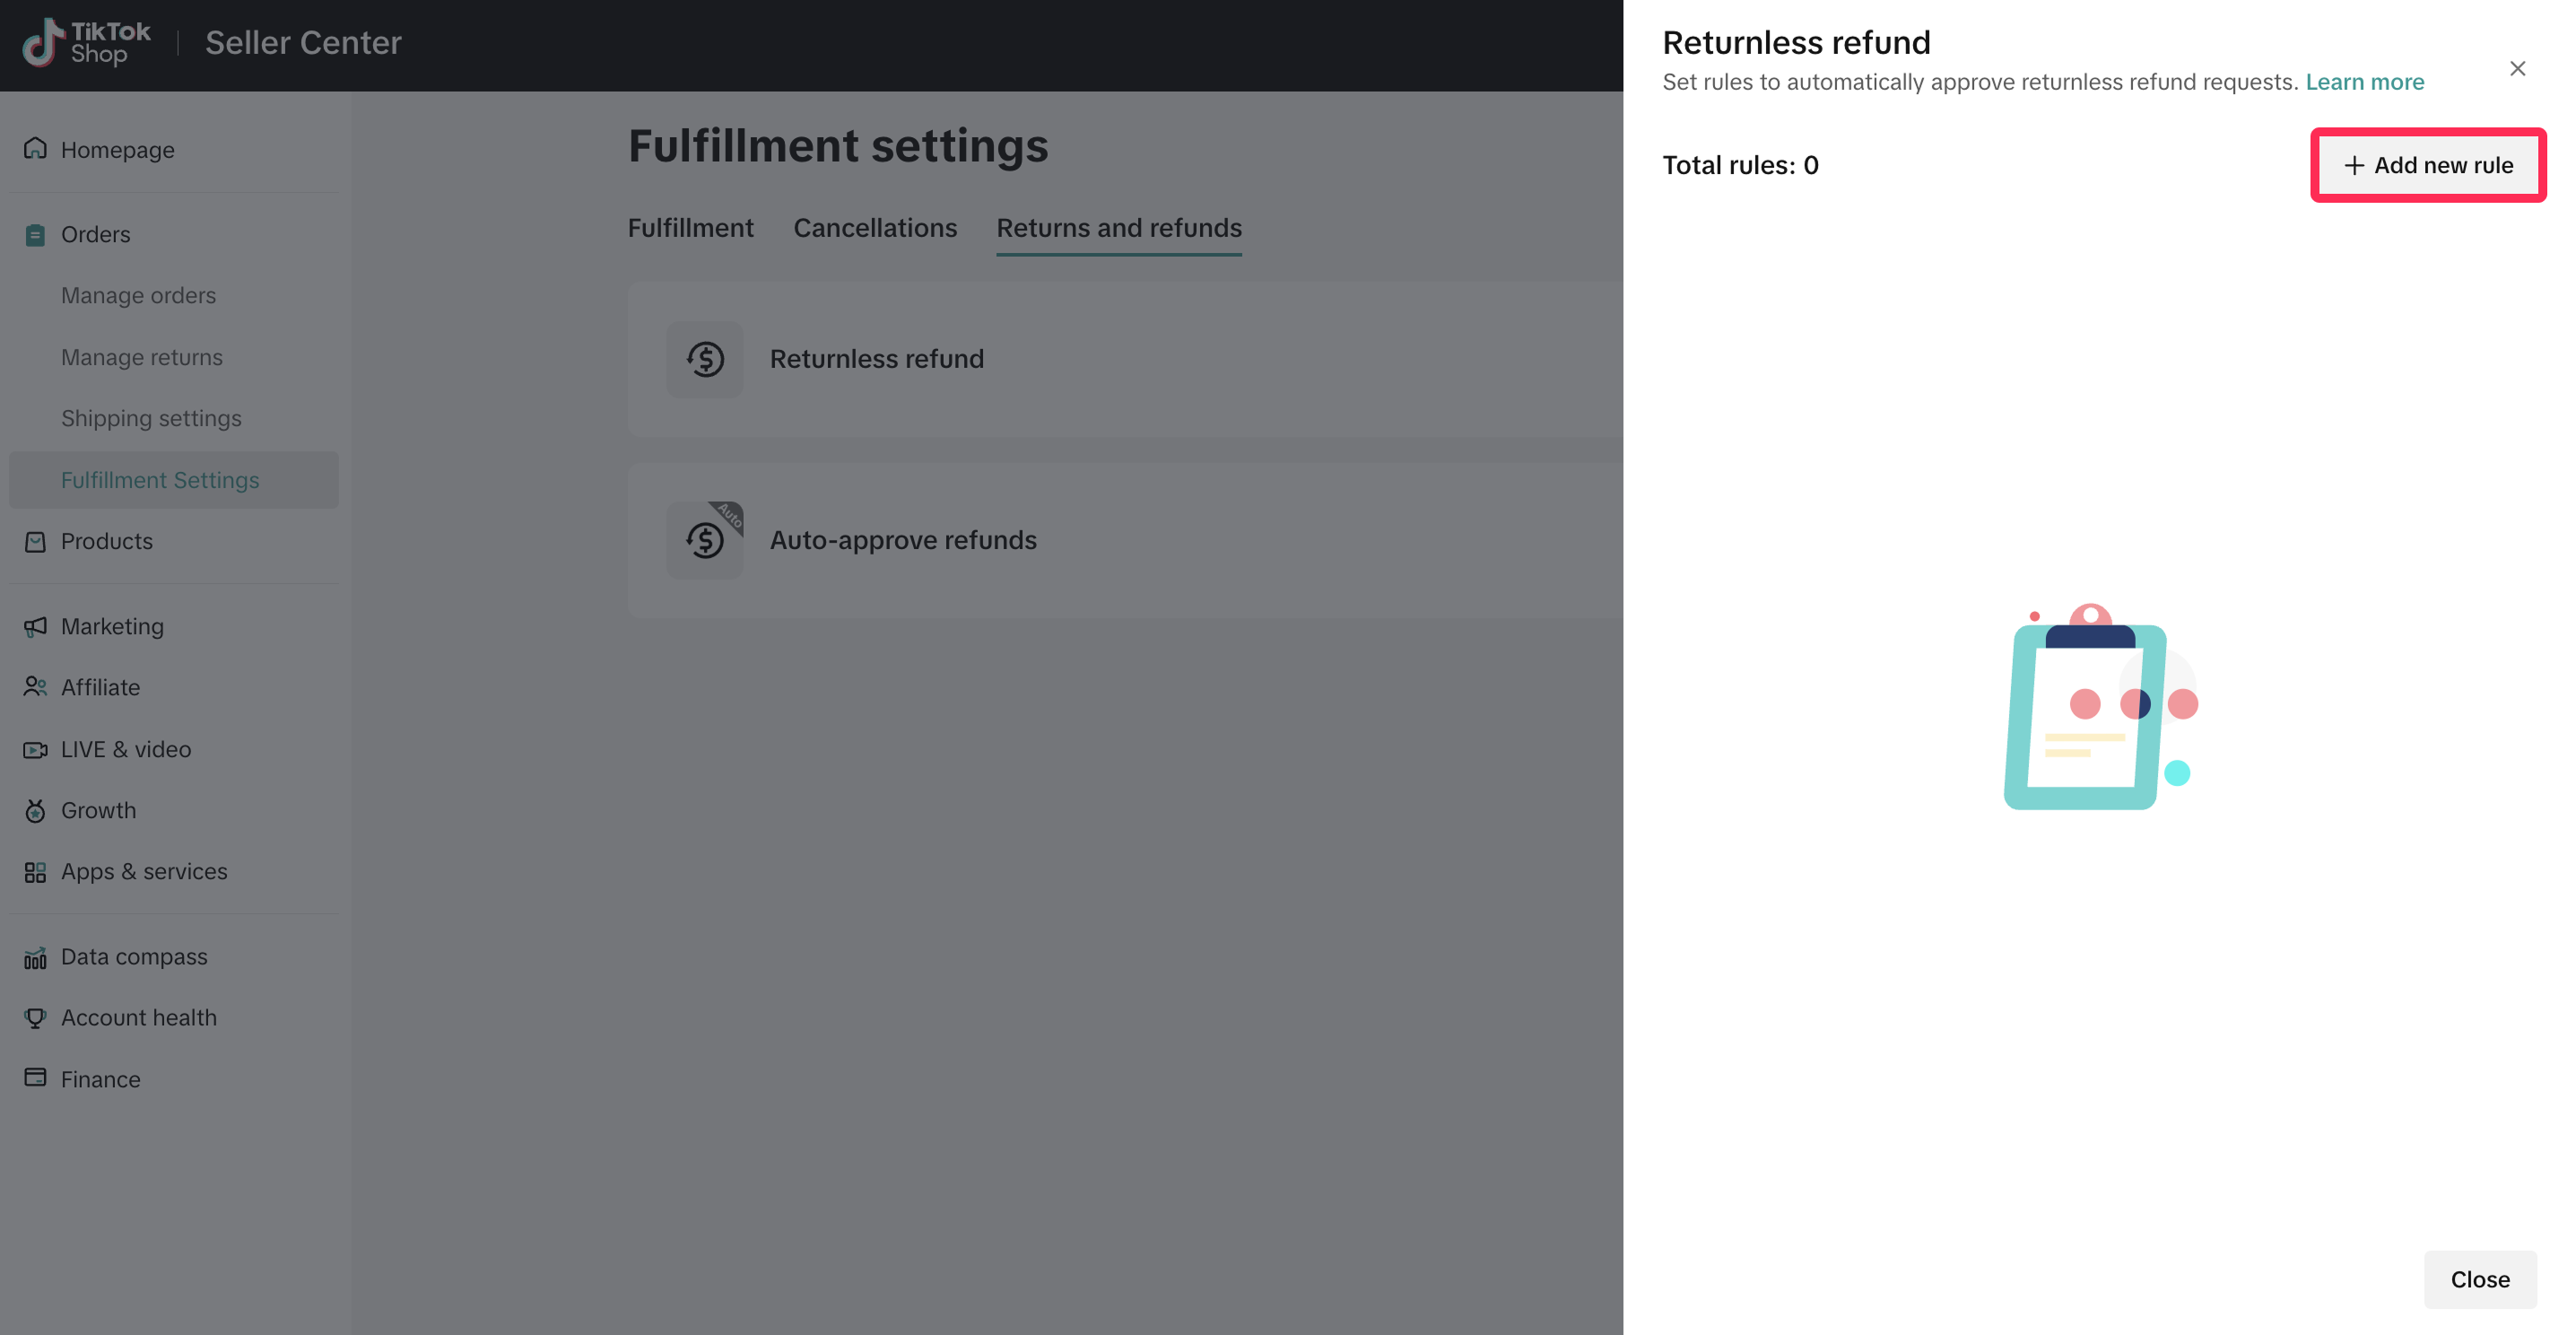
- You will see either the new Returnless Refund tab or the Auto-Approved Refund tab, depending on the rule you want to set up. Click 'Add New Rule' to access the rule-setting options.
- On this page, you can set the policy name and select the accepted return reasons, product categories, refund range/refund range for returnless refunds, the effective date, and the maximum limit per customer. Returnless refunds will be processed when the buyer's return reason matches your settings. Please carefully review your selections before clicking 'Confirm' to enable the rule.
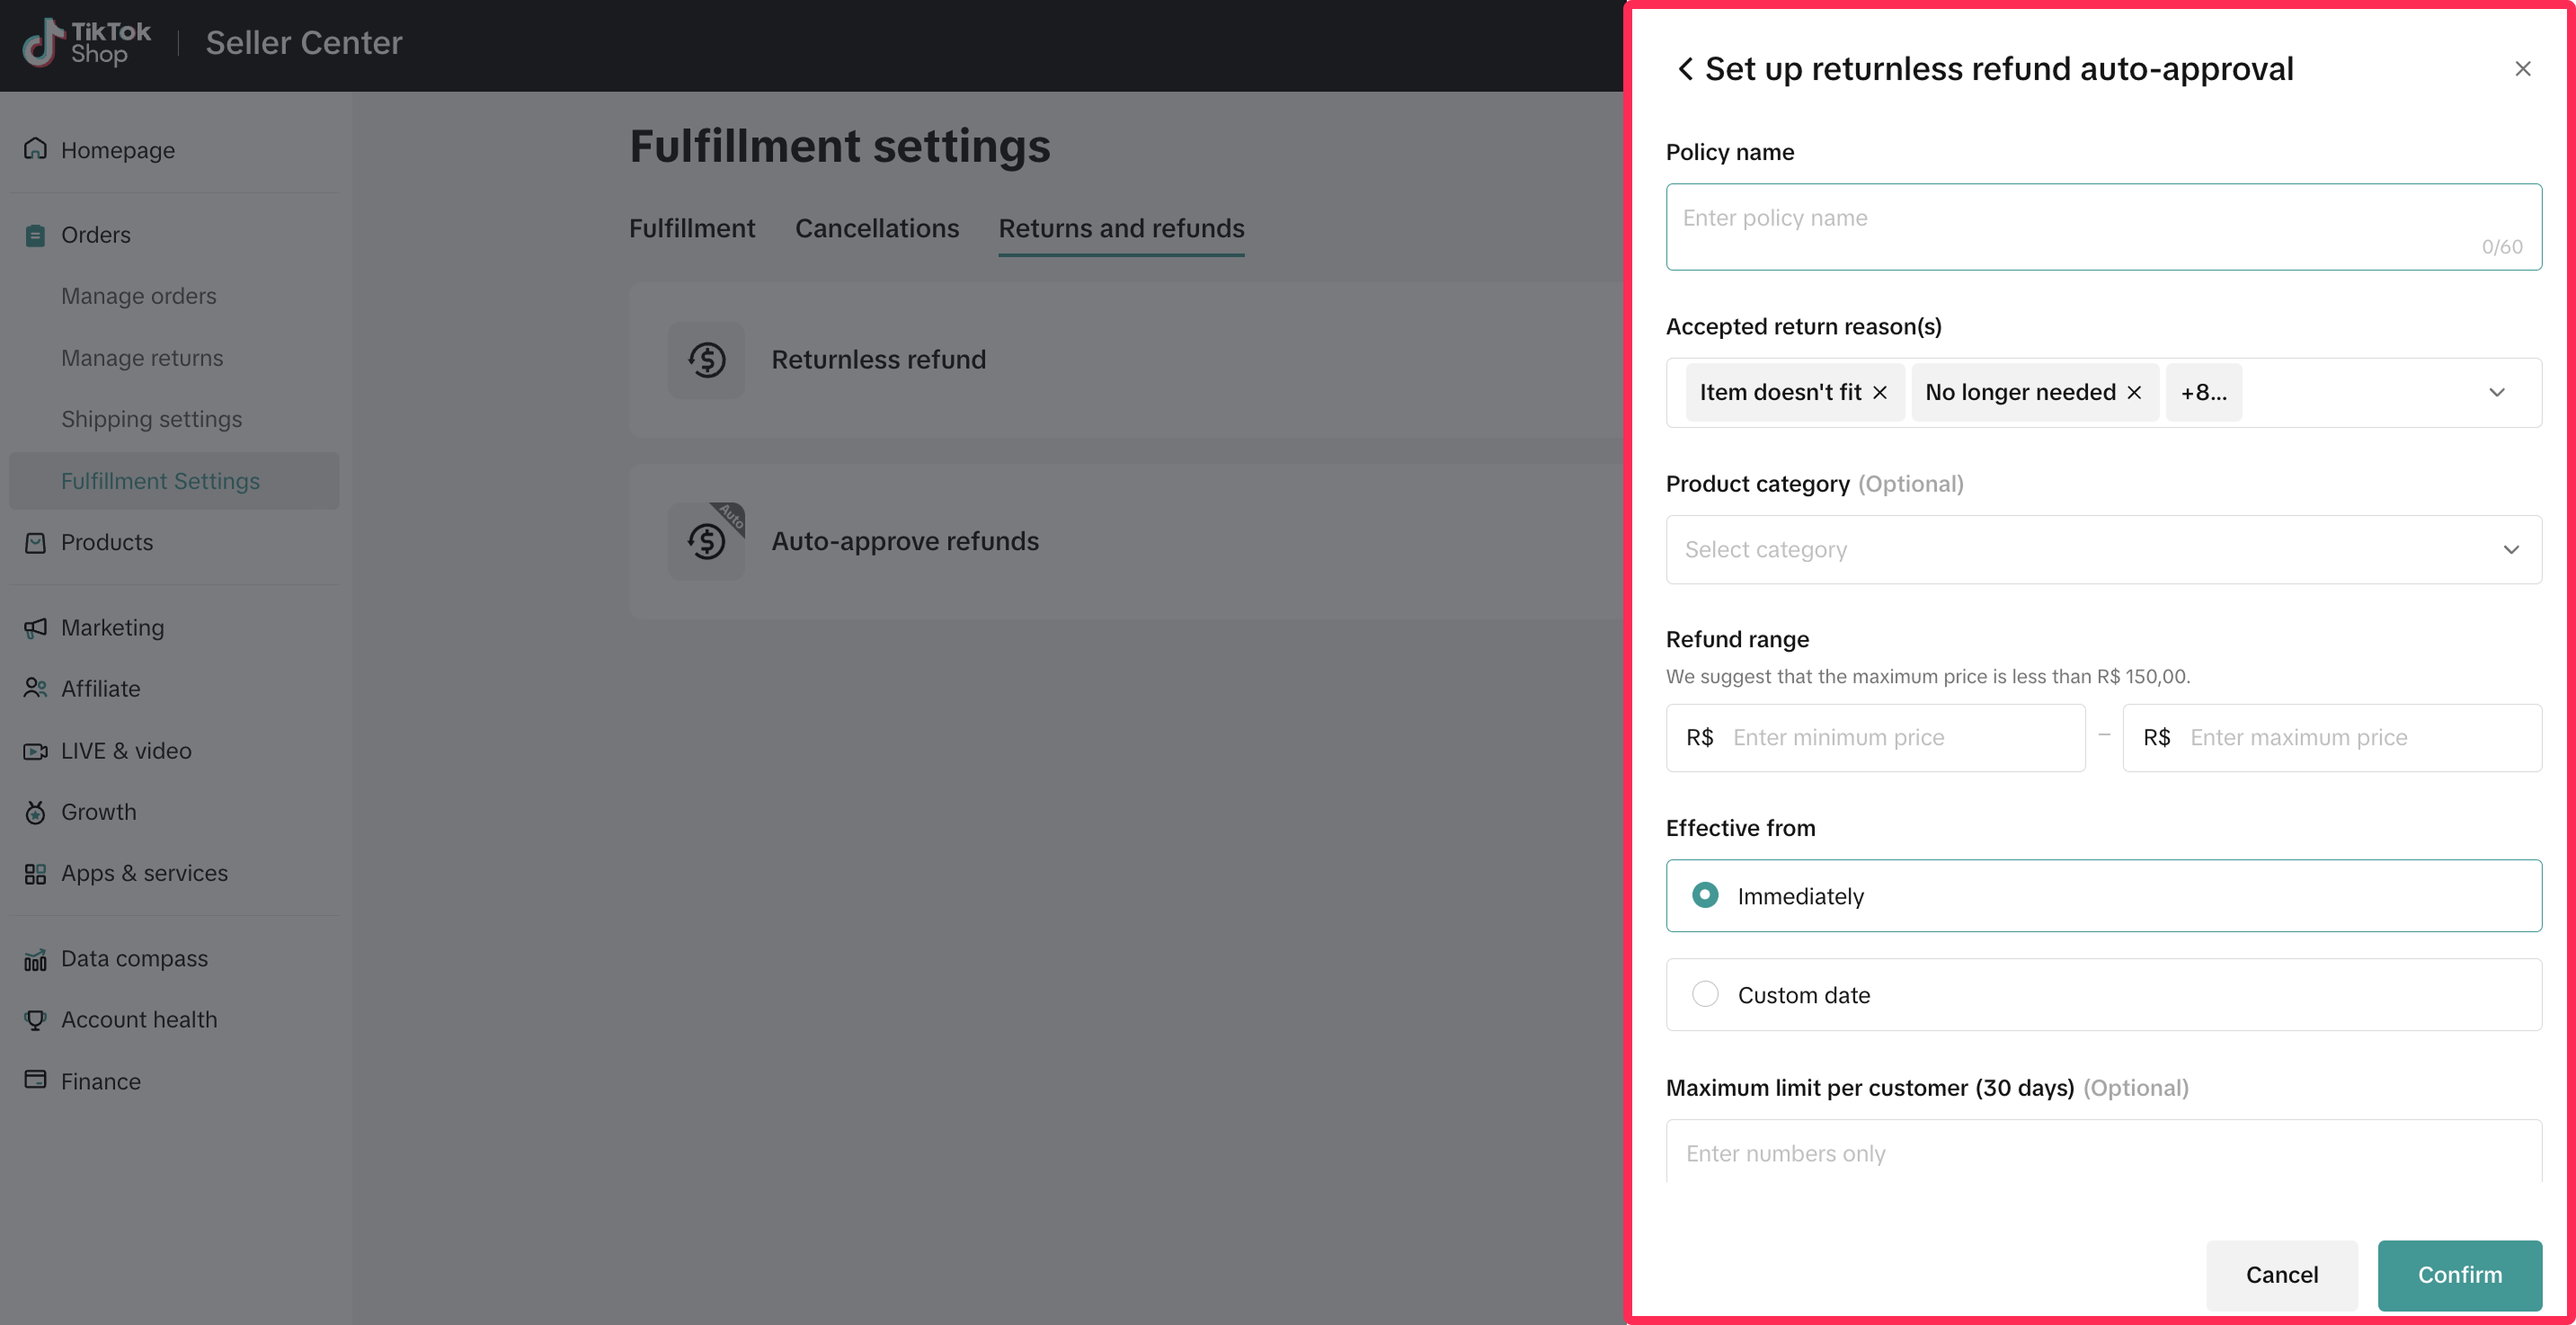 ❗️Important: Pay close attention to the refund range. To minimise any potential financial loss, we recommend setting the refund range to not exceed THB100.
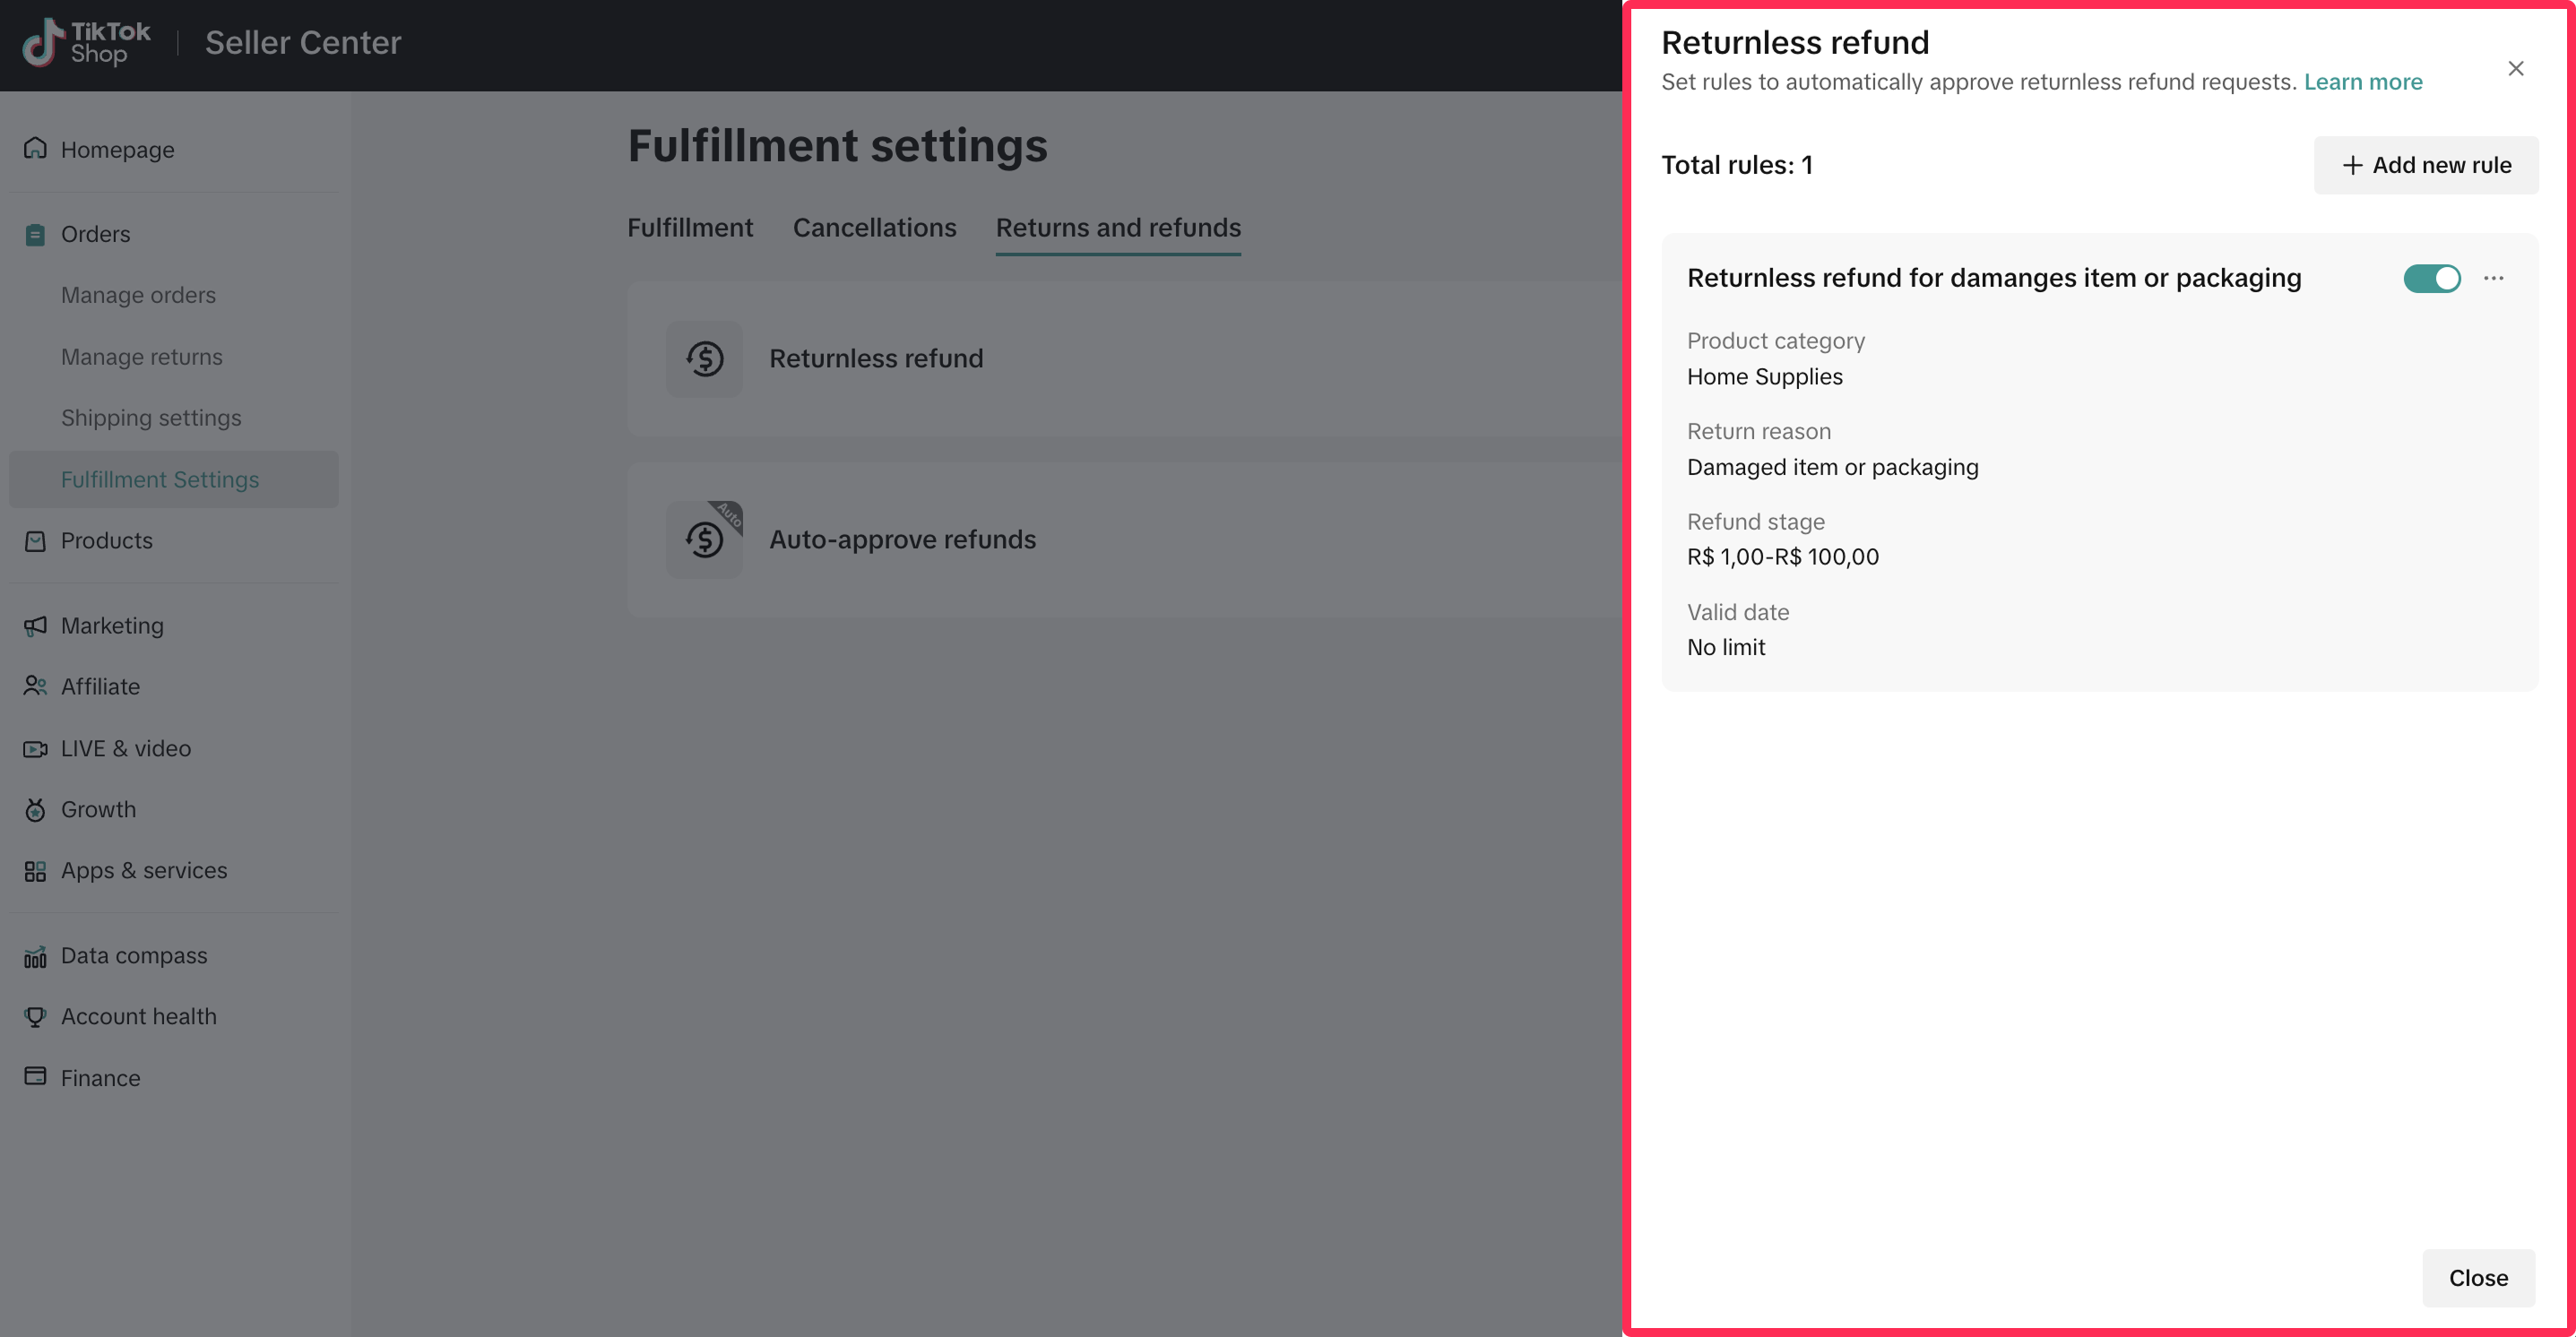
- Once you have set up the refund/returnless refund rule, it will be activated. You can easily toggle these rules on or off by adjusting the toggle switch.

Editing Rules
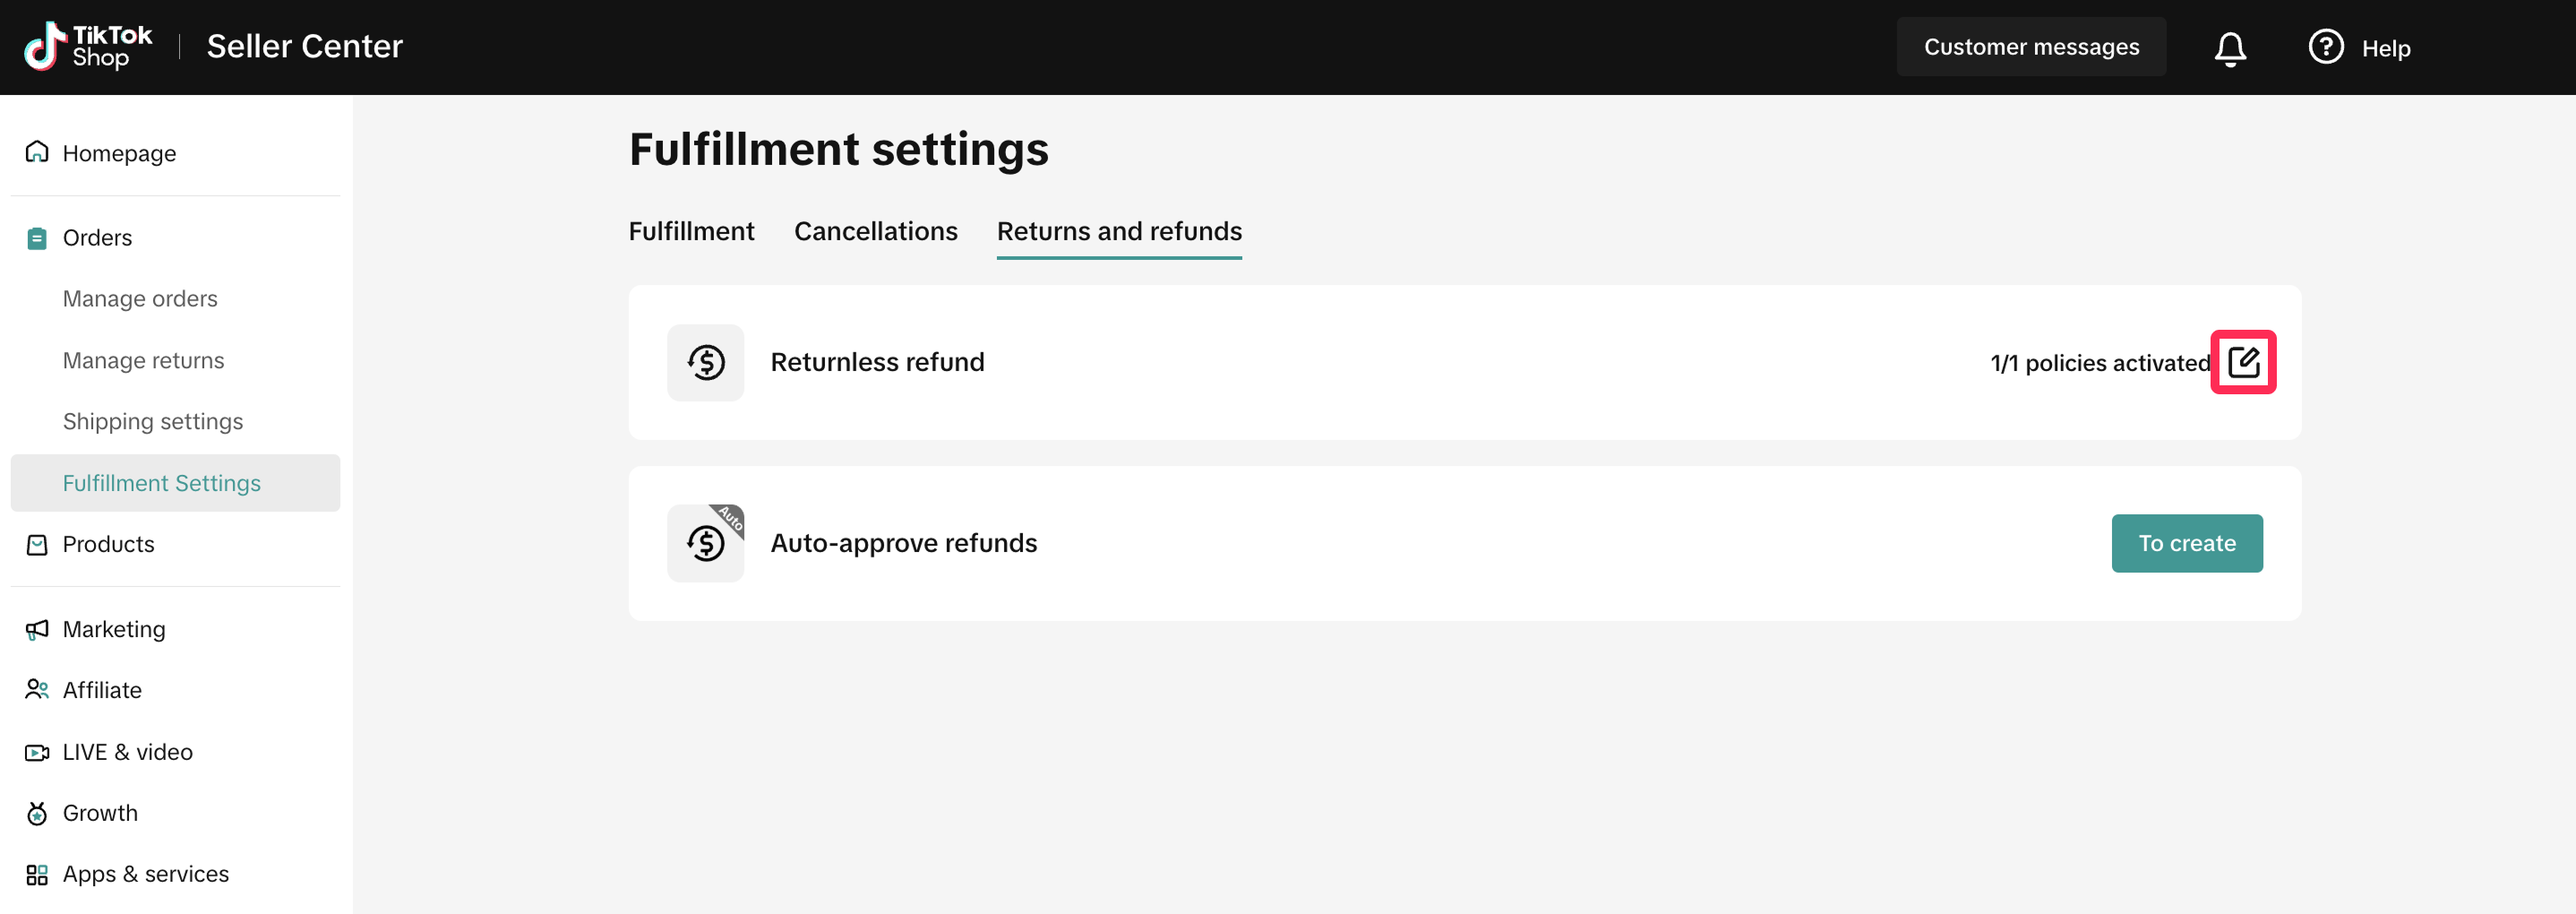
- To edit existing rules, navigate to the Fulfiment Settings page. Under the Returns and Refunds tab, click on the edit icon.
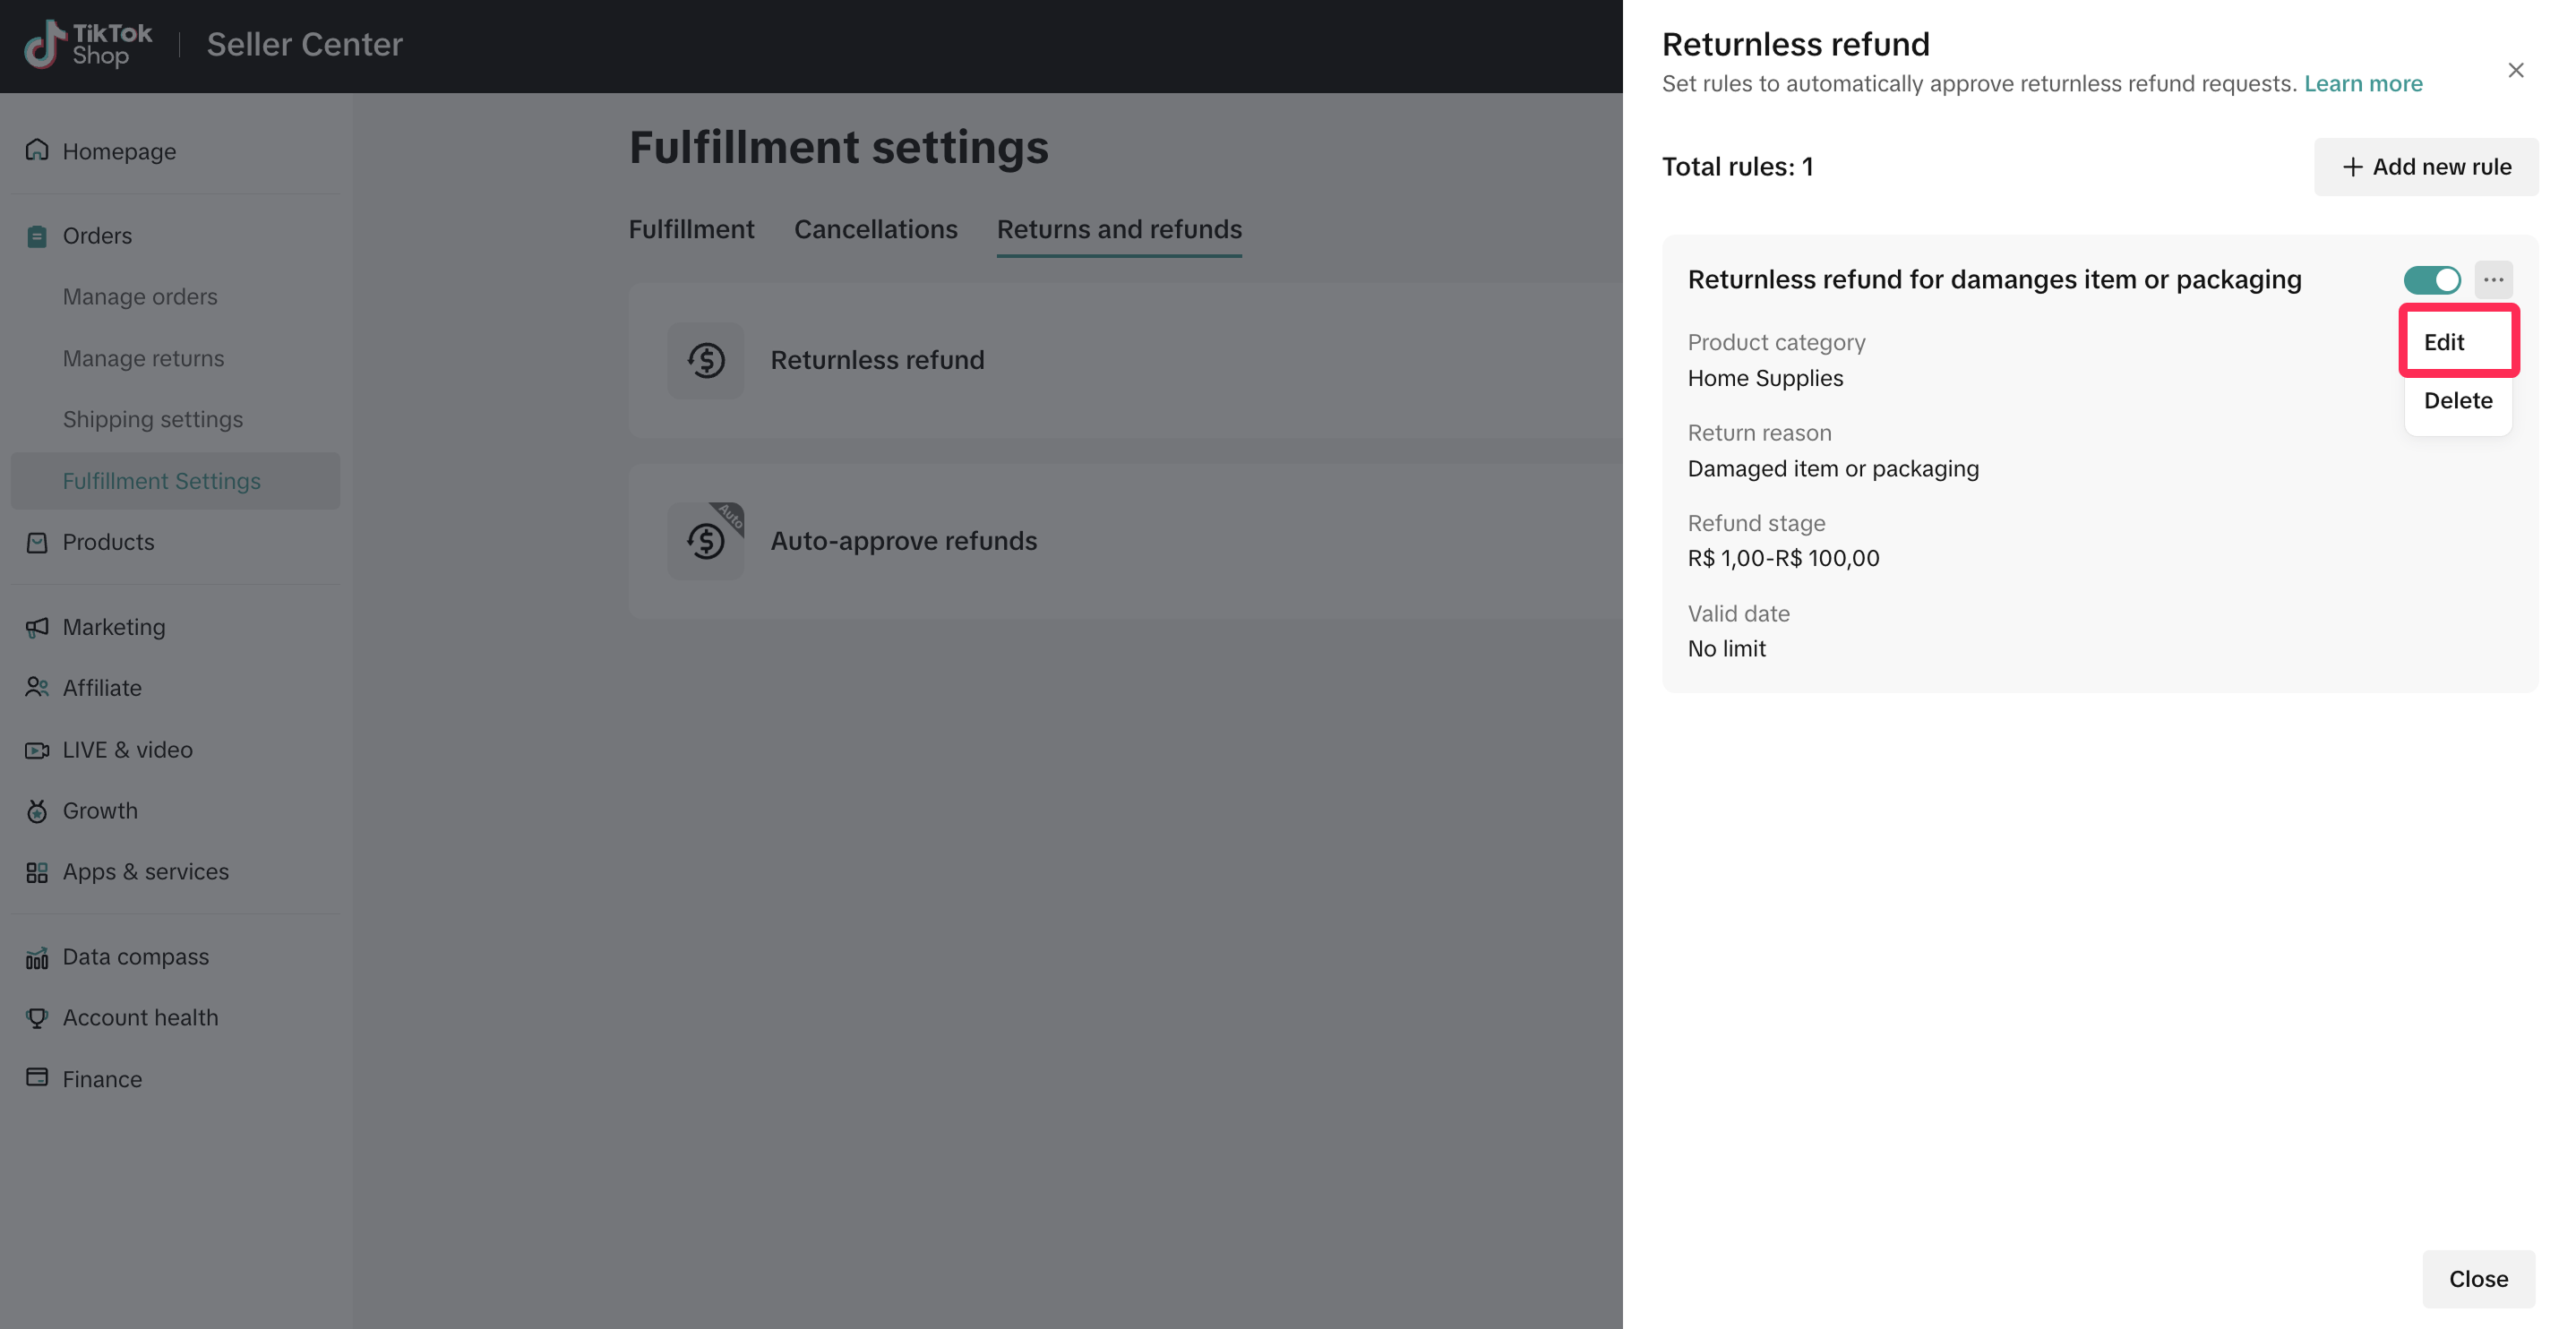
- You will see a list of rules that you created. Click on the three-dot icon (...) next to the rule and select 'Edit.'
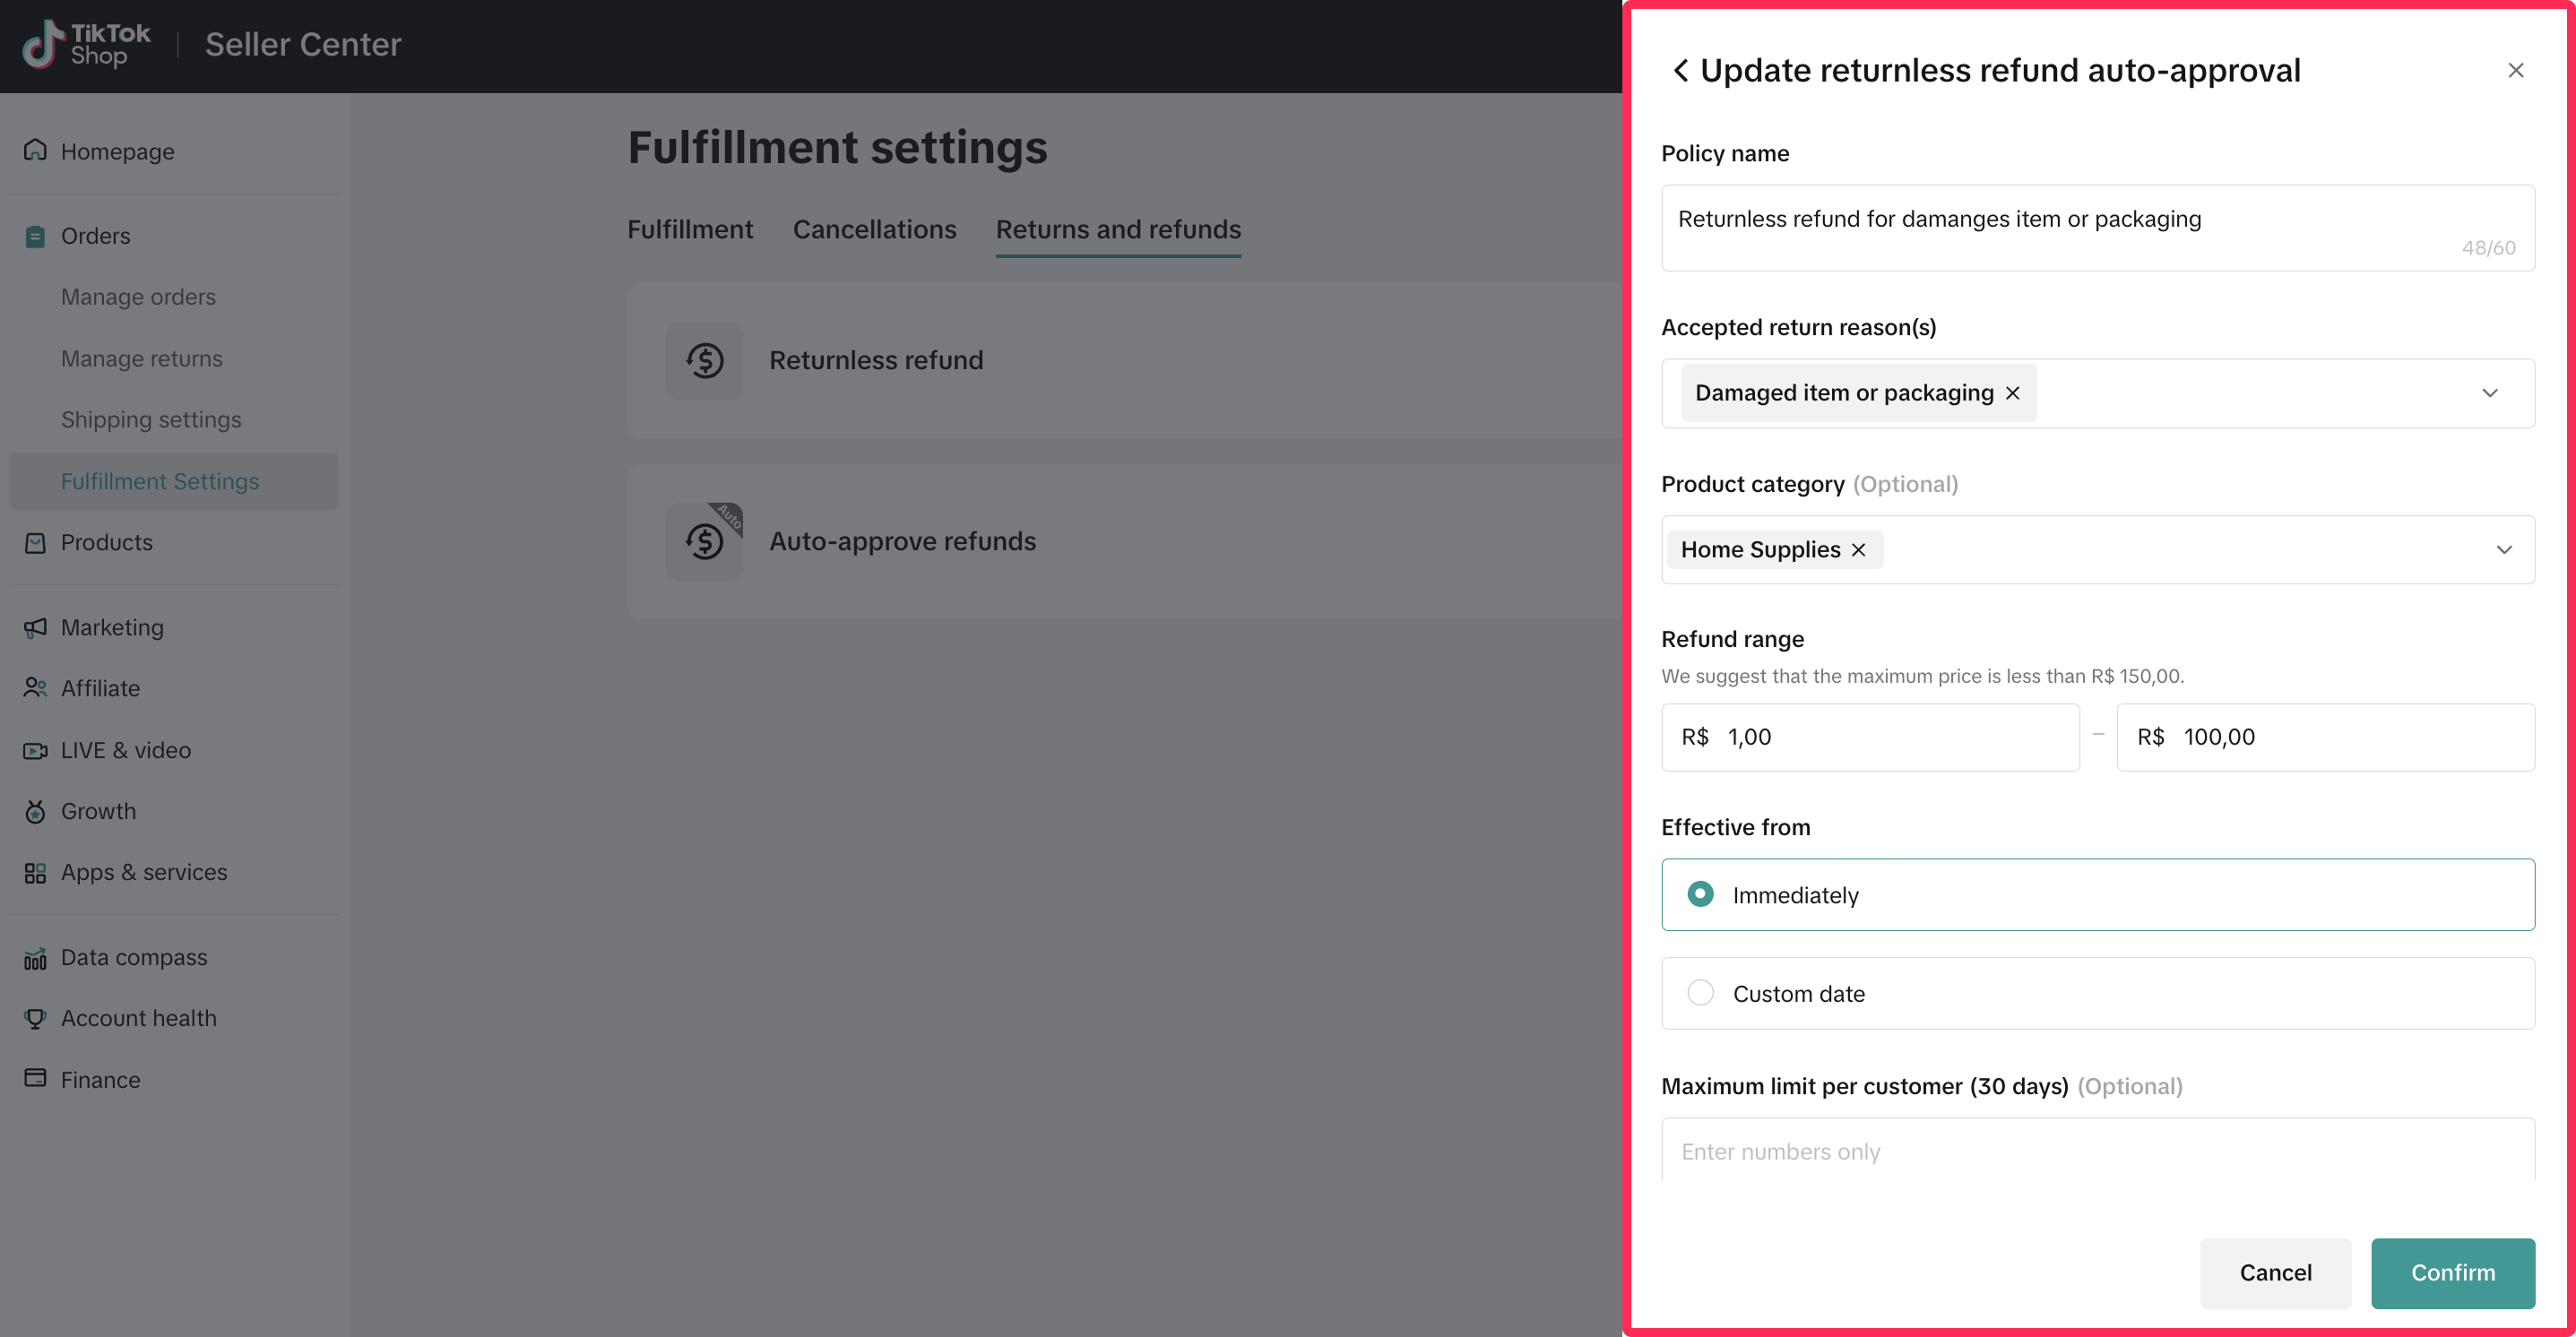
- Make the desired changes to the rule settings. Once you have updated the settings, click 'Confirm' to save your new configuration.

Deleting Rules
- To delete the existing rules, navigate to the Fulfiment Settings page. Under the Returns and Refunds tab, click on the edit icon.
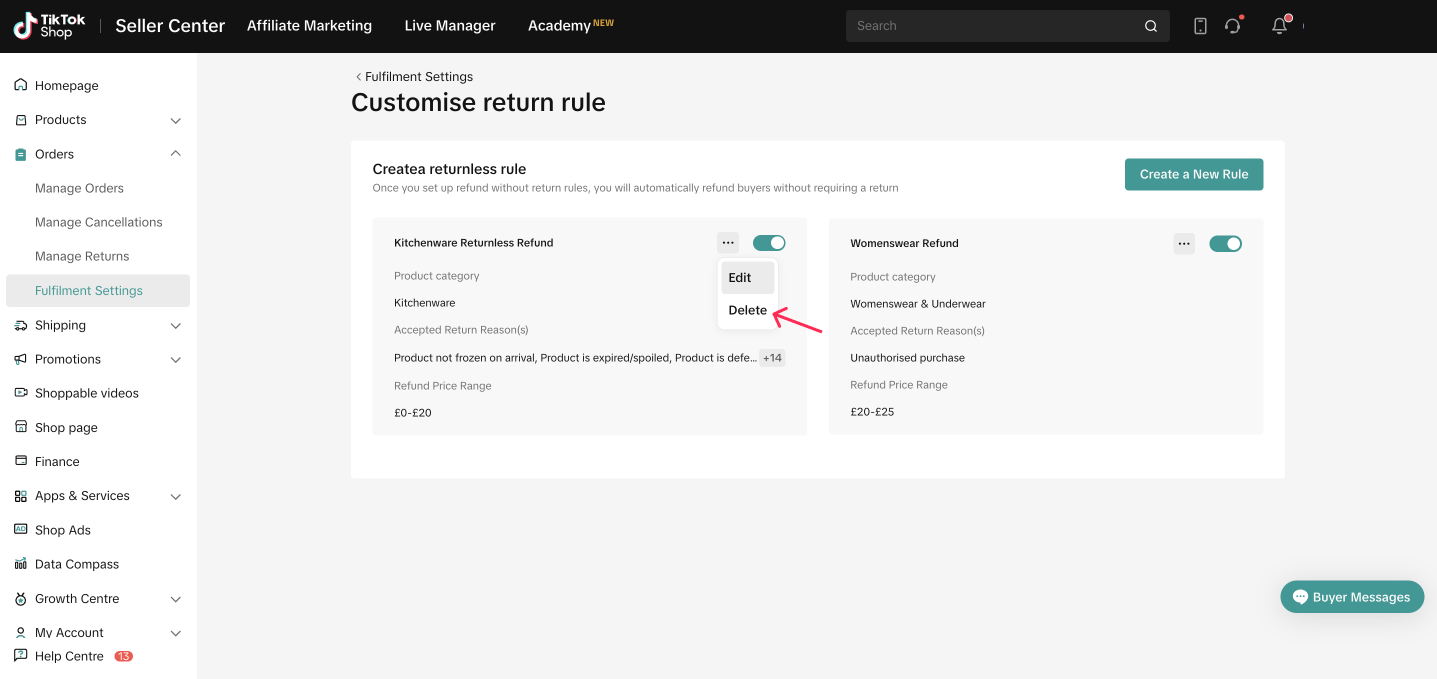
- You will see a list of rules that you created. Click on the three-dot icon (...) next to the rule and select 'Delete.'

- A pop-up window will appear asking for confirmation. Click Delete to confirm and proceed with deleting the rule.


FAQ
- Can I appeal requests that have been approved under my own rules?
- What if the automated rules I set up conflict with TikTok Shop's platform rules?
- Do I need to personally process refunds for items that are affected by my rule settings?
Anda mungkin juga tertarik
- 1 lesson
Return and Refund Policy on TikTok Shop
Sellers will learn guidelines for managing order cancellations requested by buyers, as well as refun…
Managing Refund-Only Request
This article provides a clear overview of the refund-only process, giving you the tools to respond e…

Initiating an Appeal for Return/Refund Requests
This article aims to improve seller's understanding regarding appeal management on Seller Center fro…
"Change of Mind" Returns
What are "Change of Mind" returns? These are returns when a customer selects "No Longer Needed"/"Cha…
Required Evidence for Rejecting Buyer's Aftersale Requests
This article aims to provide a comprehensive guide on how to effectively reject a buyer's return, re…
TikTok Shop Customer Order Cancellation, Return and Refund P…
Overview This TikTok Shop Customer Order Cancellation, Return and Refund Policy (hereafter referred…

Partial Refund
In this article, we will introduce a step-by-step guide for partial refunds. This feature aims to in…

Return Failed Package
Note: this rule applies only to local-to-local transactions. What is a failed return package? A fail…
Auto Rule Settings for Cancellation Requests
This article will provide you with a quick walkthrough on how to set up automated rules for acceptin…

Managing Returns and Refund Requests
This article walks you through the basics of the returns and refunds process, equipping you with the…